Too often, we see our clients making the same ClickUp Dashboard mistakes. These mistakes typically result in lost time, energy, and productivity. That’s why we decided to share which ClickUp Dashboard mistakes you should avoid!
In this video, we’ll cover five different ClickUp Dashboard mistakes, ranging from beginner to advanced. Let’s get started!

This post may include affiliate links, meaning we might earn a commission. For more details, check out our terms.
Not a video person? No worries! We’ll cover all the main points in this article.
Intro to Common ClickUp Dashboard Mistakes
It’s no surprise that ClickUp Dashboards is a key feature that ClickUp offers. If you’re someone who gets excited by ClickUp Dashboards’ functionality, you’re not alone. Most of our clients inside the ProcessDriven Membership love this ClickUp feature.
If you’ve been DIY-ing your ClickUp setup, odds are your Dashboards are all over the place. Admit it, you went Dashboard crazy, and now you’re here. 😬
Before you get ahead of yourself — or rather, before you continue down the Dashboard rabbit hole — read this article in its entirety first. We’ll be going over common mistakes we see when clients are getting started with ClickUp Dashboards in the hopes that you can avoid them.
We’ll cover five different ClickUp Dashboard mistakes, ranging from beginner to advanced. Let’s dive in!
To watch this explanation in video format, watch the video at the top of this article at timestamp 00:00.
Mistake #1: Forgetting About Watchers
A common ClickUp Dashboard mistake we see is forgetting about Watchers. Watchers are sort of like Facebook followers.
When we follow a Facebook Page, we’ll get notified every time they post something. It’s the same principle when someone is a Watcher in ClickUp — they’ll get notified every time there’s an update with that task.

On the flip side, if someone is not a Watcher in a specific ClickUp Task, they won’t get any updates about that task. They’ll have no idea what’s happening there!
What does this have to do with ClickUp Dashboards?
Many of us love Dashboards because of its Chat Widget (or Chat View). The Chat Widget is basically a chat room that we can add to our Dashboard. It’s a staple in any client portal or collaboration hub built into a Dashboard.
As impressive as this chat feature is, if no one is a Watcher on it, no one will be notified that we are posting there!
If we’re inviting a new client or team member into our ClickUp Workspace, we need to ensure we’re adding these people as Watchers in any place that person needs to be notified of updates.
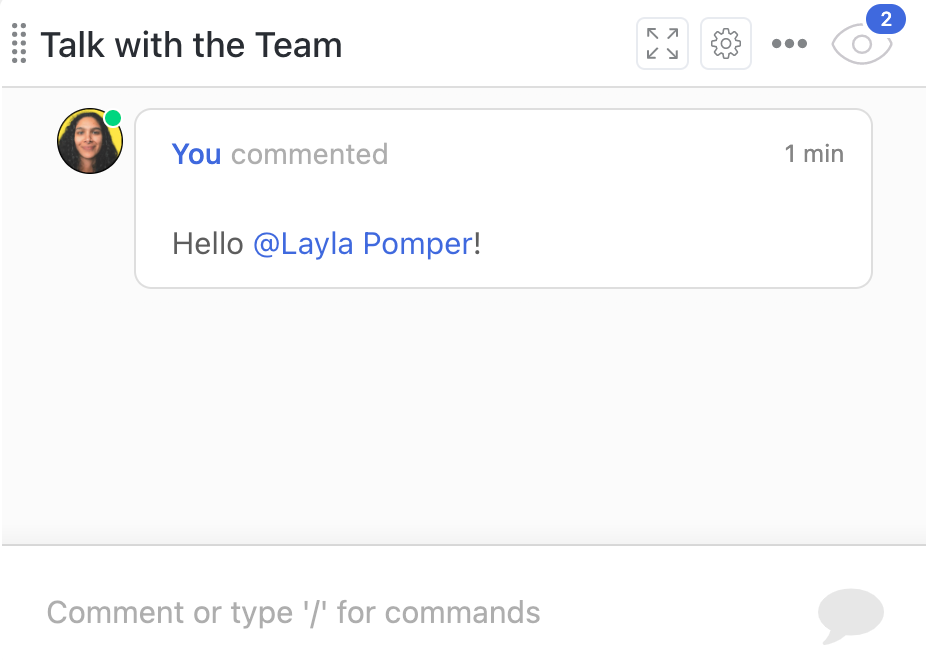
We can achieve this by tagging someone using the @ mention:
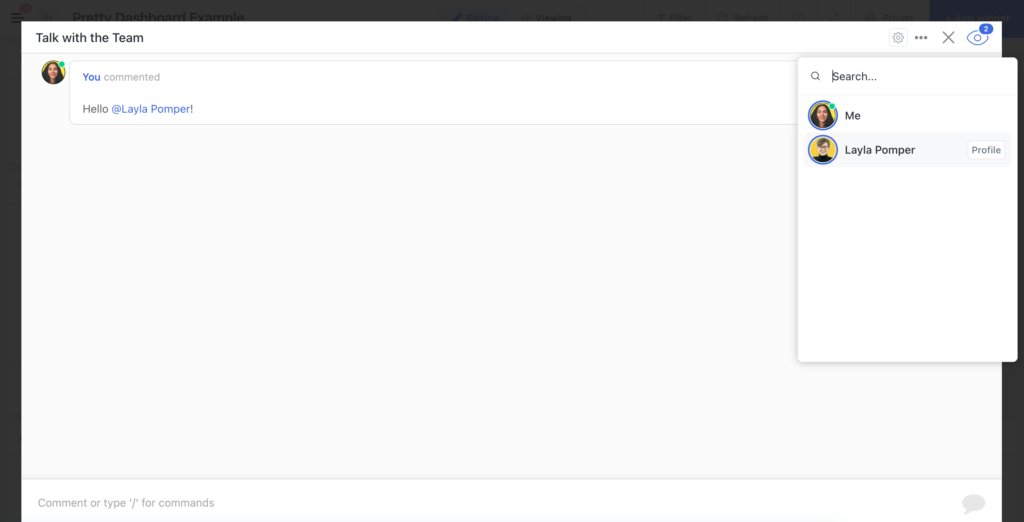
Or by adjusting the Watcher settings using the little eyeball icon in the top right corner:
Let’s move on to Mistake #2!
To watch this explanation in video format, watch the video at the top of this article at timestamp 00:44.
Mistake #2: Not Using Duplicates
This ClickUp Dashboard mistake might seem obvious to some, but we see it way too often inside the ProcessDriven Membership. At this given moment, ClickUp Dashboards cannot be templated in ClickUp.
ClickUp requires us to create them every single time manually. Sounds exhausting, right?
Rather than creating a Dashboard from scratch each time, let’s make our manual work more manageable.
Every single Dashboard has the option to duplicate it. All we have to do is click on the three dots next to the name of our Dashboard.
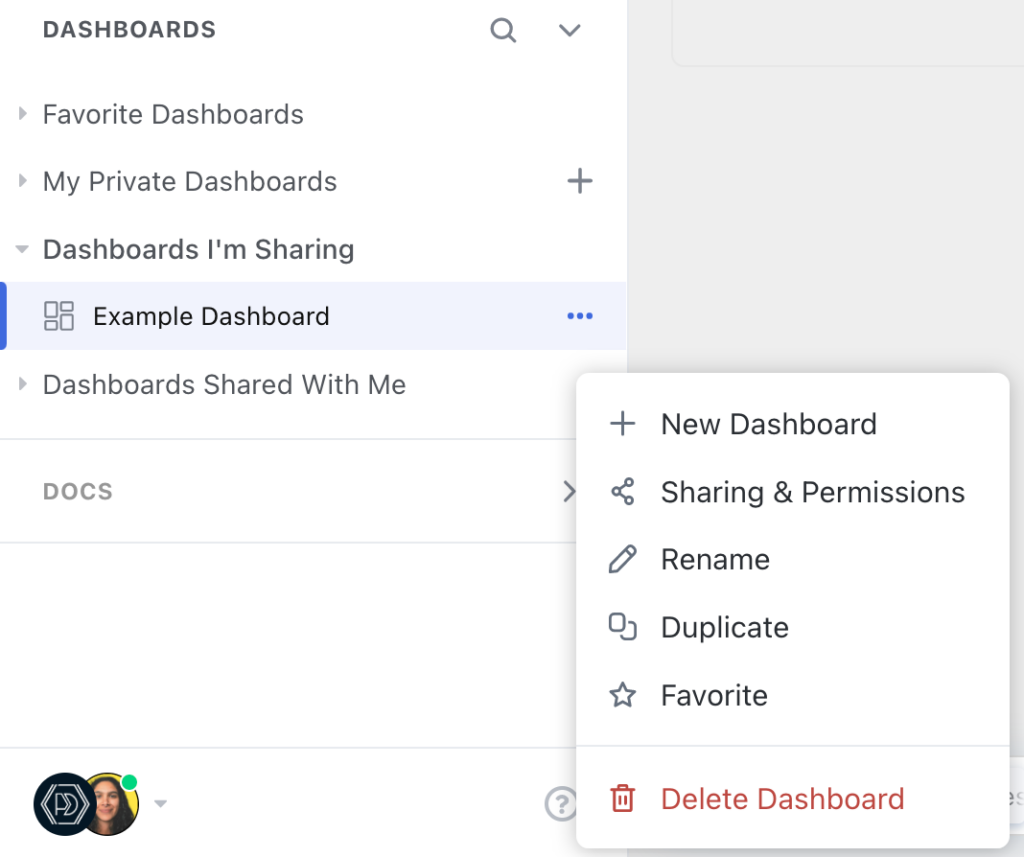
Voila! An exact copy will now appear.
There’s no need to waste hours manually recreating the wheel when we can duplicate individual Widgets that live inside a Dashboard or entire Dashboards themselves!
Seriously. Save yourself the manual work.
To watch this explanation in video format, watch the video at the top of this article at timestamp 02:00.
Mistake #3: Adding Only Widget Filters
Filters are great! However, if we only add filters to individual widgets, we’re making our lives much harder.
Instead of filtering Widgets one by one, ClickUp allows us to set up Dashboard-wide filters. To correct this mistake, we need to go to the top of the Dashboard, locate the Filters option (make sure you’re in Editing Mode), and set up a filter for the entire Dashboard.
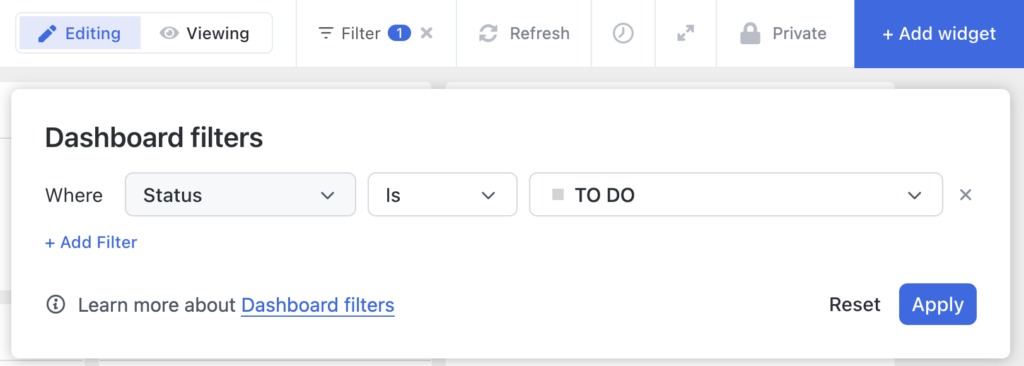
We set this up once, and ClickUp will apply it everywhere. Tons of manual work prevented! This is an easy solution to implement, but one we don’t see practiced enough.
To watch this explanation in video format, watch the video at the top of this article at timestamp 03:04.
Mistake #4: Forgetting How Permissions Work
This fourth mistake is a bit tricky and is considered more advanced than the previous ClickUp Dashboard mistakes we covered: forgetting how permissions work.
One might wonder, “How would I forget how permissions work? I invite someone to the Dashboard, and we’re good.”
This is technically true. However, there are additional permissions regarding the content we put inside our Dashboard.
For example, if we put a Task List Widget in a Dashboard, the only stuff we’ll see show up here are tasks that meet the criteria for this Widget — meaning they’re in the right spot, contain the correct information, and you, the viewer, has the proper permission to see these tasks.
If we do not have permission to see these given tasks, the entire Task List Widget will show up blank.
Imagine we invite a client to the client portal Dashboard we’ve set up for them, and we have a Task List Widget living inside that Dashboard. Let’s say we only shared permissions at the Dashboard level.
The client won’t have access to anything else.
The Task List Widget will show up blank for them because they don’t have the proper permissions to see the tasks that live in that Widget. They can only see the Dashboard overview.
This is a common mistake we see with people who use ClickUp with their clients. So what’s the workaround here?
The solution is to use Embed Views using embedded public views in ClickUp. For example, we can use the Embed Widget instead of the Task List Widget.
The reason is that Task List Widgets, and all other Widgets, require that we grant access to the source List in our ClickUp Workspace. These source Lists can contain private/sensitive information that we might not want our clients to have access to.
We can use public views if we are reluctant to share our private information with our clients for obvious reasons.
ClickUp generates public view links that we can share with anyone.
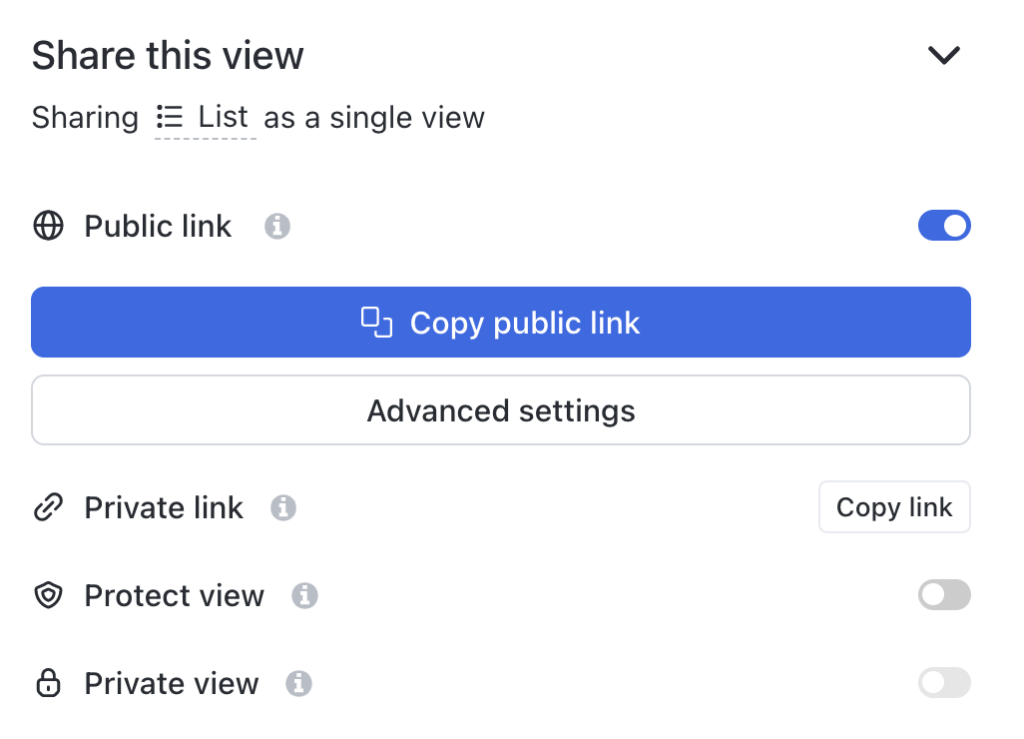
We then take that link and embed it into a Dashboard that only whoever we share it with can see.
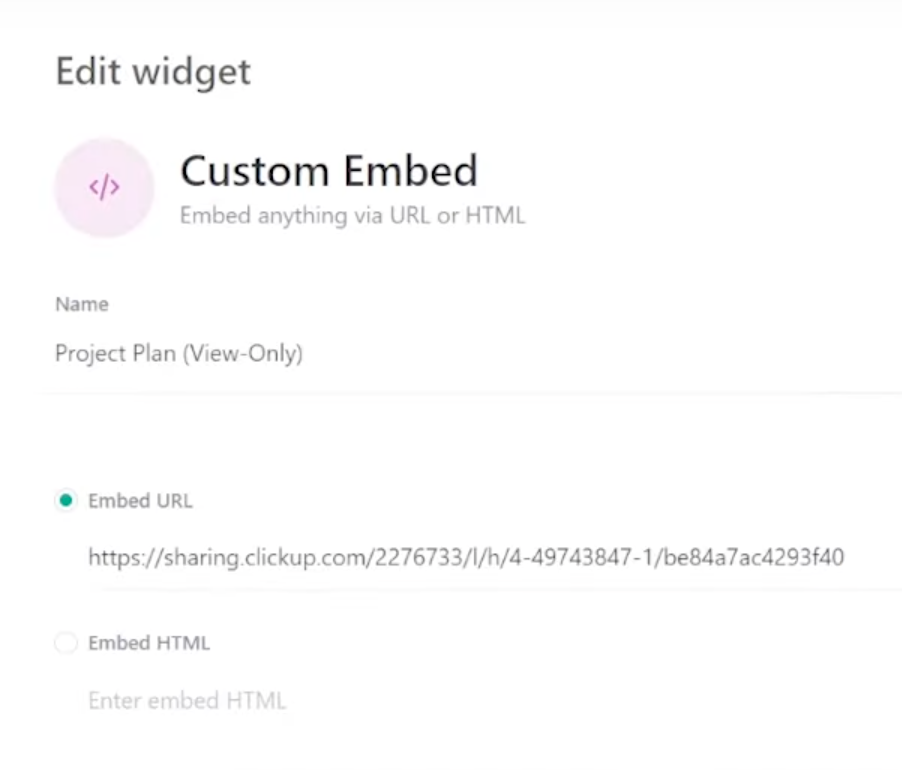
The link is public, but we’re embedding it in a private spot. With this public Embed View, the client can now see the contents inside that Embed View, even if they do not have access to the Task List.
If you’re still unclear on the concept of public views vs. guest access, check out this article.
To watch this explanation in video format, watch the video at the top of this article at timestamp 04:09.
Mistake #5: Not Having a Problem to Solve
Too often, people throw more software, features, shiny stuff, and Dashboards into their tech stack for no reason. If the Dashboard isn’t there to solve a specific problem, we don’t need that Dashboard.
Delete it.
If the Dashboard isn’t there to solve a collaboration gap or for a specific feature we need, we don’t need that Dashboard.
Delete it.
It’ll just turn into one more area we’ll get lost in. ClickUp already has a bunch of places we could get lost in — let’s not add an extra one.
Fortunately, this ClickUp Dashboard mistake is very easy to fix. Do not add a Dashboard unless that Dashboard will solve a specific problem that you, your team, users, clients, stakeholders, or the ClickUp environment is facing.
This concludes our wrap-up of five ClickUp Dashboard mistakes you might be making. If you’re wondering what other ClickUp mistakes you might be making, check out this article.
Until next time, enjoy the process!
To watch this explanation in video format, watch the video at the top of this article at timestamp 07:09.

ProcessDriven helps small teams turn chaos into process. The ProcessDriven Approach™️ combines software expertise with practical process-first strategies that have helped 1,800+ teams build a scalable foundation of business systems.