Do you wish you had an aesthetically-pleasing ClickUp Dashboard to share with your clients and go that extra mile for them?
We’re showing you how to build a visually appealing Client Portal ClickUp Dashboard, so you don’t have to figure it out alone!

This post may include affiliate links, meaning we might earn a commission. For more details, check out our terms.
Not a video person? No worries! We’ll cover all the main points in this article.
This beginner ClickUp tutorial will show you how to build a pretty ClickUp Dashboard
In this quick tutorial, we’ll show you how to turn a ClickUp Dashboard into an aesthetically pleasing overview for your external clients, stakeholders, or anyone on your team who appreciates a prettier overview experience.
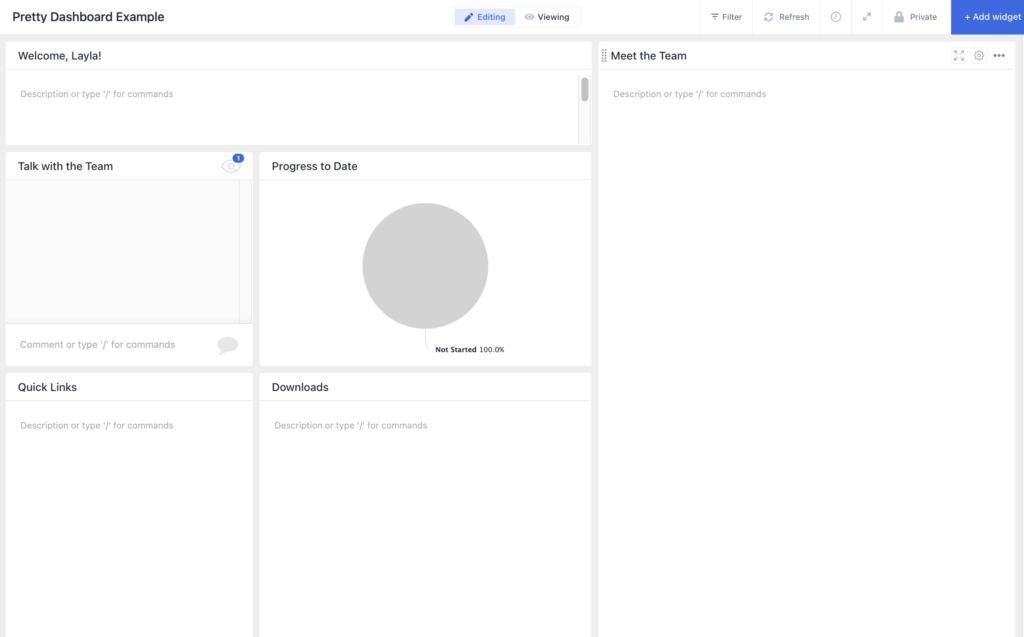
In this example, we’ll build out all of the following widgets using custom images, like this:
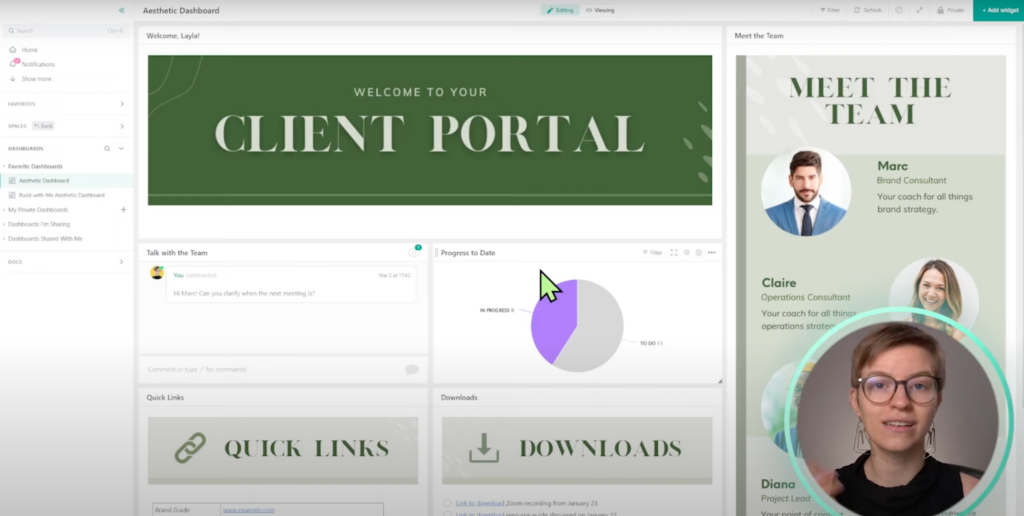
These custom images are very easy to create. We’ll then put them in ClickUp and stack them together to create one comprehensive ClickUp Dashboard that you might actually enjoy using.
To watch this explanation in video format, watch the video at the top of this article at timestamp 00:00.
Concepts we’ll be using during this video
As we go through this example, we are assuming that you, the reader, understand the following things:
- What a ClickUp Dashboard is
- What a ClickUp Task List is
- What a ClickUp Dashboard Widget is
If you are unfamiliar with the above concepts, pause here and read this article first. You must get those basic concepts down first to understand the intricacies we’ll be discussing in this article.
Time to start building! 🔨
To watch this explanation in video format, watch the video at the top of this article at timestamp 00:38.
Step 1. Create a new ClickUp Dashboard from Scratch
Let’s start with an empty Dashboard. We achieve this by going to Dashboards and clicking on the plus sign ( + ):
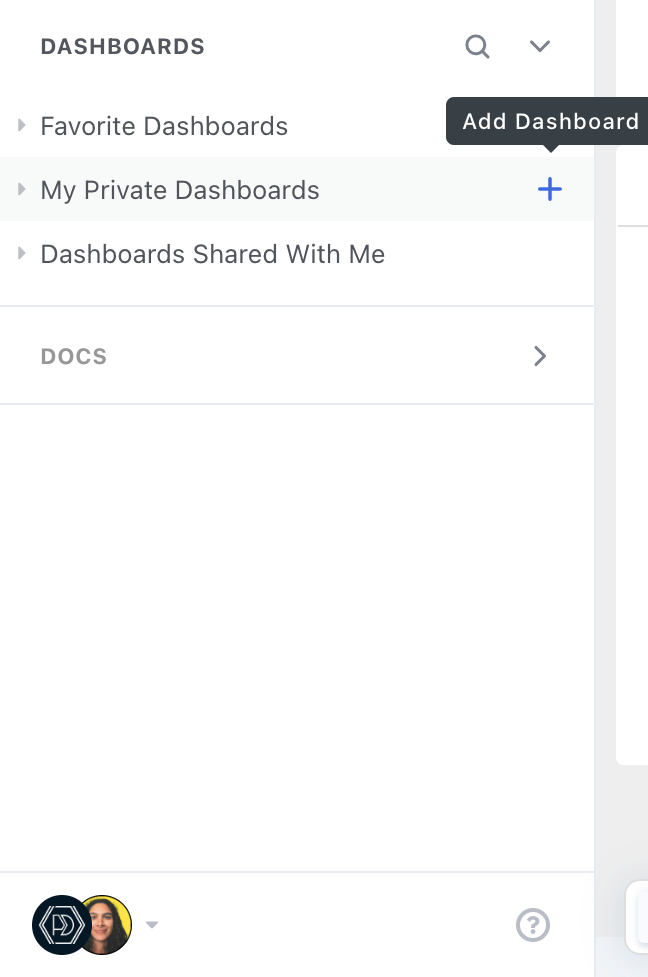
The blank slate will look like this:
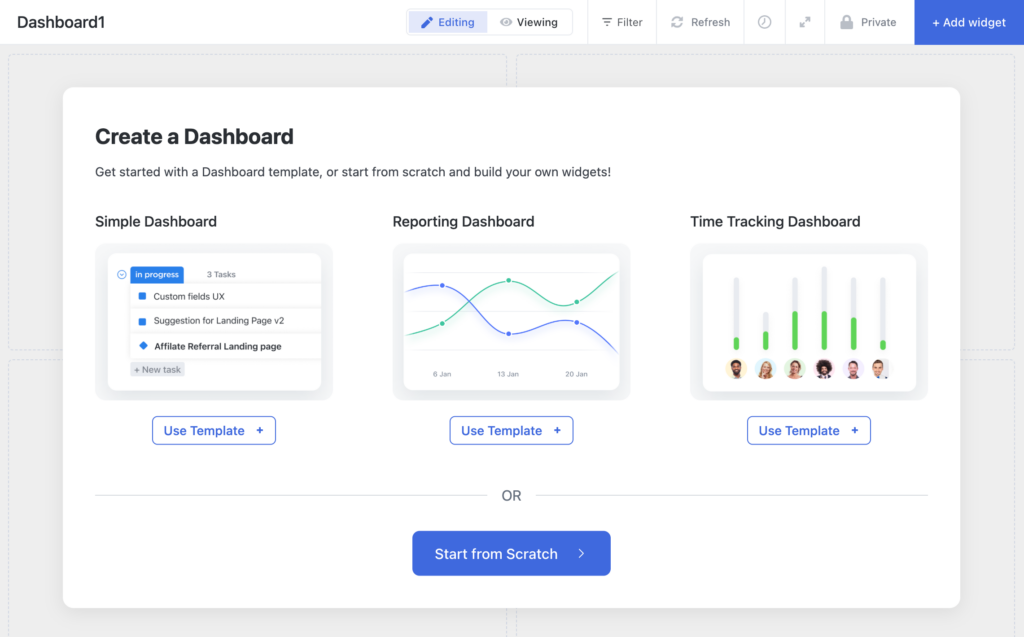
For the sake of this tutorial, we’ll click on Start from Scratch.
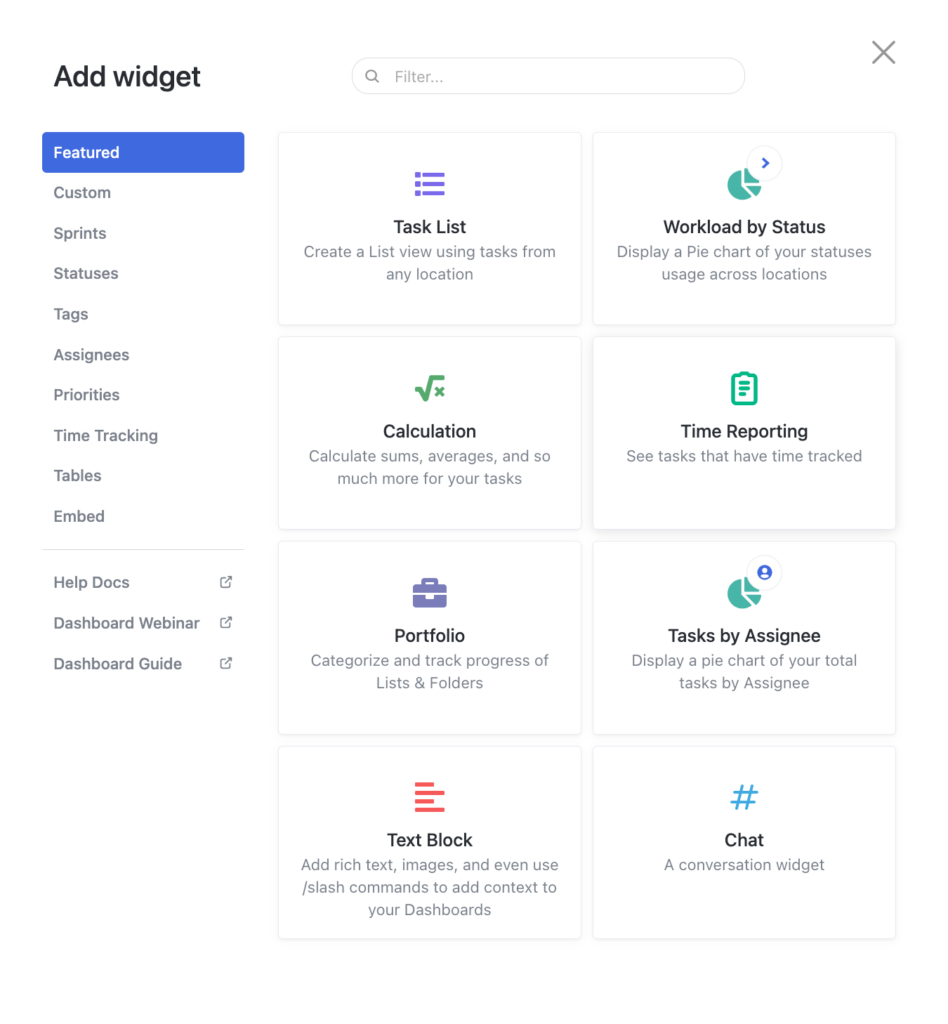
Since we’re starting from scratch, ClickUp will prompt us to choose which Widgets we’d like to add to our Dashboard:
We need to ask ourselves which piece of our ClickUp Dashboard we want to create first. For the sake of simplicity, let’s start with the most important pieces of information.
For most of us, talking with our team is the most important, so we’re going to create a chat room first.
To watch this explanation in video format, watch the video at the top of this article at timestamp 01:21.
Step 2. Create Chat Widget
Next, select the Chat Widget.
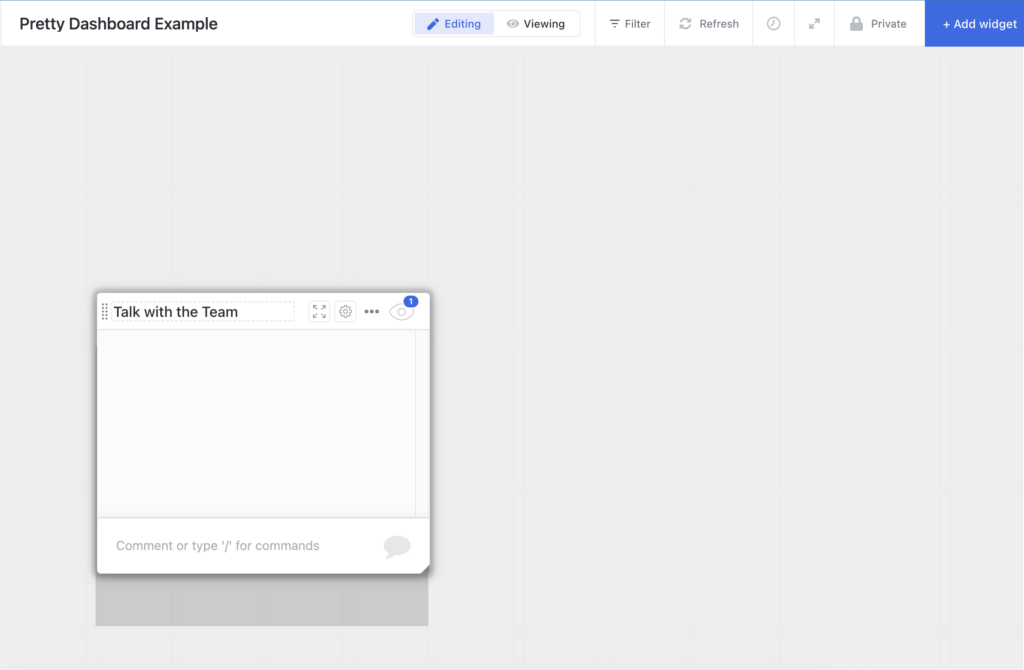
Give it a descriptive name, such as Talk with the Team, and then click Add Widget.
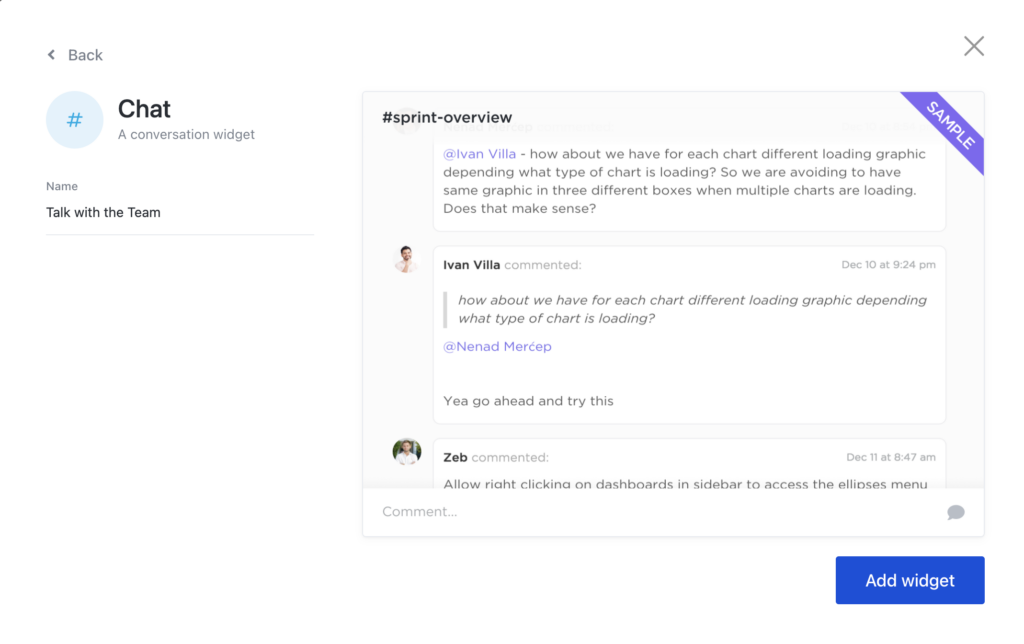
This will build a chat room we’ll use to communicate with our team, stakeholders, and anyone else we choose to have as a Watcher on this Dashboard.
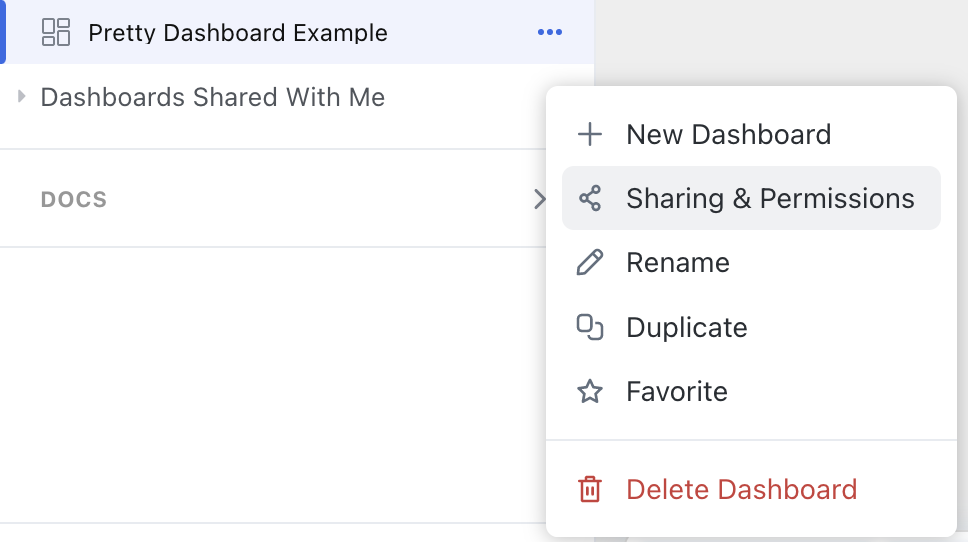
If we’re using this ClickUp Dashboard with multiple people, we first need to share this Dashboard with those people by going to Sharing & Permissions:
We then have to add those people as Watchers, so they receive notifications from this chat room:
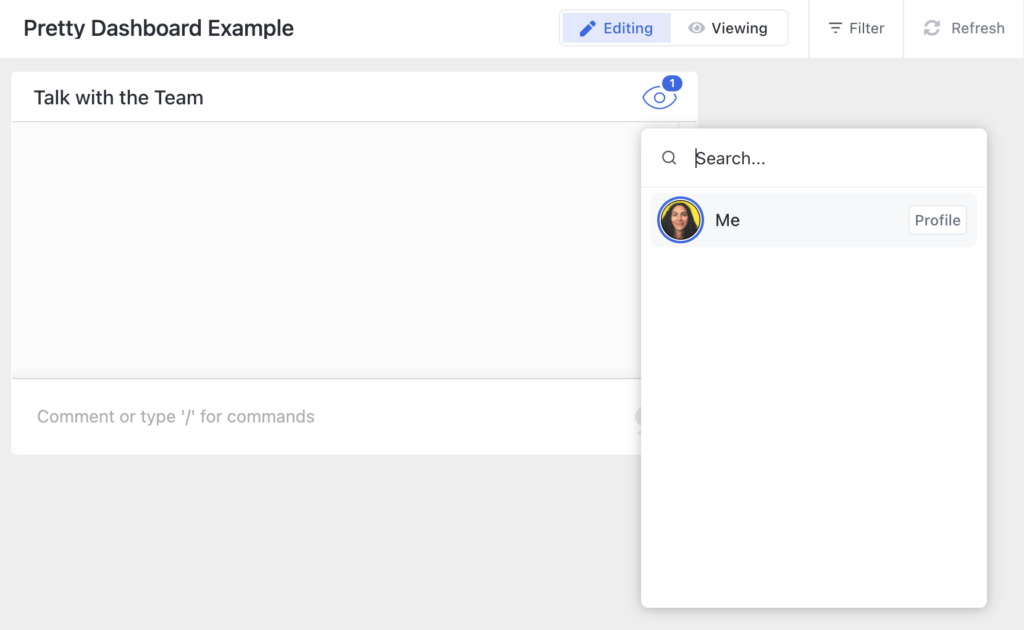
Once we’re done with that, we can drag and drop this Widget wherever we’d like:
On to the next Widget!
To watch this explanation in video format, watch the video at the top of this article at timestamp 02:05.
Step 3. Create a Task List Widget (or Embedded Public View)
The next Widget we’re going to add is for our client tasks. This Widget lets us let someone else see what we are waiting for from them.
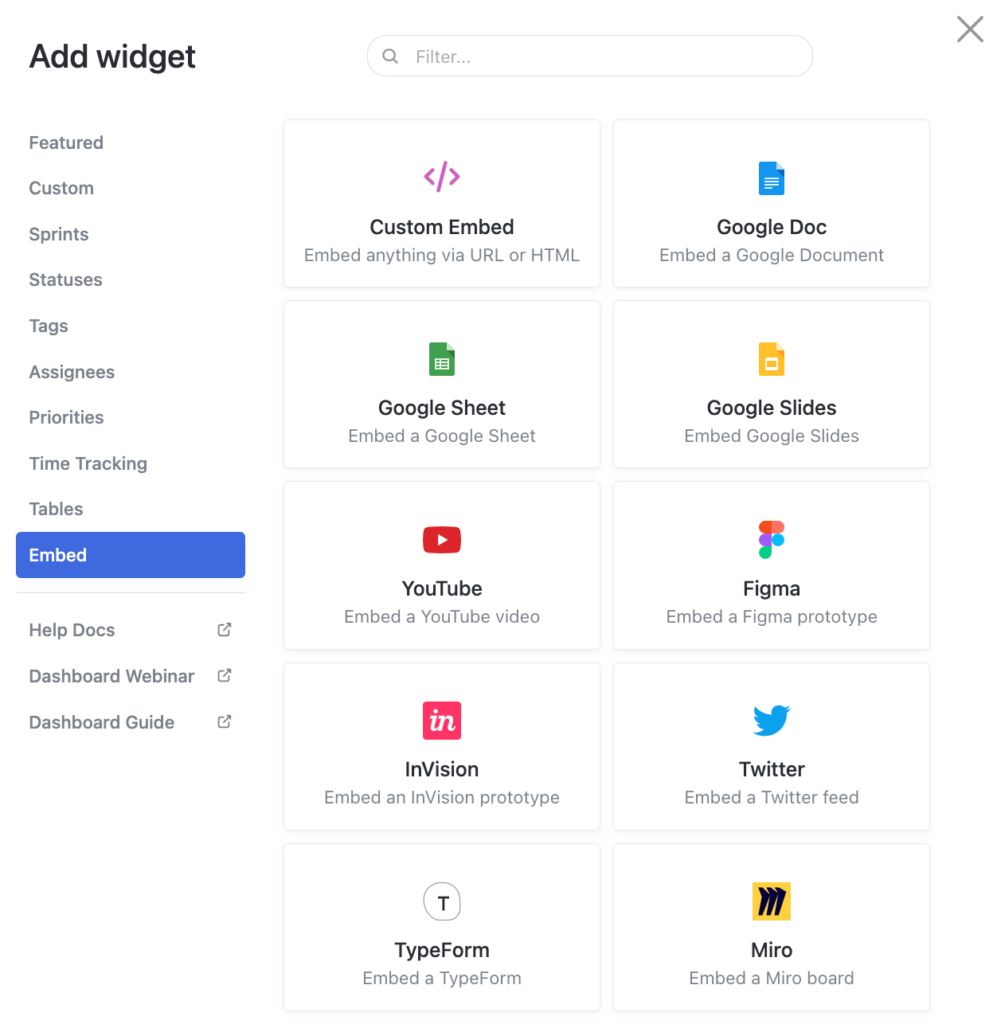
We have two options for this Widget: Task List Widget or Embed Widget.
If the people we’re sharing this Dashboard with have access to other areas of our ClickUp Workspace, choose the Task List Widget. If we do not want them to access any other part of our ClickUp Workspace and only want them to see this Dashboard, choose the Embed Widget.
If you’re unsure why we recommend these two options based on the above scenarios, check out this article.
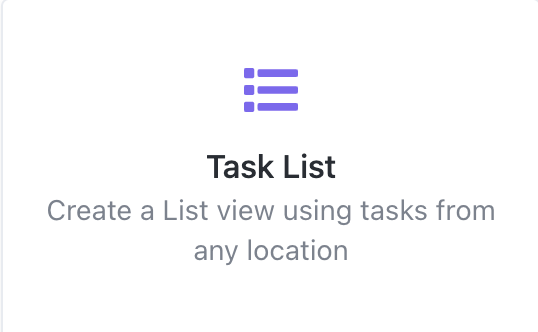
For this tutorial, we’ll choose the Task List Widget.
We then fill in the information prompted on the screen:
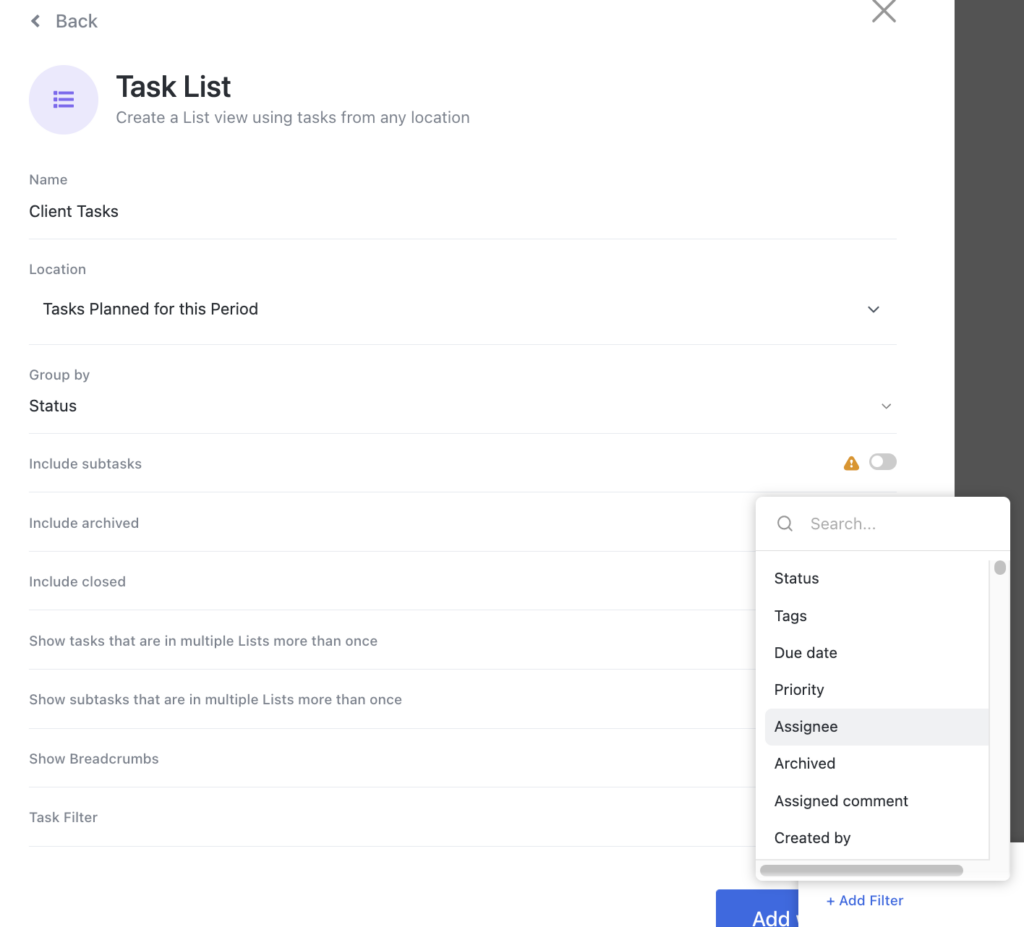
We can name this Widget Client Tasks, add it to the proper location, and make sure to Add a Filter at the bottom to only show tasks assigned to our client.
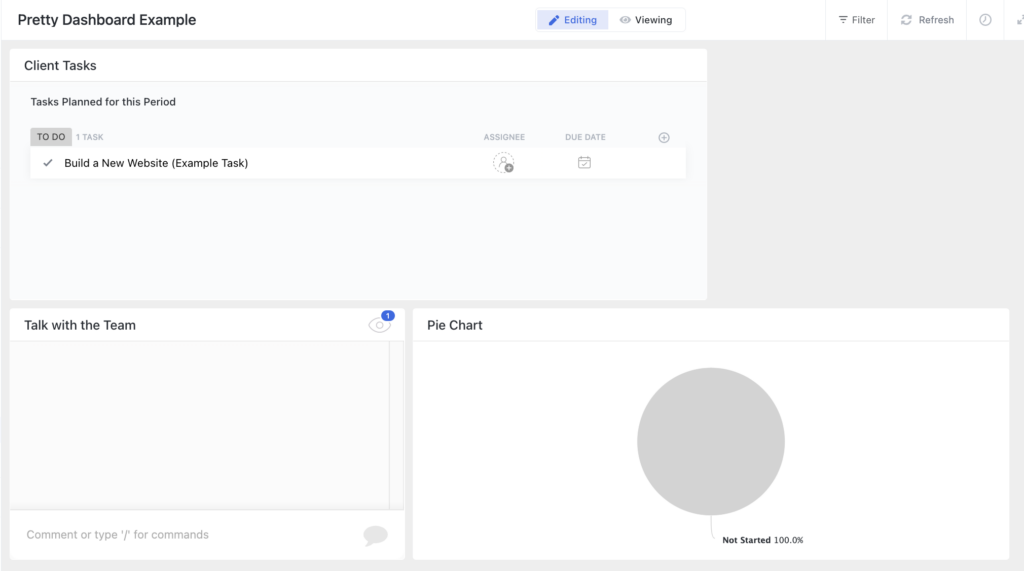
Hit Add Widget when done, and this is what it’ll look like:
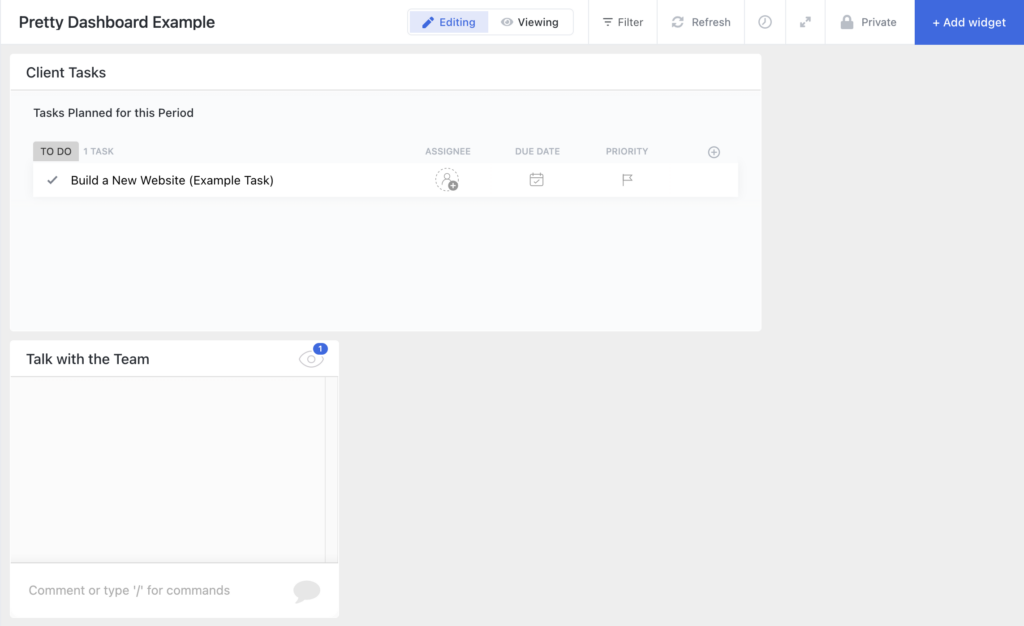
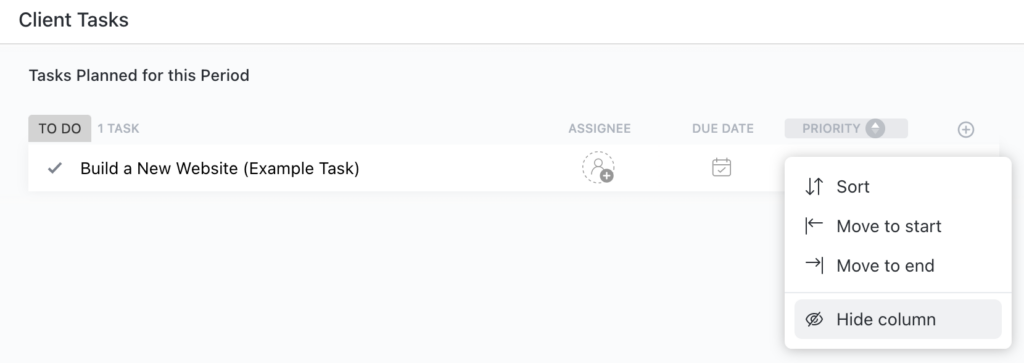
We’ll notice a task appear in the Task List Widget.
Pro Tip: Like every other area of ClickUp, we want to hide things we don’t need. In this case, we can hide the Priority column and leave Assignee and Due Date.
Now we can drag and drop this Widget wherever we’d like and move on to the next one!
To watch this explanation in video format, watch the video at the top of this article at timestamp 02:46.
Step 4. Create a Custom Pie Chart Widget
The next piece we’ll build is our Pie Chart that reports on the overall progress of a project.
Go to the top right corner, click Add Widget > Custom > Pie Chart. Just like the previous example, we need to give this a name, a location, and assignees.
If Time Estimates are used, add that to the Value area. Otherwise, we’ll leave it as Tasks. We’ve also opted to Include Closed for this Pie Chart Widget.
Click Add Widget, and we’ll see our report. For this example, we chose random locations, so this pie chart won’t be accurate. However, it’ll look something like this:
Keep in mind the Pie Chart should look colorful. The colors in the Pie Chart represent the different Statuses we have with the color we attached to that specific Status.
On to our next element in this aesthetic ClickUp Dashboard!
To watch this explanation in video format, watch the video at the top of this article at timestamp 04:15.
Step 5. Create Portfolio Widget
The Portfolio Widget is one of the only ways we can easily report on ClickUp Lists and Folders.
Please note: the Portfolio Widget isn’t available on all plans.
First click Add Widget > Portfolio. It’ll look like this:
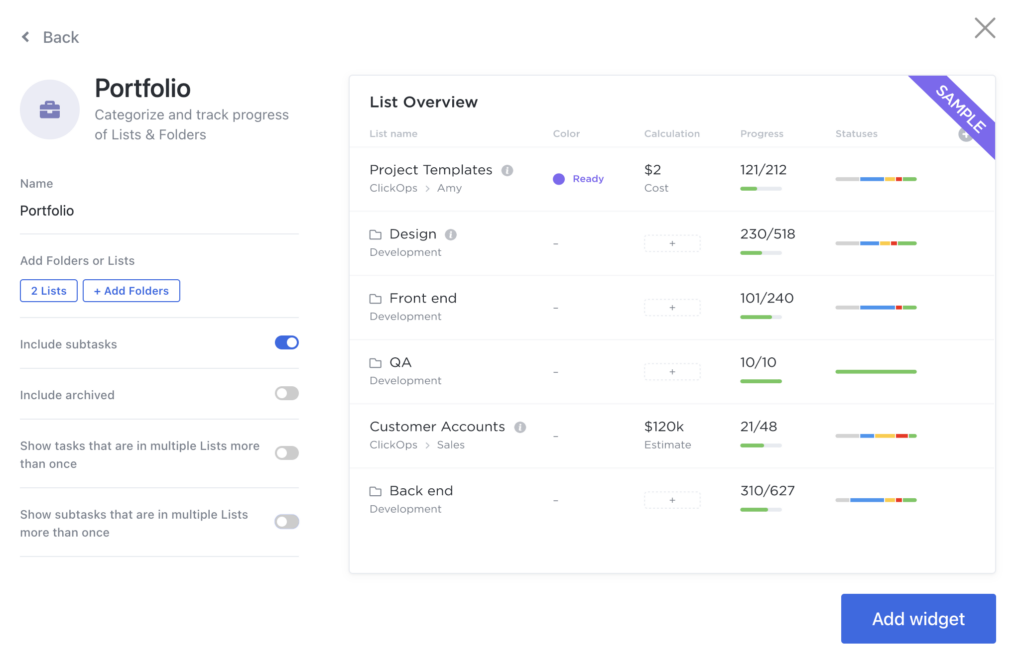
Click on Add List on the left-hand side. This will summarize progress on all Lists in a given Space.
Once we’ve selected our Lists, make sure to toggle on Include Subtasks, everything else should be toggled off.

Again, we chose random locations, so this information will look a bit wonky.
Now it’s time to start selecting the Widgets that’ll add those visual elements we’re looking for.
Wherever a visual element is added, we need to add a Text Widget. This is how we’ll give ourselves a flexible canvas to build. It’s not the only option but the one we’re going with.
To successfully implement the following elements that include images like this:
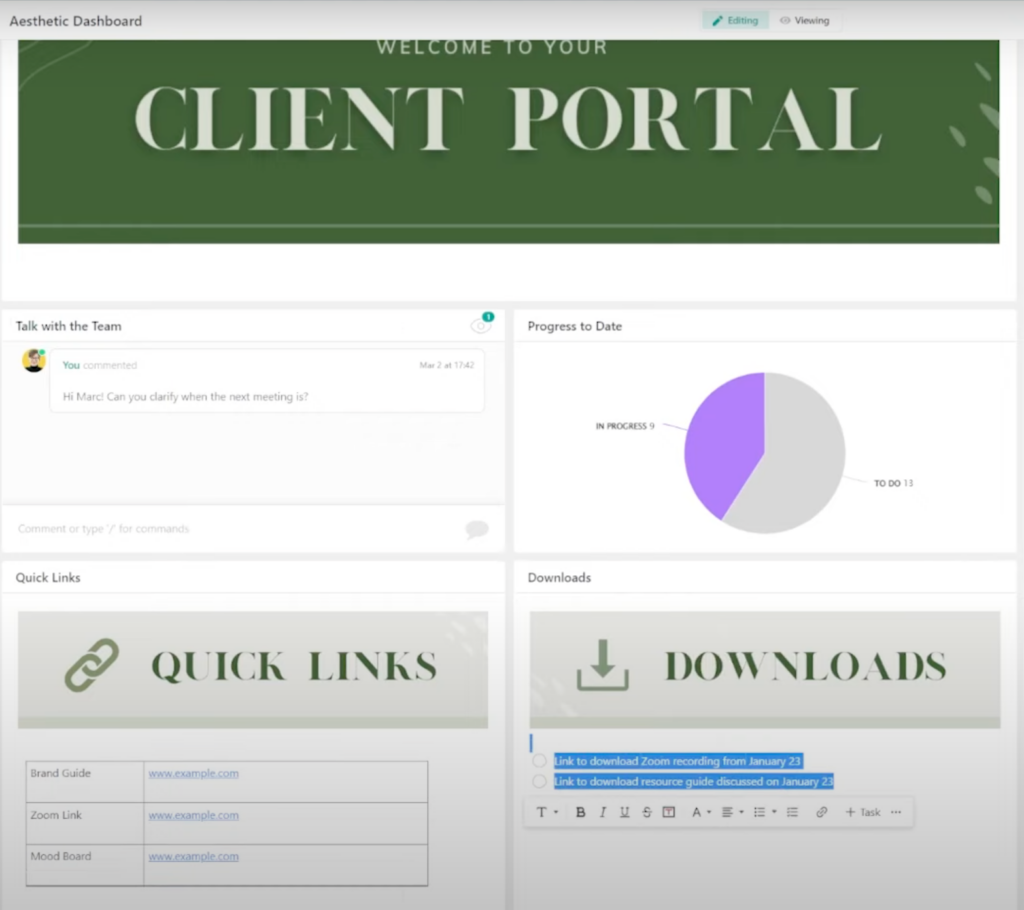
We’re going to first copy whatever text information we need and build a Text Widget around it.
To watch this explanation in video format, watch the video at the top of this article at timestamp 05:38.
Step 6. Create Text Widgets
First, select the Text Block Widget and click Add Widget without adding any extra information. Repeat this however many times we need to.
Once we’re comfortable with the amount of Text Block Widgets and rearranged them however we want, they should look like this:
We can continue to resize, drag and drop, move things around, etc., but first, let’s name our Text Block Widgets, so they don’t just say Text Block.
As shown in the image above, we’ve already named them. Feel free to steal our titles or call them whatever you’d like! Once done, we’re going to add any necessary text information.
Next, it’s time to add our images so we can add some pizzazz! ✨
To watch this explanation in video format, watch the video at the top of this article at timestamp 00:00.
Step 7. Create Images using Canva and Download as PNG
This step is super easy because we’re just using images! ClickUp allows us to resize images, so it’s effortless to drag and drop them around in our ClickUp Dashboard.
To create images, you can use any graphic tool, whether PowerPoint or a picture of a doodle you drew on a sticky note. Team ProcessDriven uses Canva because it’s super easy to use and it’s cloud-based.
We found a Canva Template, added Headings, and customized it.
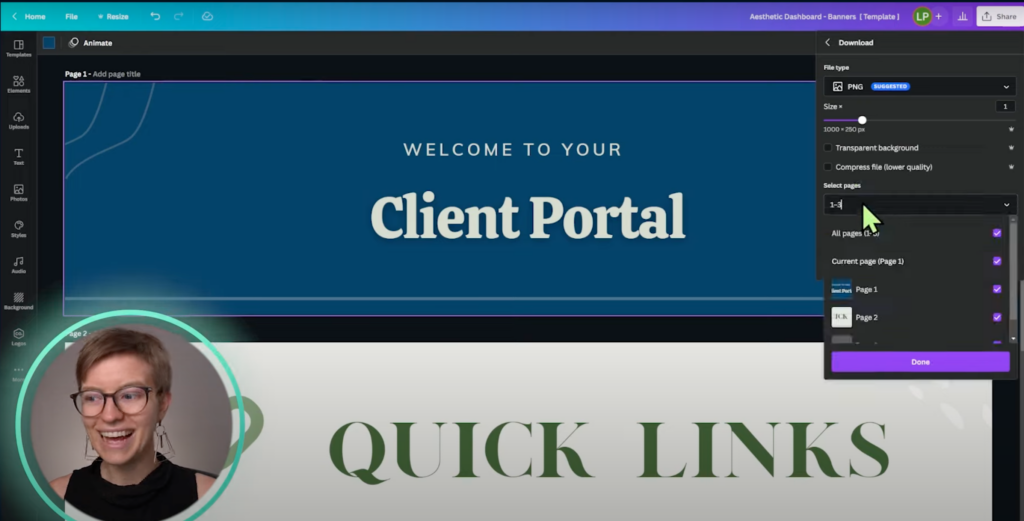
Once satisfied, download the files as either JPEG, PNG, or similar.
To watch this explanation in video format, watch the video at the top of this article at timestamp 08:16.
Ready to feel fully in control of your business so you can hire, scale, or sell your business with ease? Check out ProcessDriven Foundations™️.
Pro Tip: Members can grab these Canva templates inside the ProcessDriven Membership!
We have fully customizable Canva Templates available inside the ProcessDriven Membership if you’re someone who isn’t so fond of graphic design. You choose which template you want, click Install, wait a few seconds, and voila!
Step 8. Attach ( /attach ) images into ClickUp’s Text Widgets
Go into one of the Text Block Widgets to which we just added our names. Hit the Slash Command ( / ) and type Attachment.
Then, select the image we want to attach. At this point, we can resize the image to look how we want. Move on to the other Text Block Widgets and do the same thing.
And we’re done! Our Pretty Dashboard should look something like this:
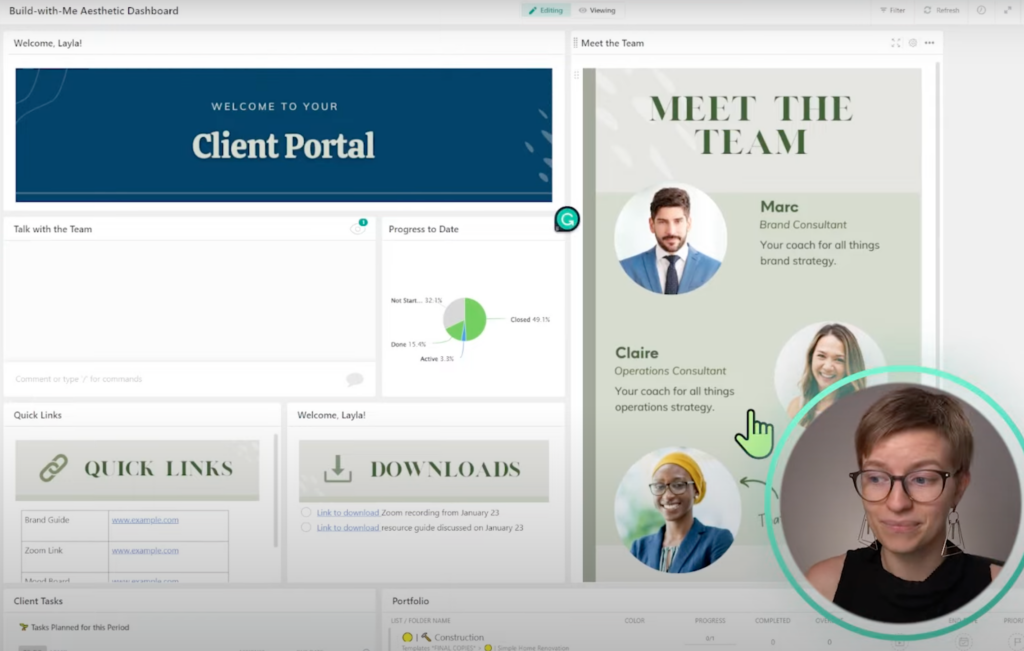
Yours will probably look better and not have clashing themes like ours. 😂
Before we finish up, we want to leave you with three pro tips so that you can stay on top of this Pretty Dashboard.
To watch this explanation in video format, watch the video at the top of this article at timestamp 10:40.
Pro Tip #1: Images can be set to “Full Width” but still look odd on different screens! Consider using embeds instead if you’d like a perfect fit.
Don’t obsess too much about the spacing. The images look different depending on device type, when we’ve zoomed in or out, or screen size.
No need to have perfect spacing!
It just needs to make sense visually for the screen your clients will be using. Unfortunately, that’s the trade-off of the image approach.
If we want to avoid this issue, we could use Embed Widgets instead of graphics.
Instead of an image, we could create a web page, custom code, or responsive design and embed those into ClickUp if we wanted to ensure this Dashboard always looked perfect regardless of screen size.
Most people think this tends to be overkill, but it’s worth sharing!
To watch this explanation in video format, watch the video at the top of this article at timestamp 11:46.
Pro Tip #2: Customize your images per client if you’d like to add a personal touch.
If we want to stick with images but make them a bit nicer, we could add our client’s branding to our portal.
An example would be to include the client’s logo in one of our images. We could add a place holder in Canva and then add the logo like this:
We would have to swap out the image for each new client, but it’s worth it if we’re trying to go above and beyond.
To watch this explanation in video format, watch the video at the top of this article at timestamp 12:27.
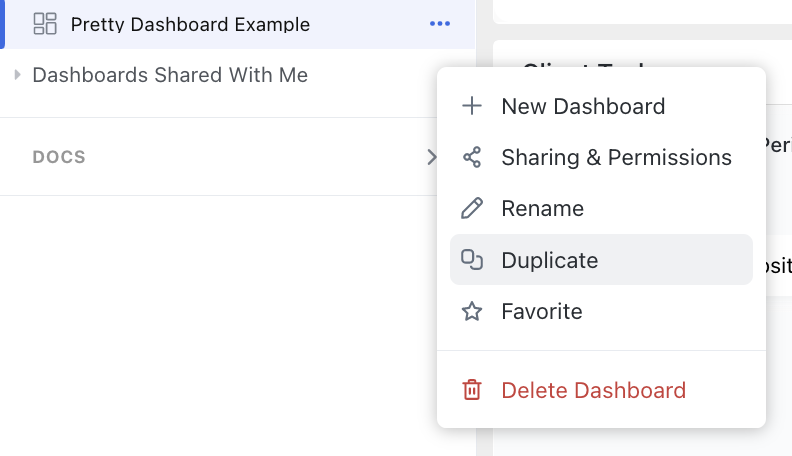
Pro Tip #3: Save Yourself Time By Duplicating This ClickUp Dashboard
Once we’ve built this ClickUp Dashboard out, we can always duplicate it when we need another one. No need to start from scratch each time; just use the Duplicate button!
And that’s it! You now have a pretty Client Portal in ClickUp! That wasn’t so bad, was it?
13:41 To see our full ClickUp Dashboard example gallery, join us inside the ProcessDriven Membership!
If you’re interested in seeing more examples like this, check out the ProcessDriven Membership. We have a Dashboard Gallery where you can browse the different ClickUp Dashboards we built (18 and counting) and install the ones you need.
Until next time, enjoy the process!
Ready to feel fully in control of your business so you can hire, scale, or sell your business with ease? Check out ProcessDriven Foundations™️.