If you’re a team leader or business owner trying to find the best software for project management or tracking your processes, odds are you’ve heard of ClickUp and the importance of ClickUp training for your users.
In a few short years, ClickUp has become one of the most popular task management tools available. But — to be clear — it’s not ClickUp itself that gets operations specialists so excited.
ClickUp (affiliate link) is so powerful because we can adapt ClickUp’s flexible structure around our own unique workflows and processes.
3 Phases of a ClickUp Setup & Training
So, in reality, a ClickUp implementation involves three stages:
1️⃣ Outline your Workflows How do we do what we do?
2️⃣ Set Up your ClickUp while Learning How to Use It How can we prepare our ClickUp to help us?
3️⃣ Document and Improve Your Processes in ClickUp How can we continually improve (and streamline) our efficiency?
When complete, you transform ClickUp into the most valuable asset in your business: a business instruction manual. ClickUp, when setup properly:
-
- Outlines how to perform all the common tasks in your business without it relying on your memory
- Tells your team what to do without relying on human memory
- Allows you to see where your energy is being spent, by showing all your projects and tasks in one place
…ultimately, ClickUp becomes the external “brain” of your business, freeing you and your team to focus on higher-value tasks.
I’ve dedicated years (and 100+ YouTube ClickUp tutorials!) to unpacking this framework. I won’t attempt to recreate all of that here!
Instead, we’ll focus our energy today on the essential ClickUp setup steps that we’ve found are most helpful to our 150+ past ClickUp training clients.
1. Define Processes & Workflows
Introduction to Business Systems
To put our processes into ClickUp, we first need to understand what systems really are.
We define processes as an intentional “how” that guides how you perform an activity.
What is life like before processes?
We all have systems whether or not we think about them — but if they’re not intentional, we’d most likely refer to them as habits or (if we’re feeling fancy) default decisions.
You can grow a 6- and 7-figure business relying solely on habits…but it’s a stressful path!
With habits:
-
- how you handle situations relies on how you feel in the moment;
- “training” new employees is done slowly by “shadowing” existing employees until the new employee memorizes processes; and
- knowledge of the business’s successes and failures are in people’s memories. If the owner (or a seasoned employee) gets hit by a bus…that knowledge is lost, permanently.
There’s a better way!
Why build strong business systems?
When we build systems, our objective is to reflect on our habits and ultimately document the most effective way of doing each activity.
By taking the time to think about your reactions in advance, you make a decision for your future self (or future employees).
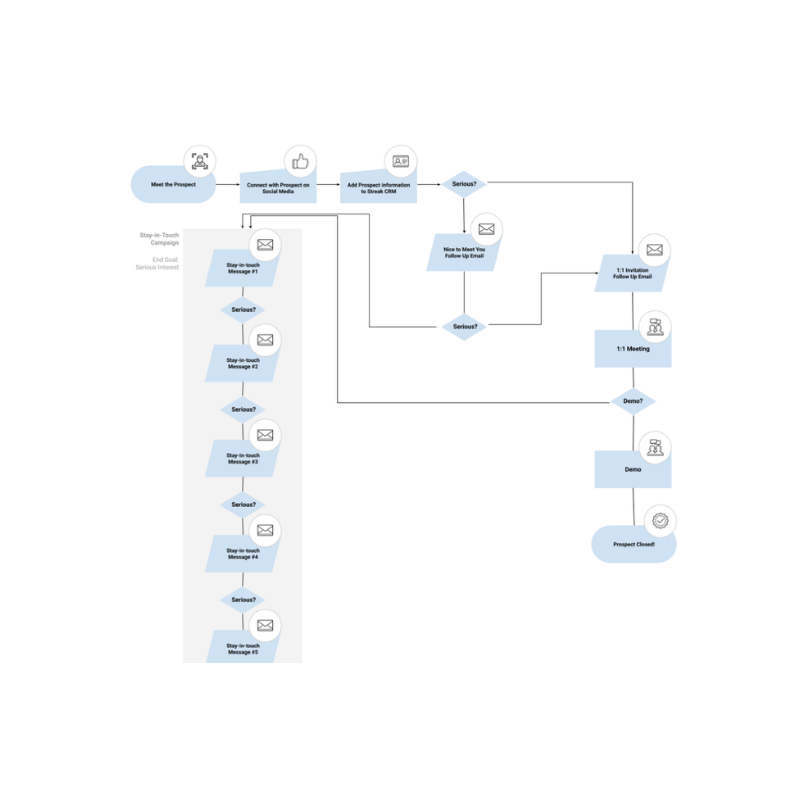
Rather than stressing about that new lead thinking, “Shoot! How am I going to remember to follow up?”
You instead think, “I need to follow up with this person, so let me apply my follow-up template so that the system reminds me of what to say (and when to say it) so I don’t have to waste my brainpower on worrying about this at all!”
Systems reduce decision fatigue while allowing you to design your customer experience in a way that anyone on your team can deliver in a consistent manner.
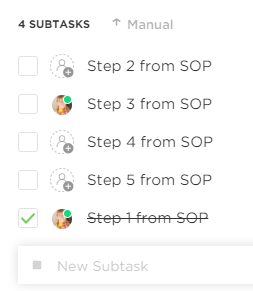

Map your business in terms of processes.
So you’re thinking, “Great. Systems matter — how do I build them?”
Our favorite exercise to guide you through that is called the “Process Org Chart” which we’ll cover in the next section.
Create an org chart focused on processes, not people.
To define your Clickup, organize your business in a hierarchy…but not a typical “org chart” listing names, departments, and job titles.
Instead, we think about the functions (aka processes or “what you do) in the business.
Just like an org chart, start with the most important overall “jobs to be done” — that is likely a variant of “make a profit”.
What “sub jobs” or “sub processes” go into “make a profit,” really? Well, that’s your next layer of the hierarchy!
(Continue like this until your process map is complete!)
How will your process org chart change over time?
The functions your business performs are going to be relatively consistent as your business grows, just like your ClickUp structure.
Whether you’re a team of one or a team of 20, the common areas — build trust, convert leads, support your team — consistently need to be taken care of.
(That’s part of why we love this exercise when we’re wearing our “ClickUp Consultant” hat!)
Looking to learn ClickUp, faster? We’re Vetted ClickUp Consultants who have build an entire vault of premade templates and action-oriented lessons to walk you through this step-by-step. Plus, we pair it with unlimited feedback through our ClickUp online course + program, ClickingUp. Click here to see all the benefits and pricing.
2. Set Up ClickUp
Ok, now that we have that out of our system…let’s get to the ClickUp training!

Create your ClickUp account (and adjust Settings)
Create your ClickUp Workspace and Admin Settings
Step 1: Enter Email
Use our affiliate link to sign up for a ClickUp account. Once you do, ClickUp will send you an email confirmation with a verification code. Once you have the code, go back to the website and type that in. Let the ClickUp Onboarding begin!

Step 2: Choose Avatar
In this first section, you will start off with the initial choice of your avatar. You can either choose to upload a photo or just pick a color to go with your initials.
I would recommend uploading a photo at this point. Once uploaded, make any adjustments needed, and then click save.
Step 3: Pick Theme Color
Moving on to the next section, you can select the theme color. This is the accent color that shows up all over your ClickUp. Choose whichever makes sense for you because each user in your team can customize their own theme color.
Step 4: Add Integrations- Time Tracking, Calendar, Cloud Storage
After you choose your theme color, we get into integrations. Here you can choose what kind of apps (like time-tracking, Google Calendar, Dropbox, etc.) you want to have integrated with your ClickUp account from the get-go. If you use any of these tools, just go ahead and select them. If not, just leave them unselected for now.
I would leave these unselected so that way things are a little bit simpler at the start. You can always add them later after your account has been set up.
Step 5: Select Workspace and Team Size
This area is for ClickUp to try to simplify and personalize your experience. If you choose “It’s just me,” it will hide features that are meant for team settings. If you want to experience all the features, or are going to eventually invite your team, then select “Me & others.”
I would recommend “Me & others” and simplify later as needed.
Step 6: Name Your Workspace
I would encourage you to make your Workspace name the name of your company, club, or nonprofit.
Step 7: Invite Your Team
Here, you can choose to invite people to your ClickUp account directly.

Step 8: Choose Workspace Avatar
Now you can finally pick a picture for your overall Workspace. In most cases, I suggest people use their company logo.
Step 9: Name Your First Space in Your Workspace
Once you have your Workspace set up, it’s going to ask you what you want to name your first space. I recommend that you name your first space “Learning ClickUp” or “Sandbox”— something to let you know that it’s just a testing area. Keep it simple for now.
Step 10: Enable ClickApps
Now, the questions do not stop at this point; they’re going to ask you what ClickApps you want to be enabled in your ClickUp space. This is referring to what extra features you want to enable beyond just the basics.
I would recommend turning them all on so you can use these features as we teach them in ClickingUp.
Step 11: Add Additional Integrations
This is the second round of integration options. Here you can select apps like Zoom, Slack, Zapier, etc. Again, if you aren’t sure, just skip it. If there is one of these that you definitely use, go ahead and select that and then move on.
Step 12: Import Tasks
Are there any tools that you are leaving that you want to pull data from? I typically recommend not importing until after you have some of your ClickUp structures settled.
Step 13. ClickUp Apps
ClickUp has mobile, web, and desktop apps that you might consider adding. Personally, we find the Browser Extension to be an invaluable way to get tasks into ClickUp from anywhere (including your email inbox!).
A Brief ClickUp Tour
This will be a quick tour around the app to get you oriented.
If I was a new ClickUp user, I would focus exclusively on Home, Tasks, and Notifications. Next, focus on Dashboards, Docs, and Quick Create Menu.
Home/Inbox
At the top is home, which has two tabs that flips between your inbox and your home view.
Tasks/Spaces
Below the Home section is where your Tasks and Spaces live. This is the area that you’re going to live in almost all of the time. This area shows you all of your tasks organized in a table of contents sidebar.
Notifications
Next up is notifications! This area lets you know what happened in your ClickUp account since you were last using it.
Here’s a beginner notifications tutorial if you need it!
If you’re the only one using the app, this will most likely just be alerts from any ClickUp Automations that might pop up. If you’re in a team with other people, these will be updates on your team’s actions on tasks you’ve been involved with. Notifications can get a lot more interesting once your account is more mature.
Dashboards
Next, we have dashboards, which can be reports based on your tasks. You can create different setups to show a completely customizable HQ of your ClickUp account.
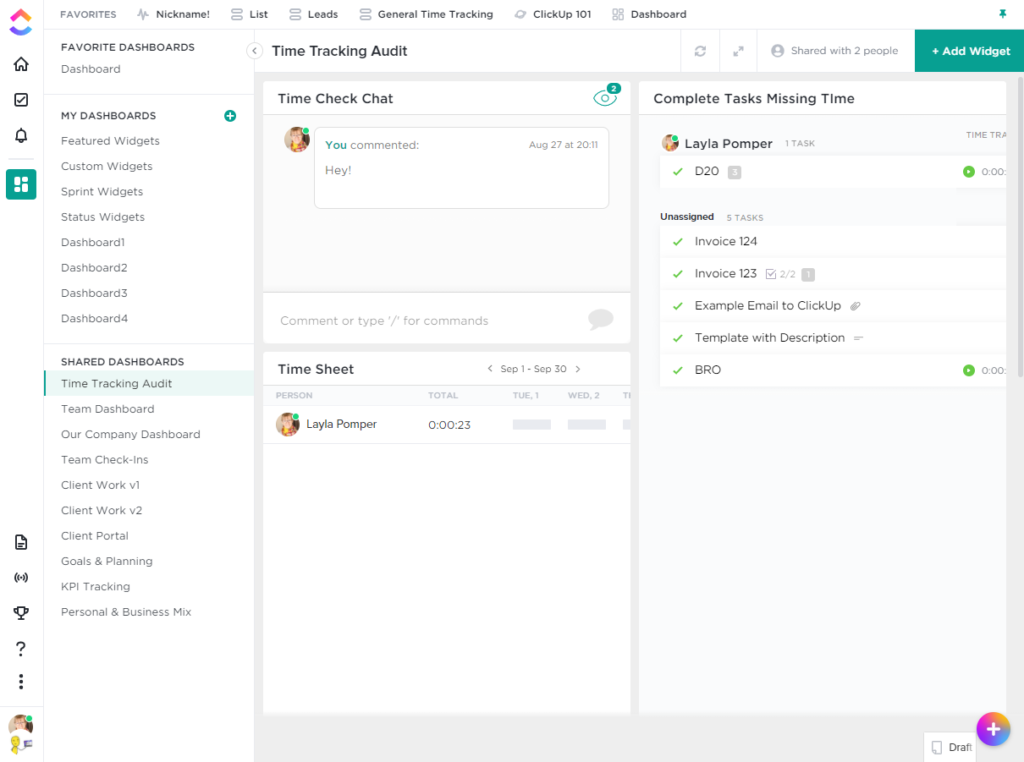
If you’re looking for some Example ClickUp Dashboards, we have a bunch of them featured on YouTube!
Docs
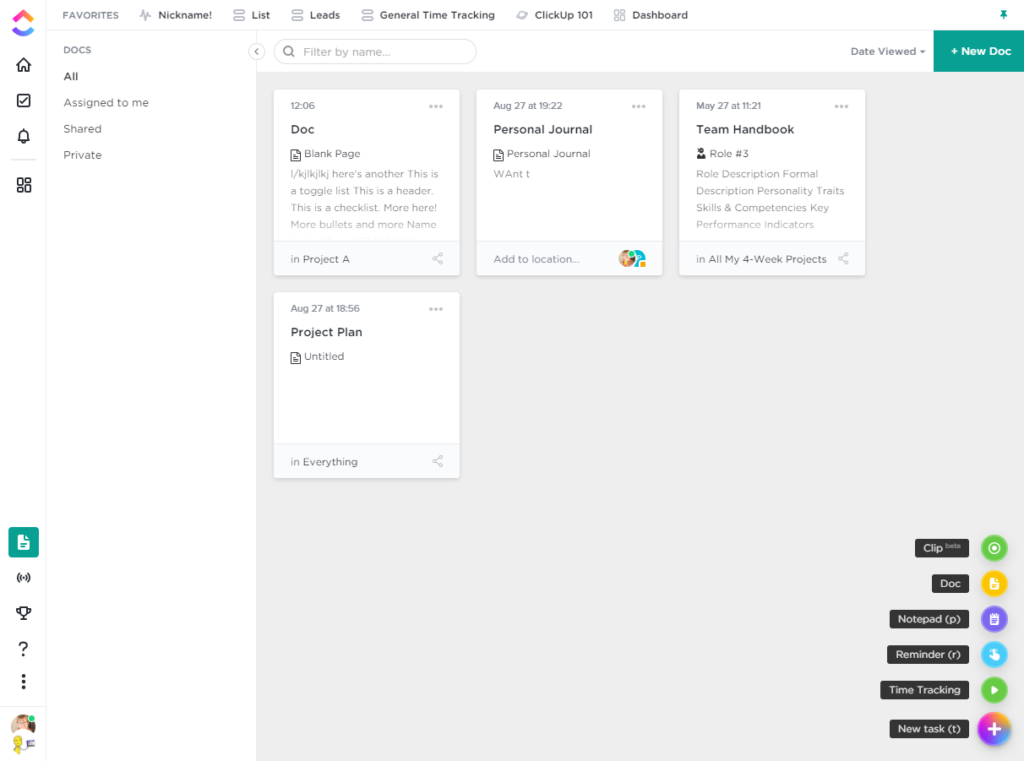
This feature allows you to create simple cloud-based documents. Though they’re called “Docs” officially, they’re really more comparable to notebooks.
Docs do not have Folders, but you can nest Doc pages for a variety of creative organization systems.
Quick Create Menu
If you want to take the next step and start exploring ClickUp further, you might want to start in the bottom corner.
There you can actually create lots of new things from this Quick Create menu. I’d suggest you start watching some of the other YouTube videos I have on specific features from the quick start menu when those features actually come up.
What Next? Notification Settings!
There’s one thing that you need to do before you’re done working in ClickUp for the day to make sure that your account does not become a waking nightmare… and that is… adjust those notification settings!
(To get into your settings, go to the bottom left corner. Then, click Settings.)
If there’s one tab you were to look at, I would go to notifications and cut back your own personal notifications from ClickUp. You can select an entire column and start hiding things. You basically want to cut down on messages so you’re not receiving a bunch of emails from the system that will drive you crazy.
If you do like email, the one email I would suggest keeping on in your ClickUp account is the Daily Digest or the Daily Brief. This option gives you one email a day and helps you stay in the loop on your ClickUp account while you’re still building that new ClickUp habit. For everything else, I would suggest turning it off.
Set up your ClickUp Hierarchy
The ClickUp Hierarchy (deciding if your project should be a Space, Folder, List, or Task in ClickUp) can be challenging…but it doesn’t have to be.
Create your “horizontal” ClickUp Hierarchy (Views, Custom Fields, Tasks)
If you’d like to develop your ClickUp hierarchy little-by-little, I’d recommend starting with one Space and one List. Nothing more!
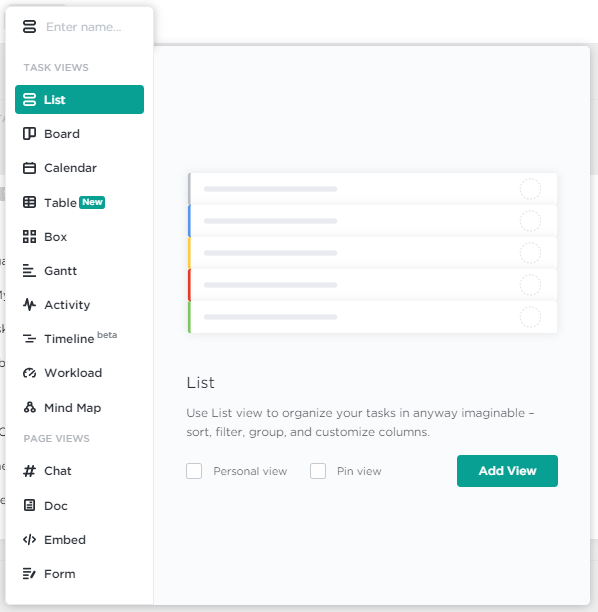
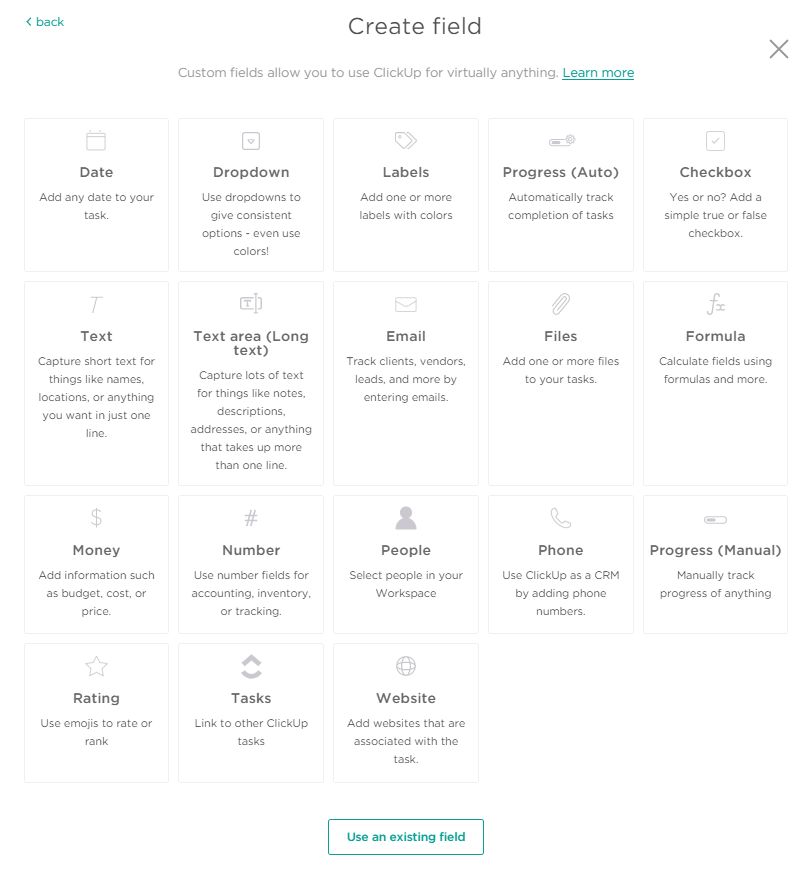
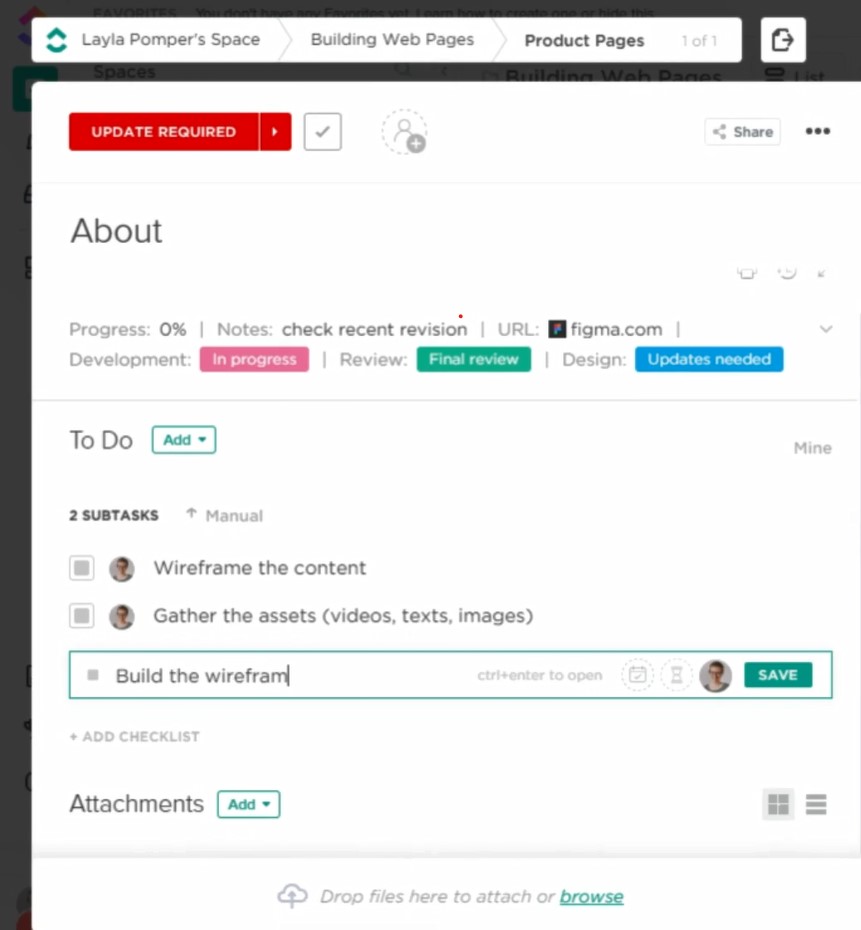
Then, focus all your energy on making the most out of what I like to call the “horizontal hierarchy” in ClickUp. This includes: Views, Custom Fields, and (of course) Tasks.
One View that’s rather unusual (but useful!) is Form View. It’ll allow you to create Tasks instantly from a form submission and may be worth checking out.
Define your “vertical” ClickUp Hierarchy (Spaces, Folders, Lists)
When you’ve reached the limits of what your horizontal hierarchy can do, then add the vertical hierarchy into the mix. This includes: Spaces, Folders, and Lists.
The tempation here will be to overbuild and overcomplicate the elements. Resist the urge! It is much easier to expand your vertical hierarchy than it is to simplify it. Start simple!
Also, if you’re feeling stuck be sure to check out our video on common setup mistakes!
Need a shortcut to perfect your setup, fast?
We provide a lot of personal feedback on organization hierarchies inside our membership (every business is unique!) but if you’d like some general pointers…watch the free ClickUp training video below!
(In it, we went through 10 example ClickUp hierarchies for businesses including contractors, virtual assistants, photographers, bookkeepers, and more.)

ClickUp training for your team
Alright! You’ve got a ClickUp Workspace and you’ve started your first draft of your ClickUp hierarchy. It’s time to invite your team!
Invite your employees and contractors in ClickUp
If you haven’t already, you can now use the settings in the bottom-left corner to locate the “People” settings. Inside ClickingUp, we have a Decision Tree to help you determine what level of access you need but, as a shorthand:

-
- Most of your permanent team members will need “Member” access in ClickUp.
- Contractors, clients, and team members who only work on certain projects will likely be free “Guest” access.
Provide basic ClickUp training to your team
Implementation of new tech is going to be exciting for some and terrifying for others. There’s no way around it.
Managing the change swiftly, with clear communications, and ample ClickUp training can go a long way to reduce stress.
We love helping ClickUp users self-educate so they can successfully DIY ClickUp. We help with this to a limited extent through free ClickUp tutorials on YouTube…but we’ve also dedicated our entire membership to solve this problem quickly. Reach out if this is an area that is proving challenging for you!
Define the best practices for your team
To ensure the blind isn’t leading the blind in your setup, you might find it helpful to hire a ClickUp Consultant (like us!) 1-on-1 to provide ClickUp training. If we’re not a good fit, you can also find the full directory of ClickUp Consultants on ClickUp’s website.
(If you’re curious, you can learn more about how we recommend our ClickUp Consultant clients implement ClickUp by watching this video.)
Want a faster way to get up-and-running? We’ve spent years helping businesses roll out ClickUp. Click here to learn about our signature program, ProcessDriven Foundations™️, and our How to ClickUp course.
3. Document Your Process

Select your process, process owner, and process manager.
ClickUp is cool…but it only becomes a valuable asset once we equip ClickUp with your workflows. At least, that’s what we believe!
Where can you store SOPs?
Standard Operating Procedures (SOPs) are instructions that tell the reader how to perform an activity (process) in your business.
While even a simple “sticky note” could be considered an SOP if it provides guidance…but a good SOP storage area is typically:
-
- Centralized (there’s one spot for all of them)
- Stored in the Cloud (accessible anywhere, through the internet)
- Easy to Edit (little friction to make adjustments)
These requirements are why we initially became ClickUp fans and, eventually, ClickUp trainers and consultants!
Essential elements of an SOP
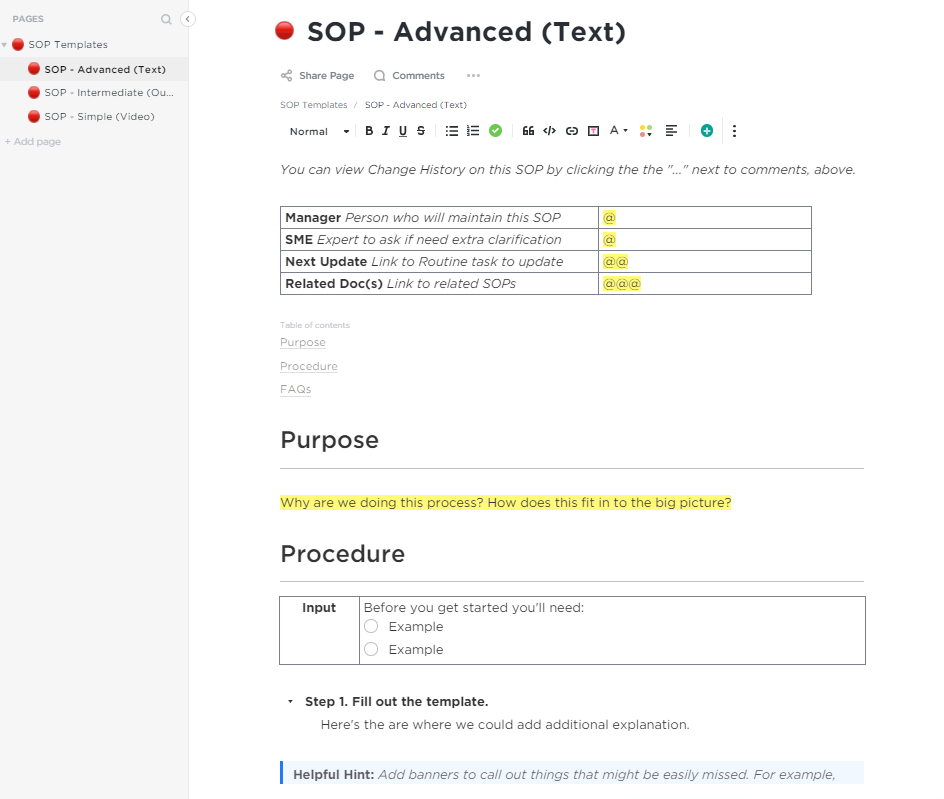
Whatever software you use (we prefer to store SOPs in ClickUp!), strong SOPs typically have a few key elements:
-
- Process Manager who will perform this process and, more importantly, who will update this SOP.
- Process SME who’s the expert to ask (if any) if there are questions about performing this process?
- Inputs How do I know when I’m read to start? What ingredients do I need?
- Procedure What steps do you need to take to go through this. Preferably, use Headers to make the procedure skim-friendly!
- Outputs How do I know when I’m done?
- Examples What’s a good or bad demonstration of the output?
- FAQs Put any questions that come up here if they can’t be added directly into the procedure.
Keep in mind, you don’t have to create SOPs on your own. Your team (or contractors) are there to help!
Keep Improving, Keep Learning
So you have ClickUp set up, your ClickUp training complete, and processes documented…congratulations!
Unfortunately, your ClickUp — like your processes in your business — are never done. You could chip away at improving these areas (learning as you go) on your own. That works!
But, as I’ve mentioned throughout this post, there is an alternative. We’ve worked with hundreds of teams to implement ClickUp and thousands of ClickUp users…if you’d like guidance, support, and strategy, check out our signature program, ProcessDriven Foundations™️.
