This post contains affiliate links or sponsored content for which we may receive compensation. For details, visit https://processdriven.co/terms
The Human Resources or People Function is a complex yet necessary part of every business. Rather than having your HR work spread across multiple tools, you might benefit from having everything centralized in a simple and cost-effective software like SmartSuite that talks to the tools you already use.
SmartSuite is a no-code software that allows us to have the perfect balance between a database tool like Airtable and a task management tool like Asana. In this article, we’ll show you how to build out a full-stack HR management system using SmartSuite. Make sure to use our affiliate link for SmartSuite to create an account follow along with this tutorial!
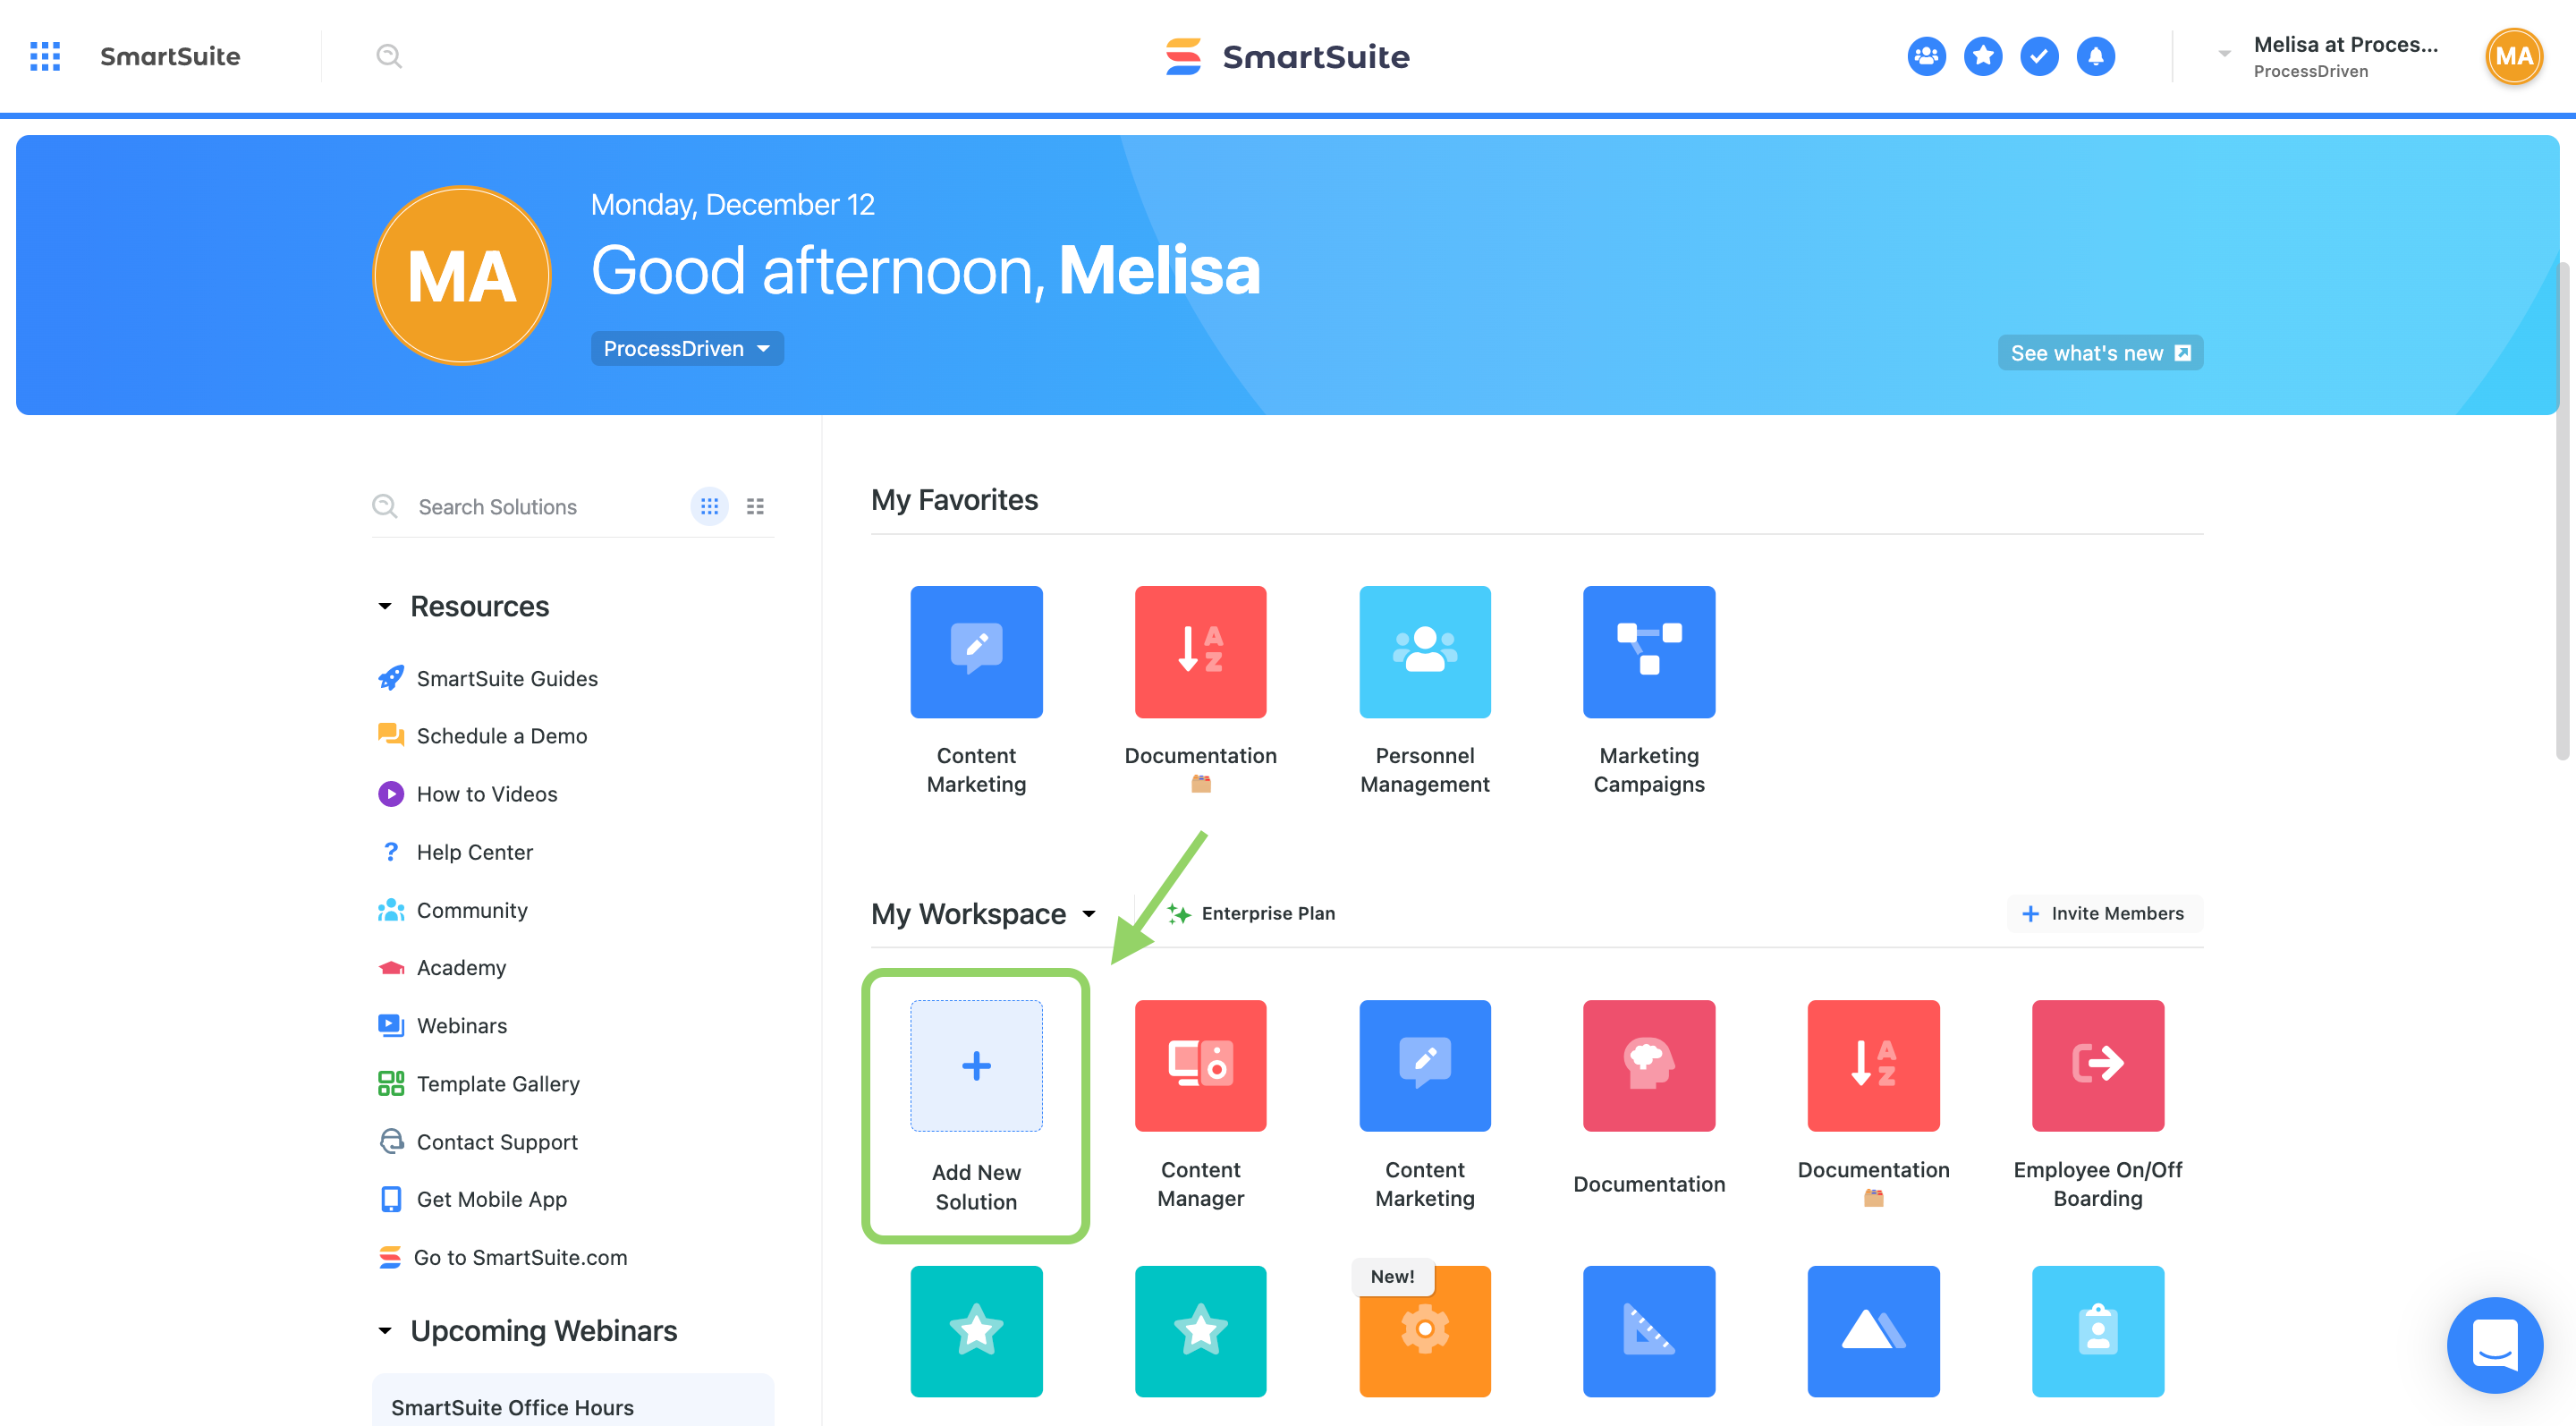
Create a New Solution for Human Resources using SmartSuite Personnel Management Template
After you’ve created your SmartSuite account, create a new Solution for your HR Management using the Add New Solution button.
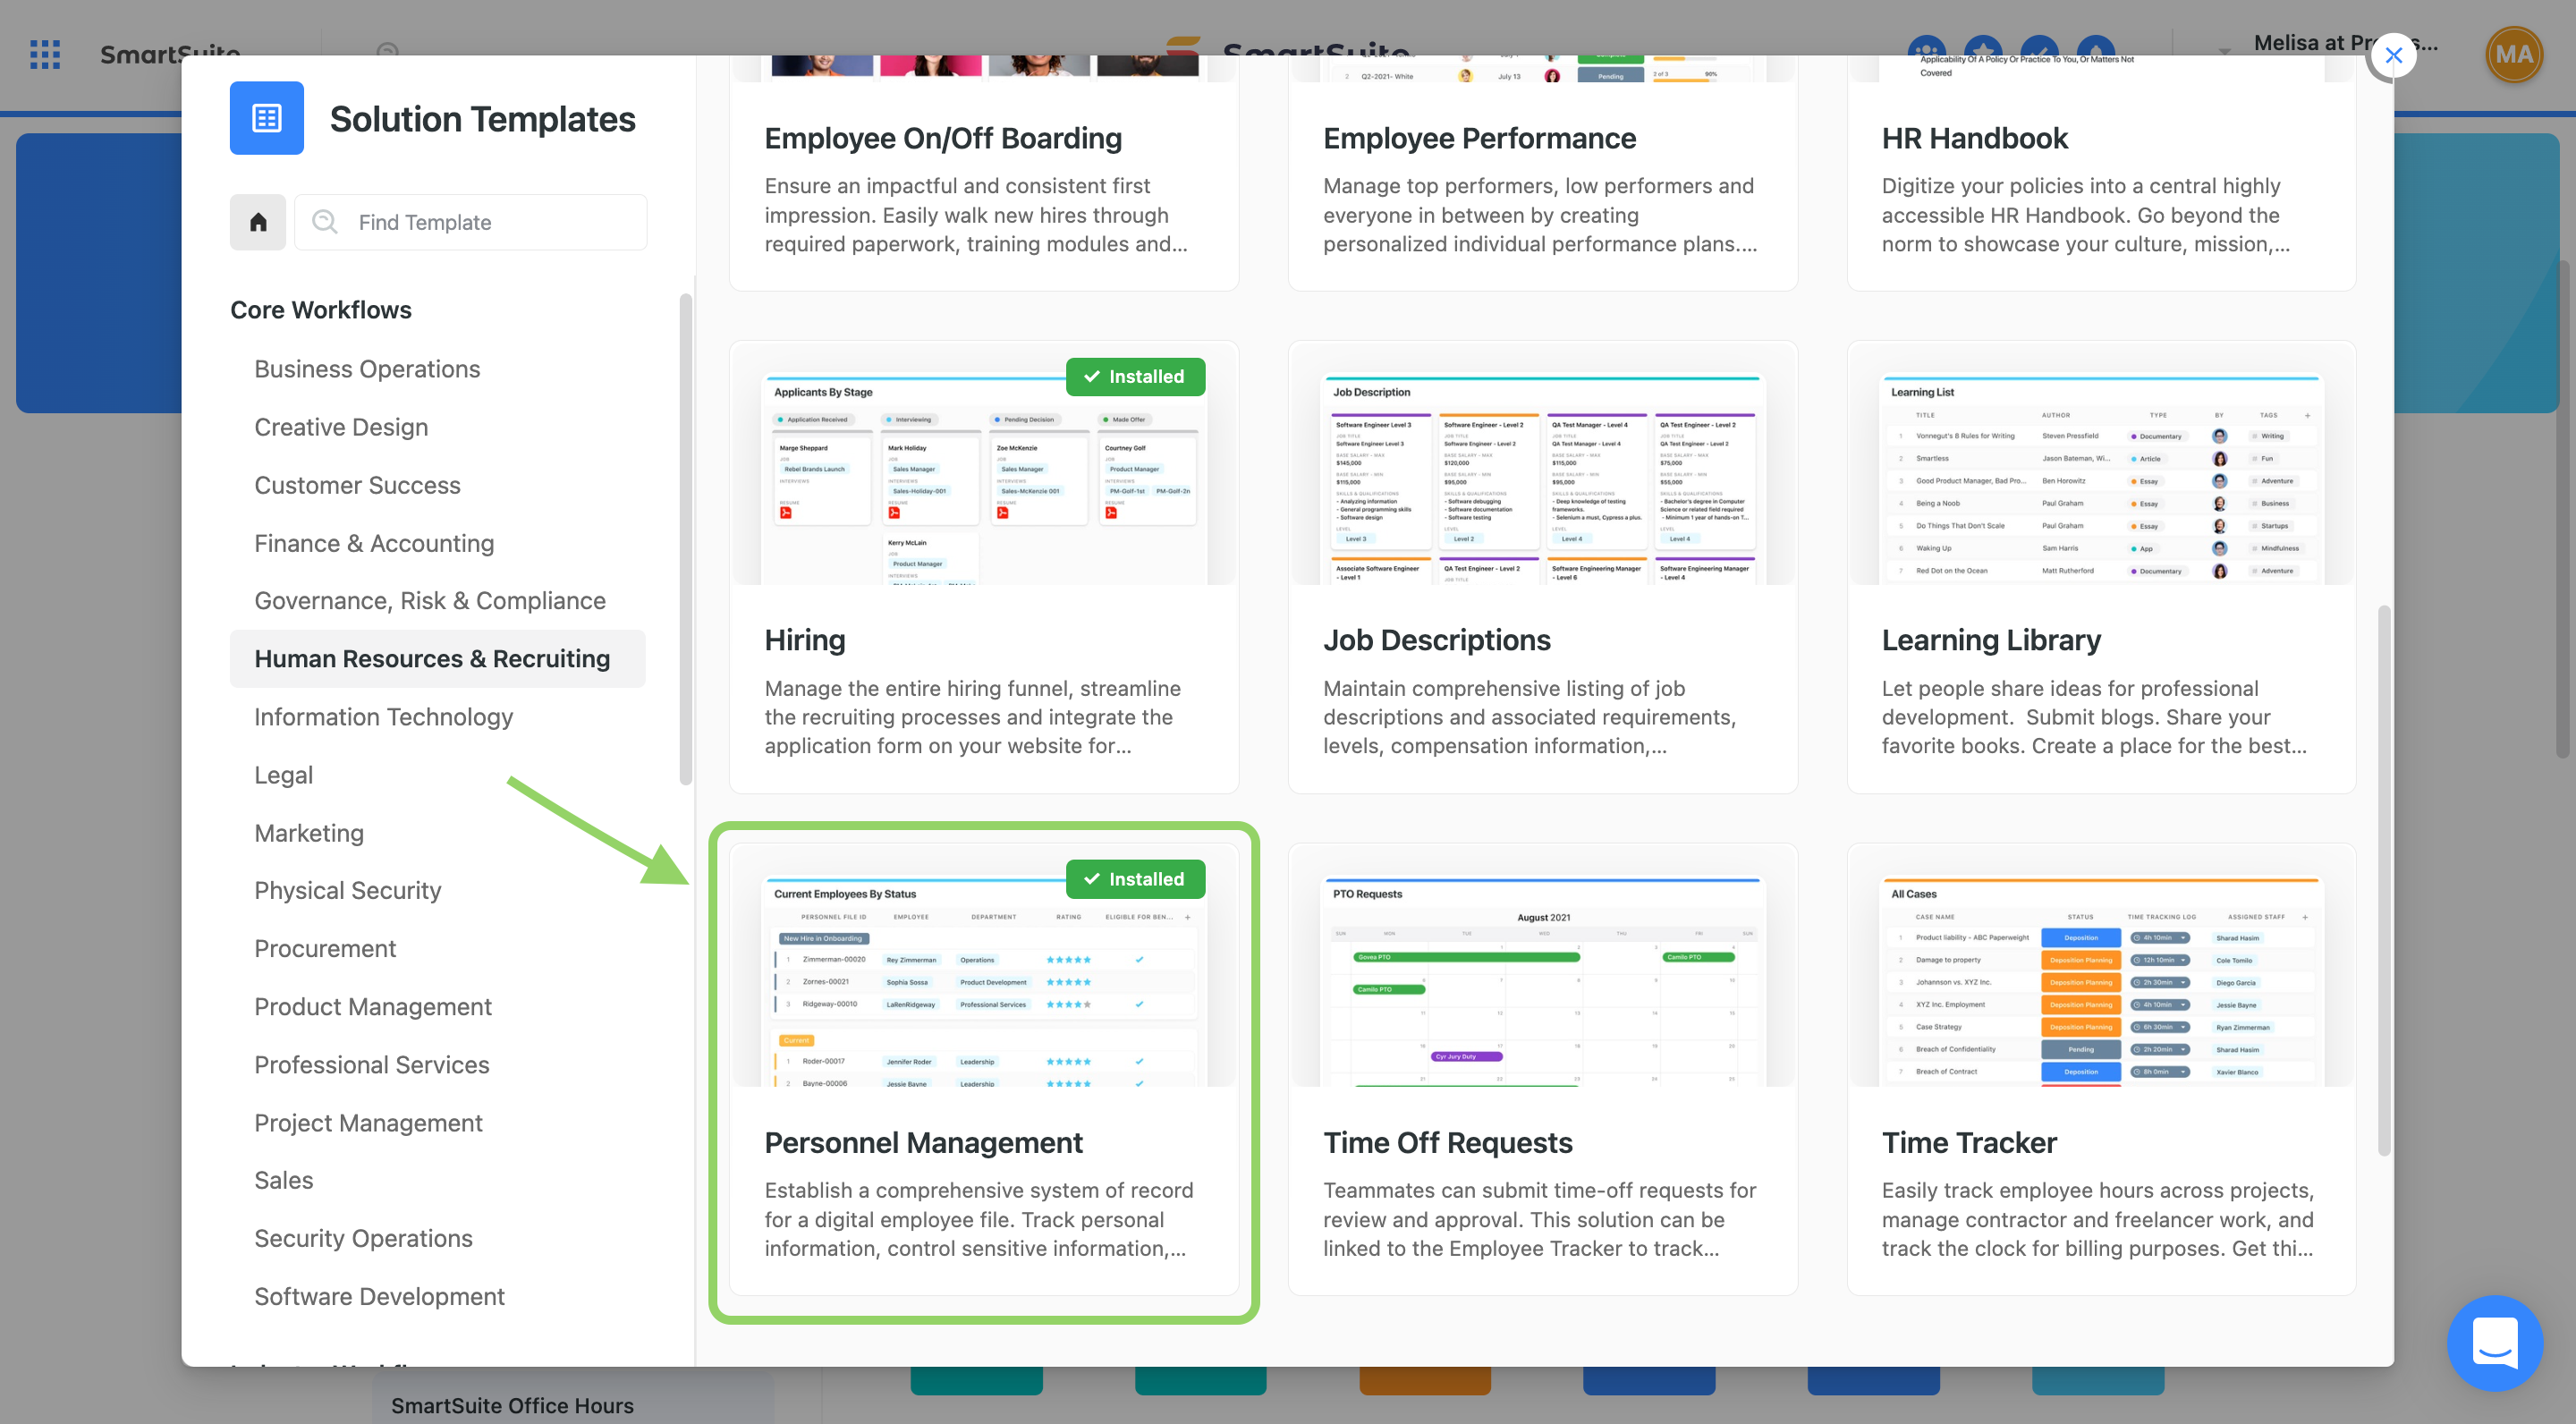
We’ll be using a SmartSuite template because neither you nor I have time to build out an HR management system from scratch! We’ll use the Personnel Management Solution Template for this tutorial, but feel free to implement any of the other Human Resources & Recruiting templates SmartSuite has available.
Once the template loads, you’ll see a Kanban View with stock images representing employees:
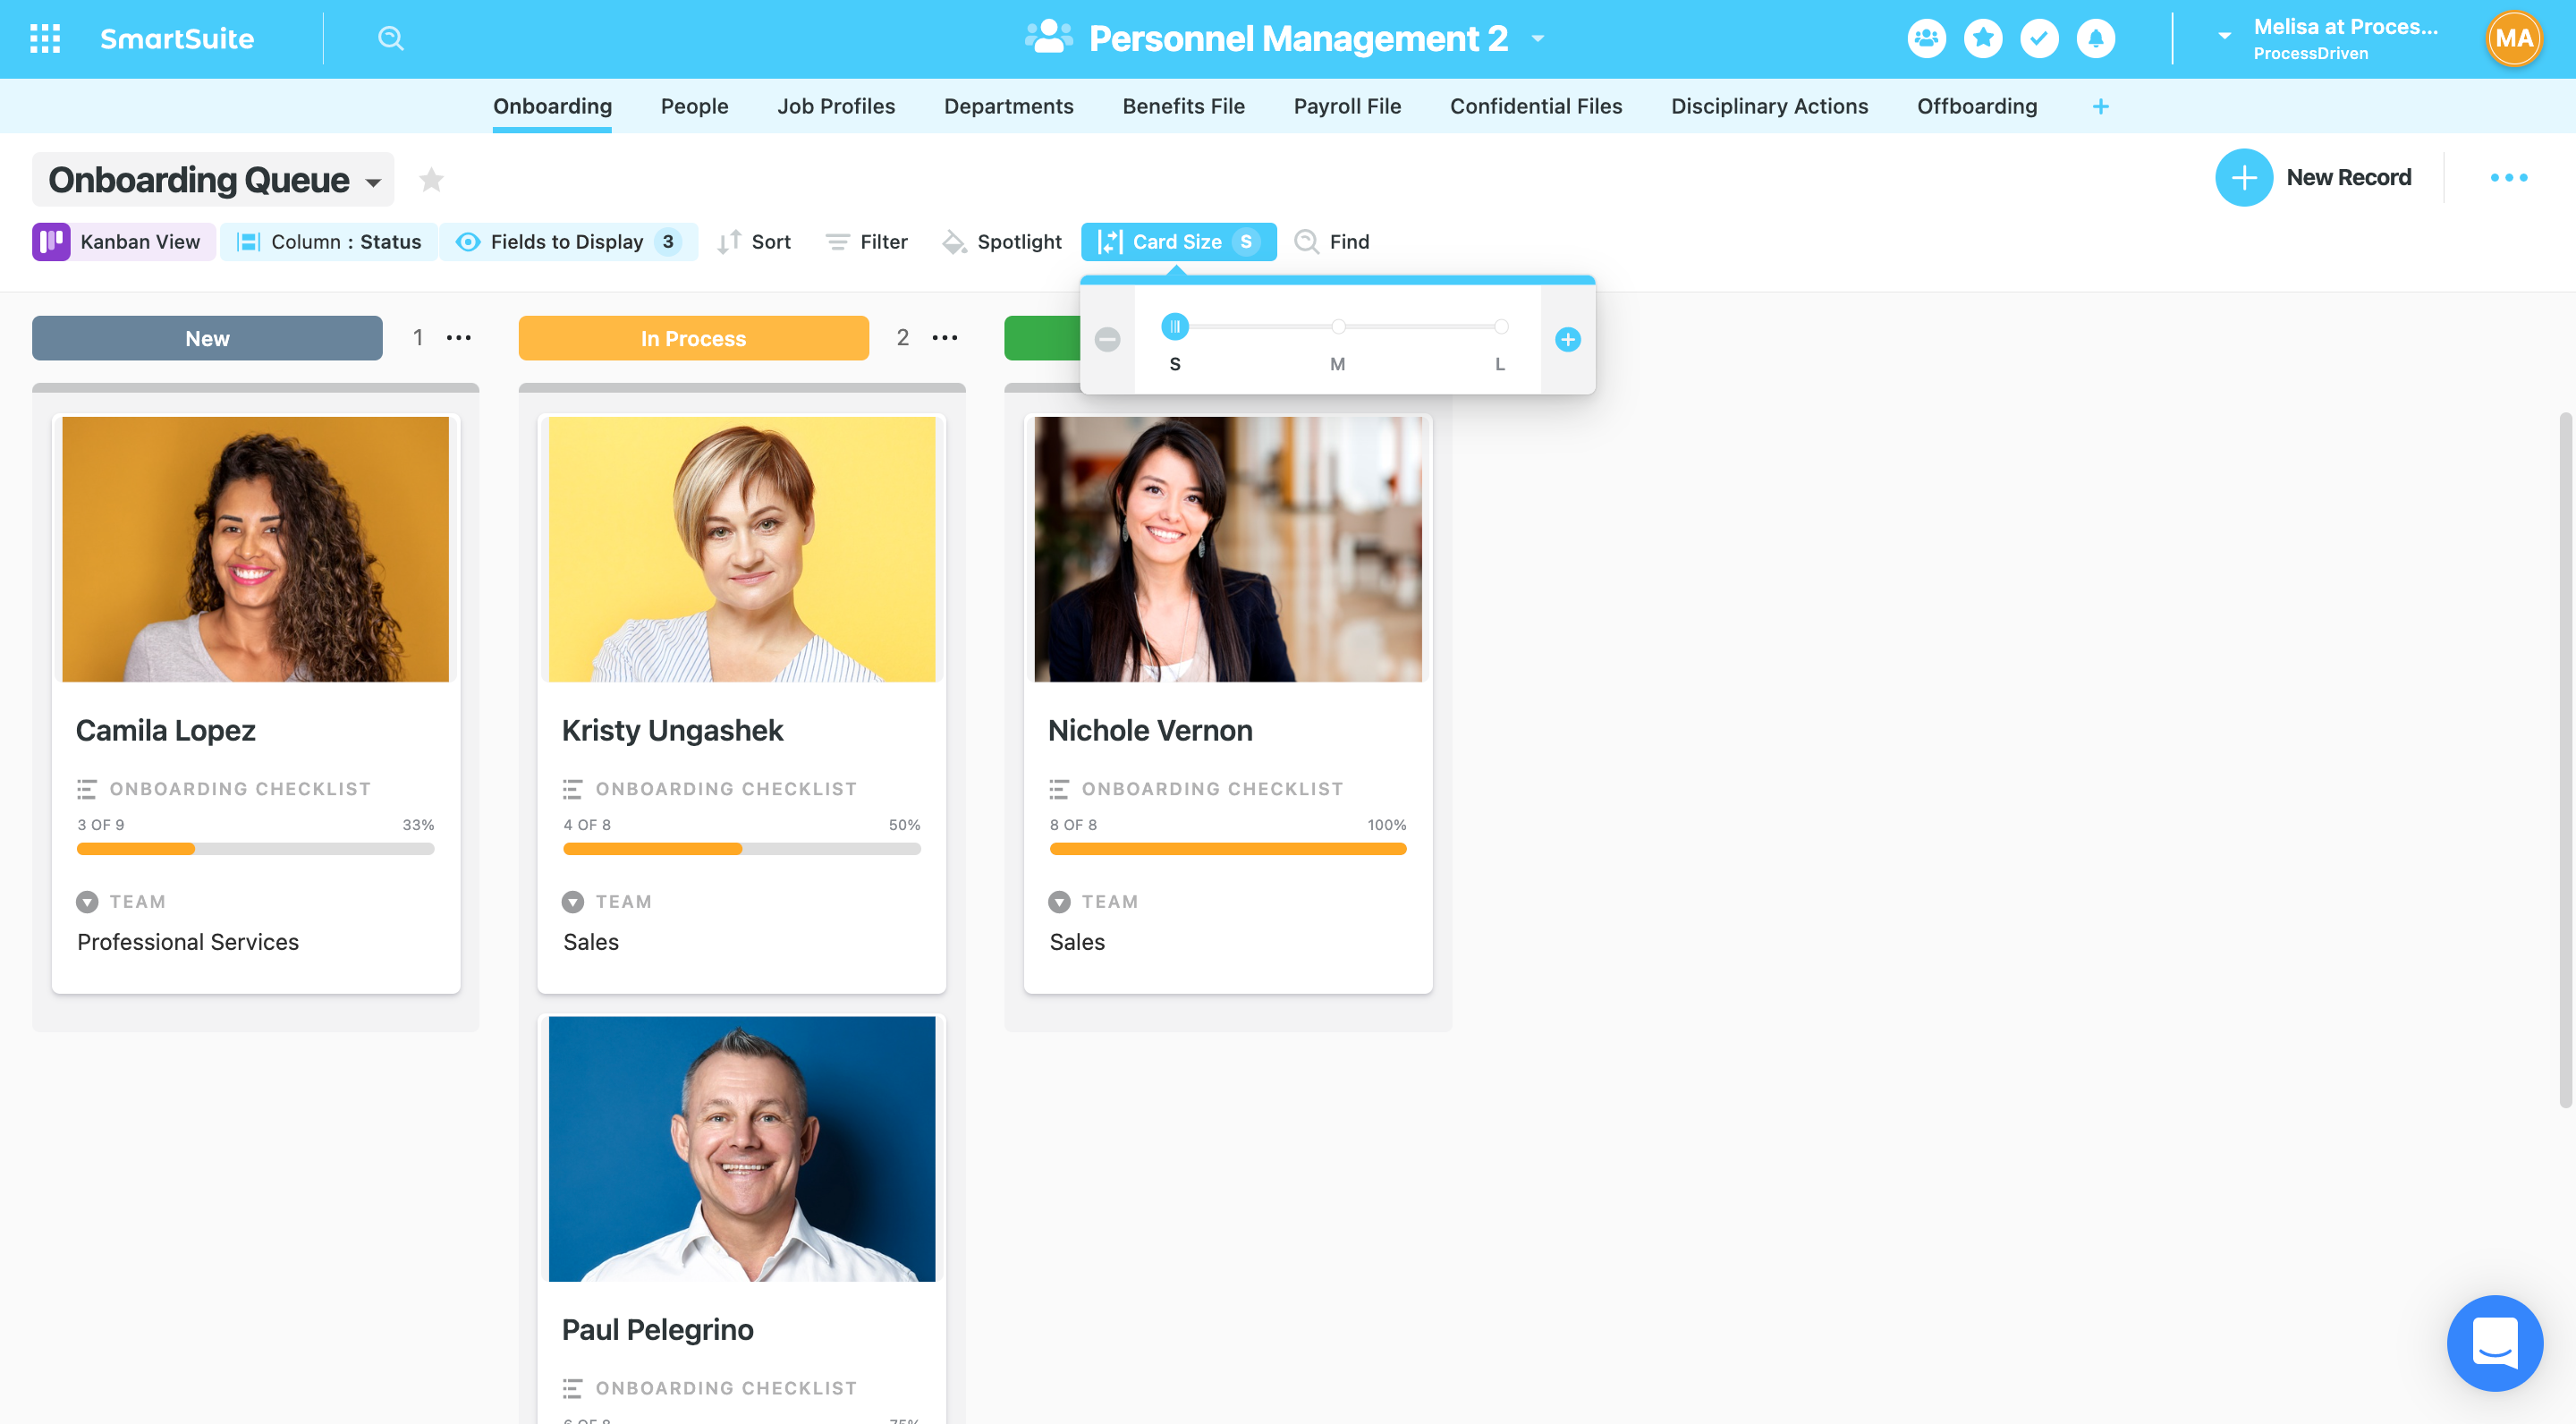
📌 Pro Tip: Adjust the Card Size between Small, Medium, and Large to customize this view!
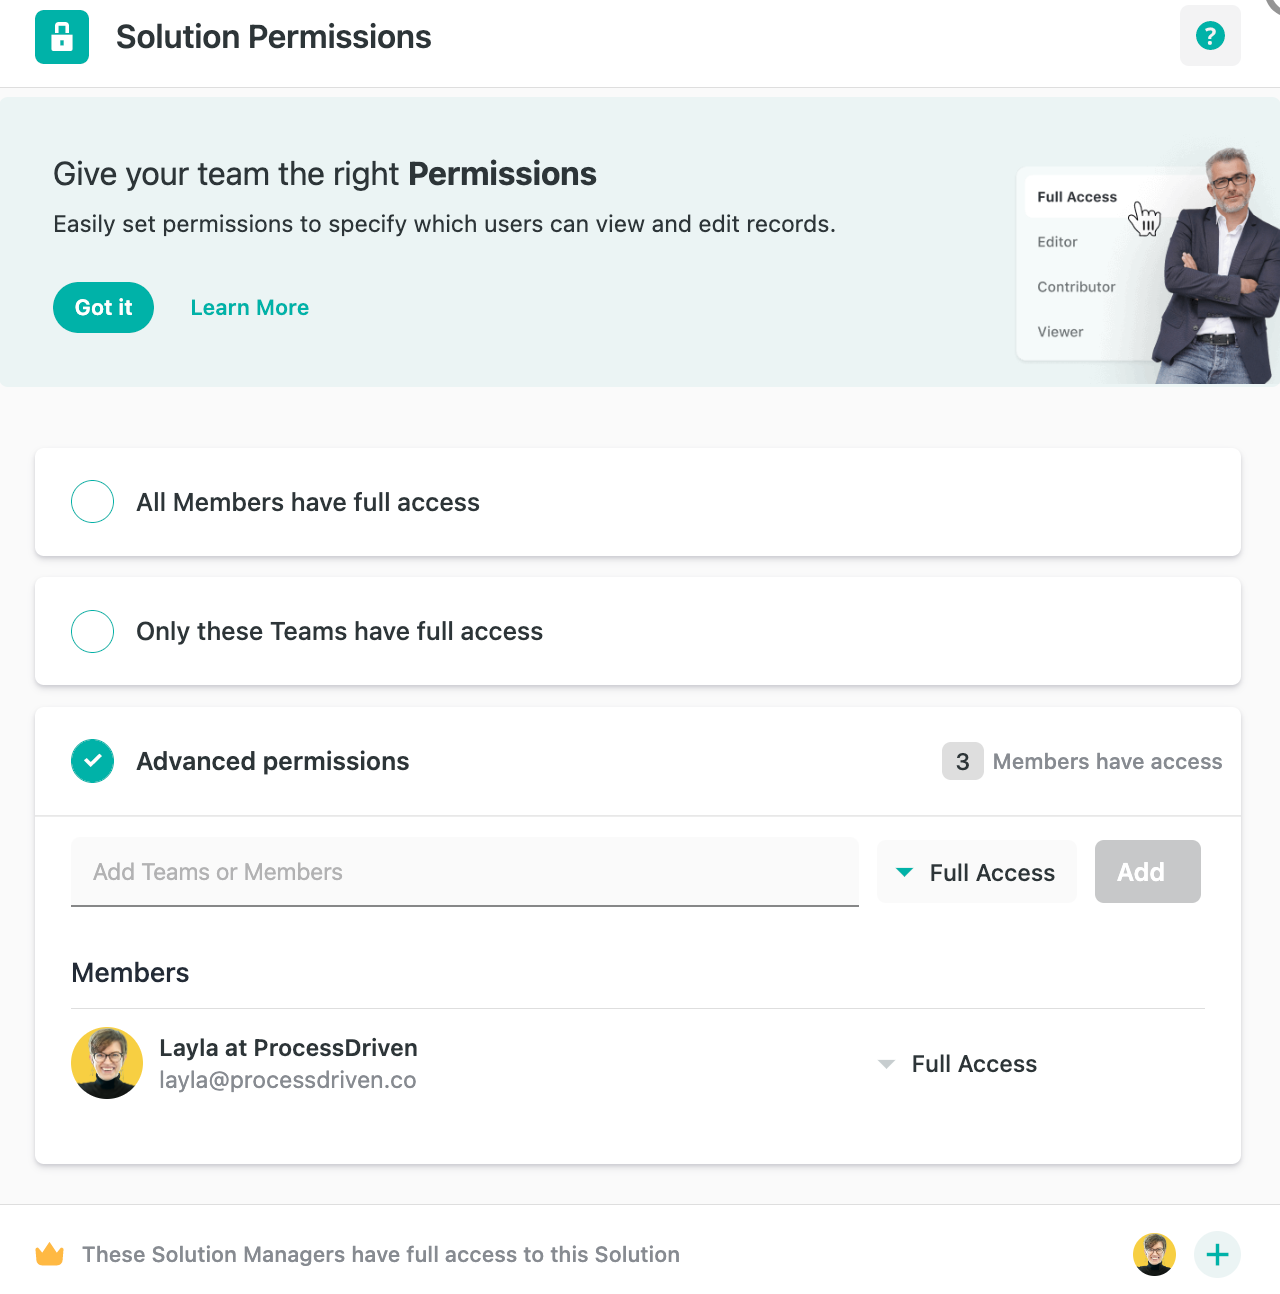
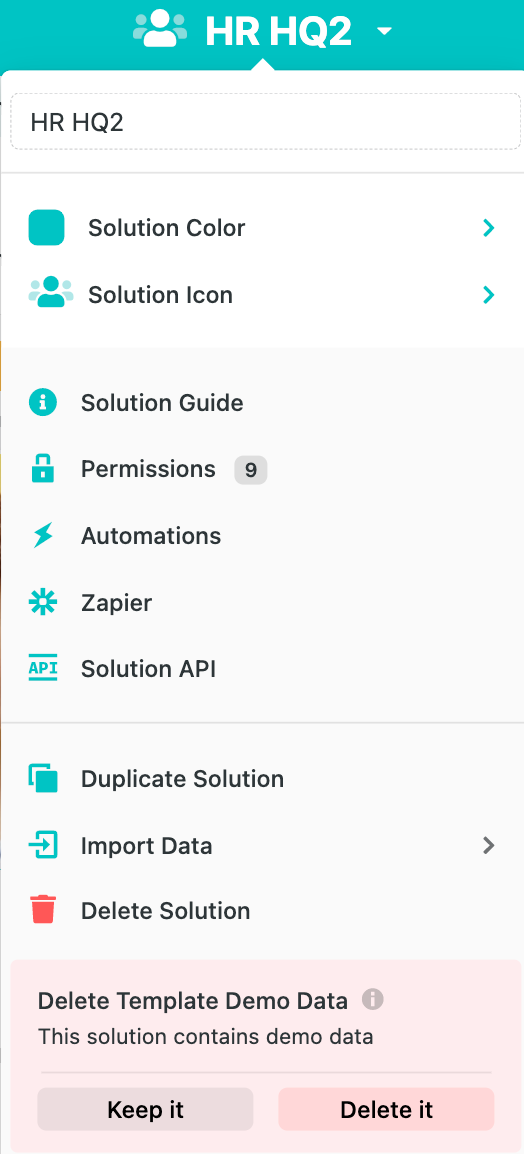
Further customize this Solution by giving it a proper name and adjusting the Solution color and icon if you’d like. If you have others on your team, adjust the Permission settings so only specific users can view or edit this information.
Tour of SmartSuite Apps to Track HR Data, Tasks, and Processes
Now that we’ve adjusted our Permissions let’s move on to our SmartSuite Apps inside our HR HQ Solution.

Apps in SmartSuite host additional information about specific areas in a Solution. As you know, HR Management is multi-faceted. Each App in the HR HQ Solution represents an area of the HR Function in your business.
To create a new piece of information inside any of these Apps, click on the New Record button within each App.

A Record in SmartSuite is similar to a task in most tools. It’s a place where you can record (get it?) information and organize it inside an App.
📌 Pro Tip: Easily change the way your data appears by adjusting View Type without fearing of breaking or deleting data.
Customize Fields and Checklists to Incorporate our HR Process
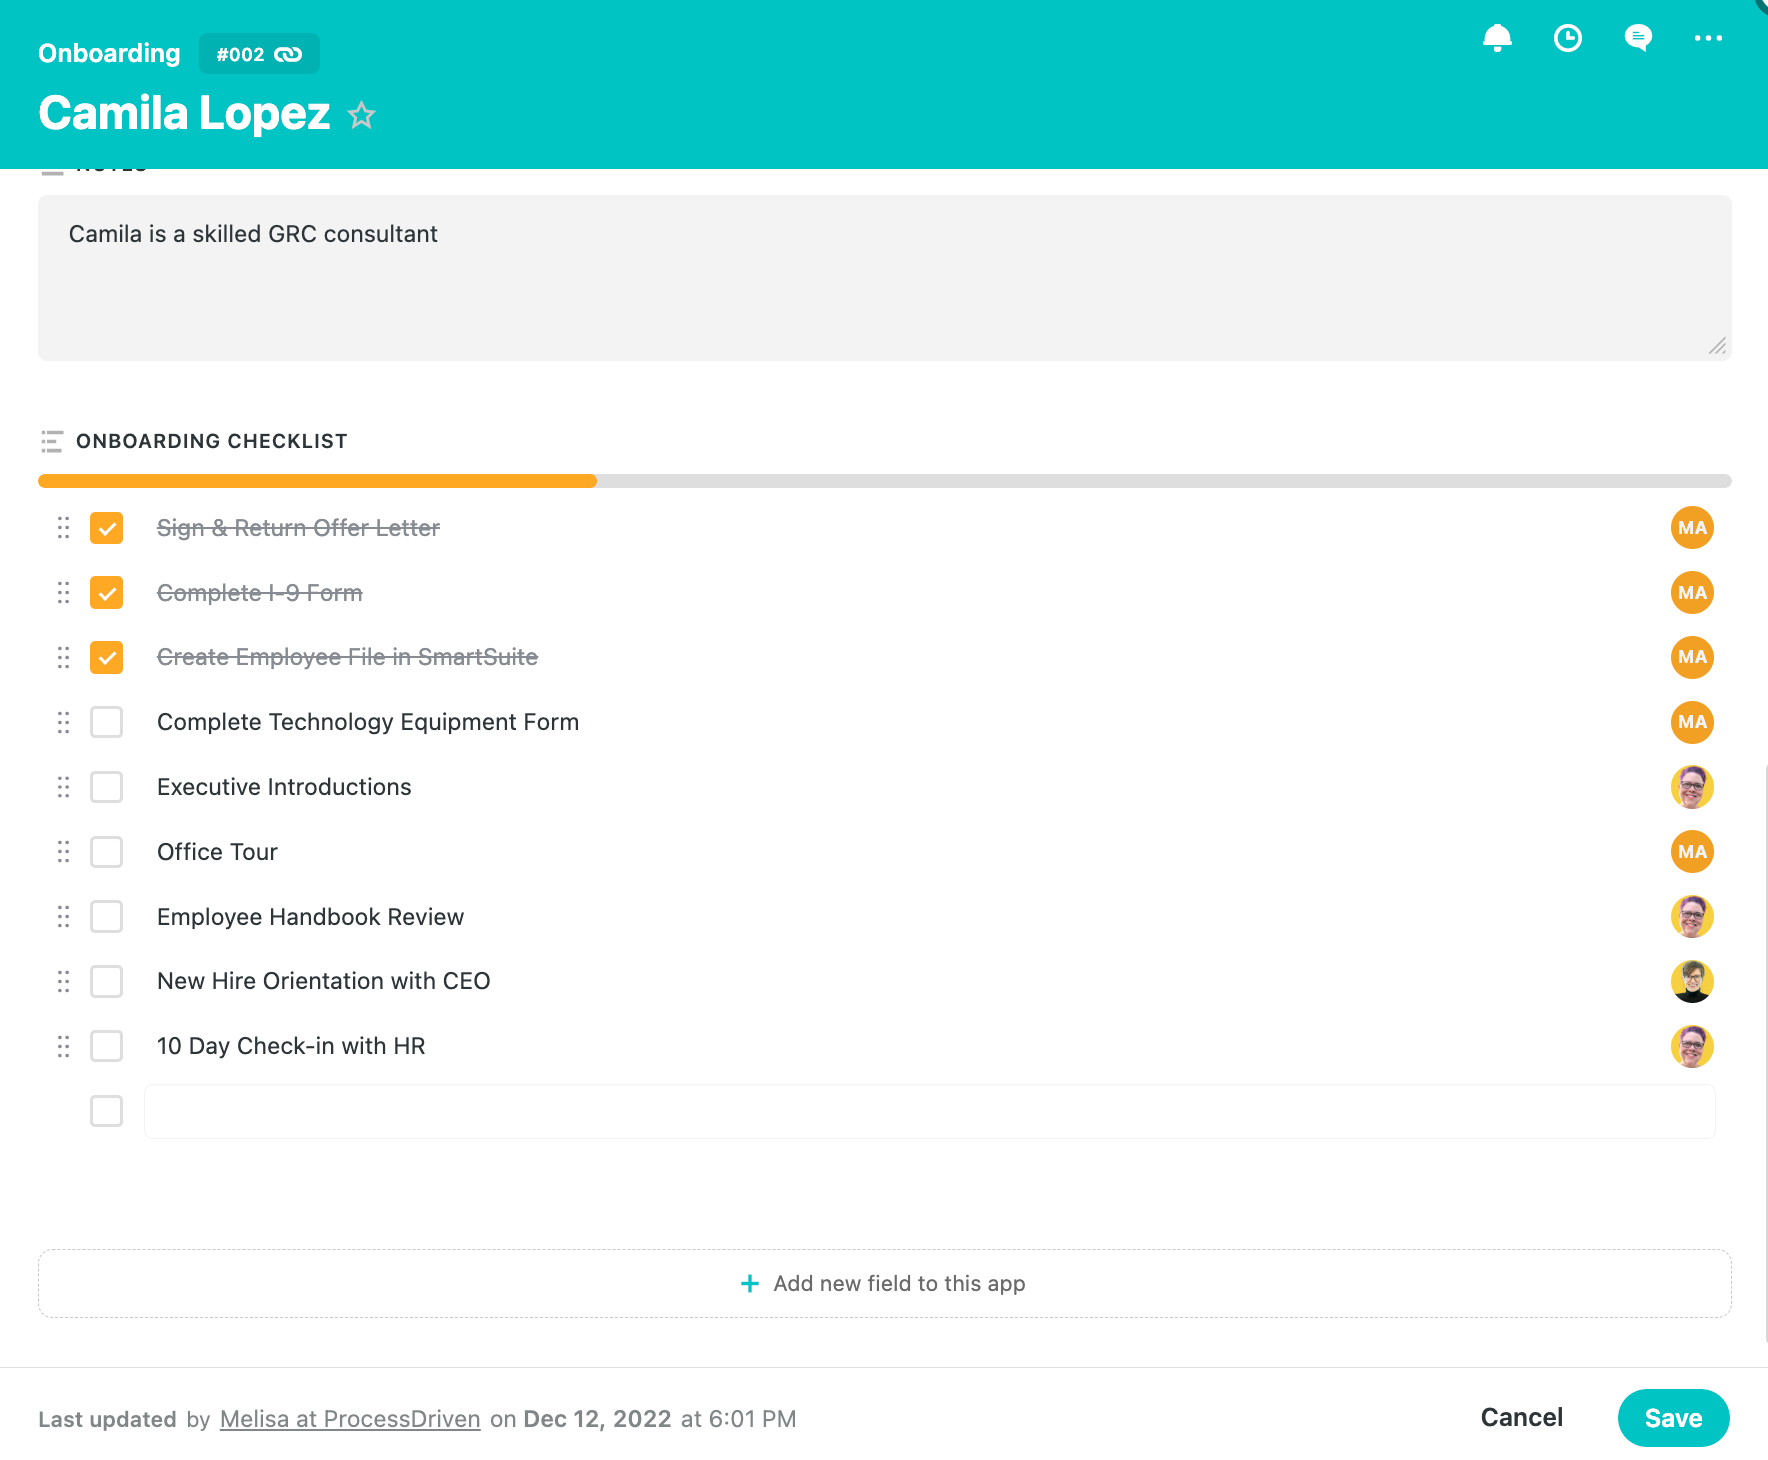
Now that we have our basic structure down let’s customize the interface to our liking. To start, let’s go into the Onboarding App and click on Camila Lopez’s Record.
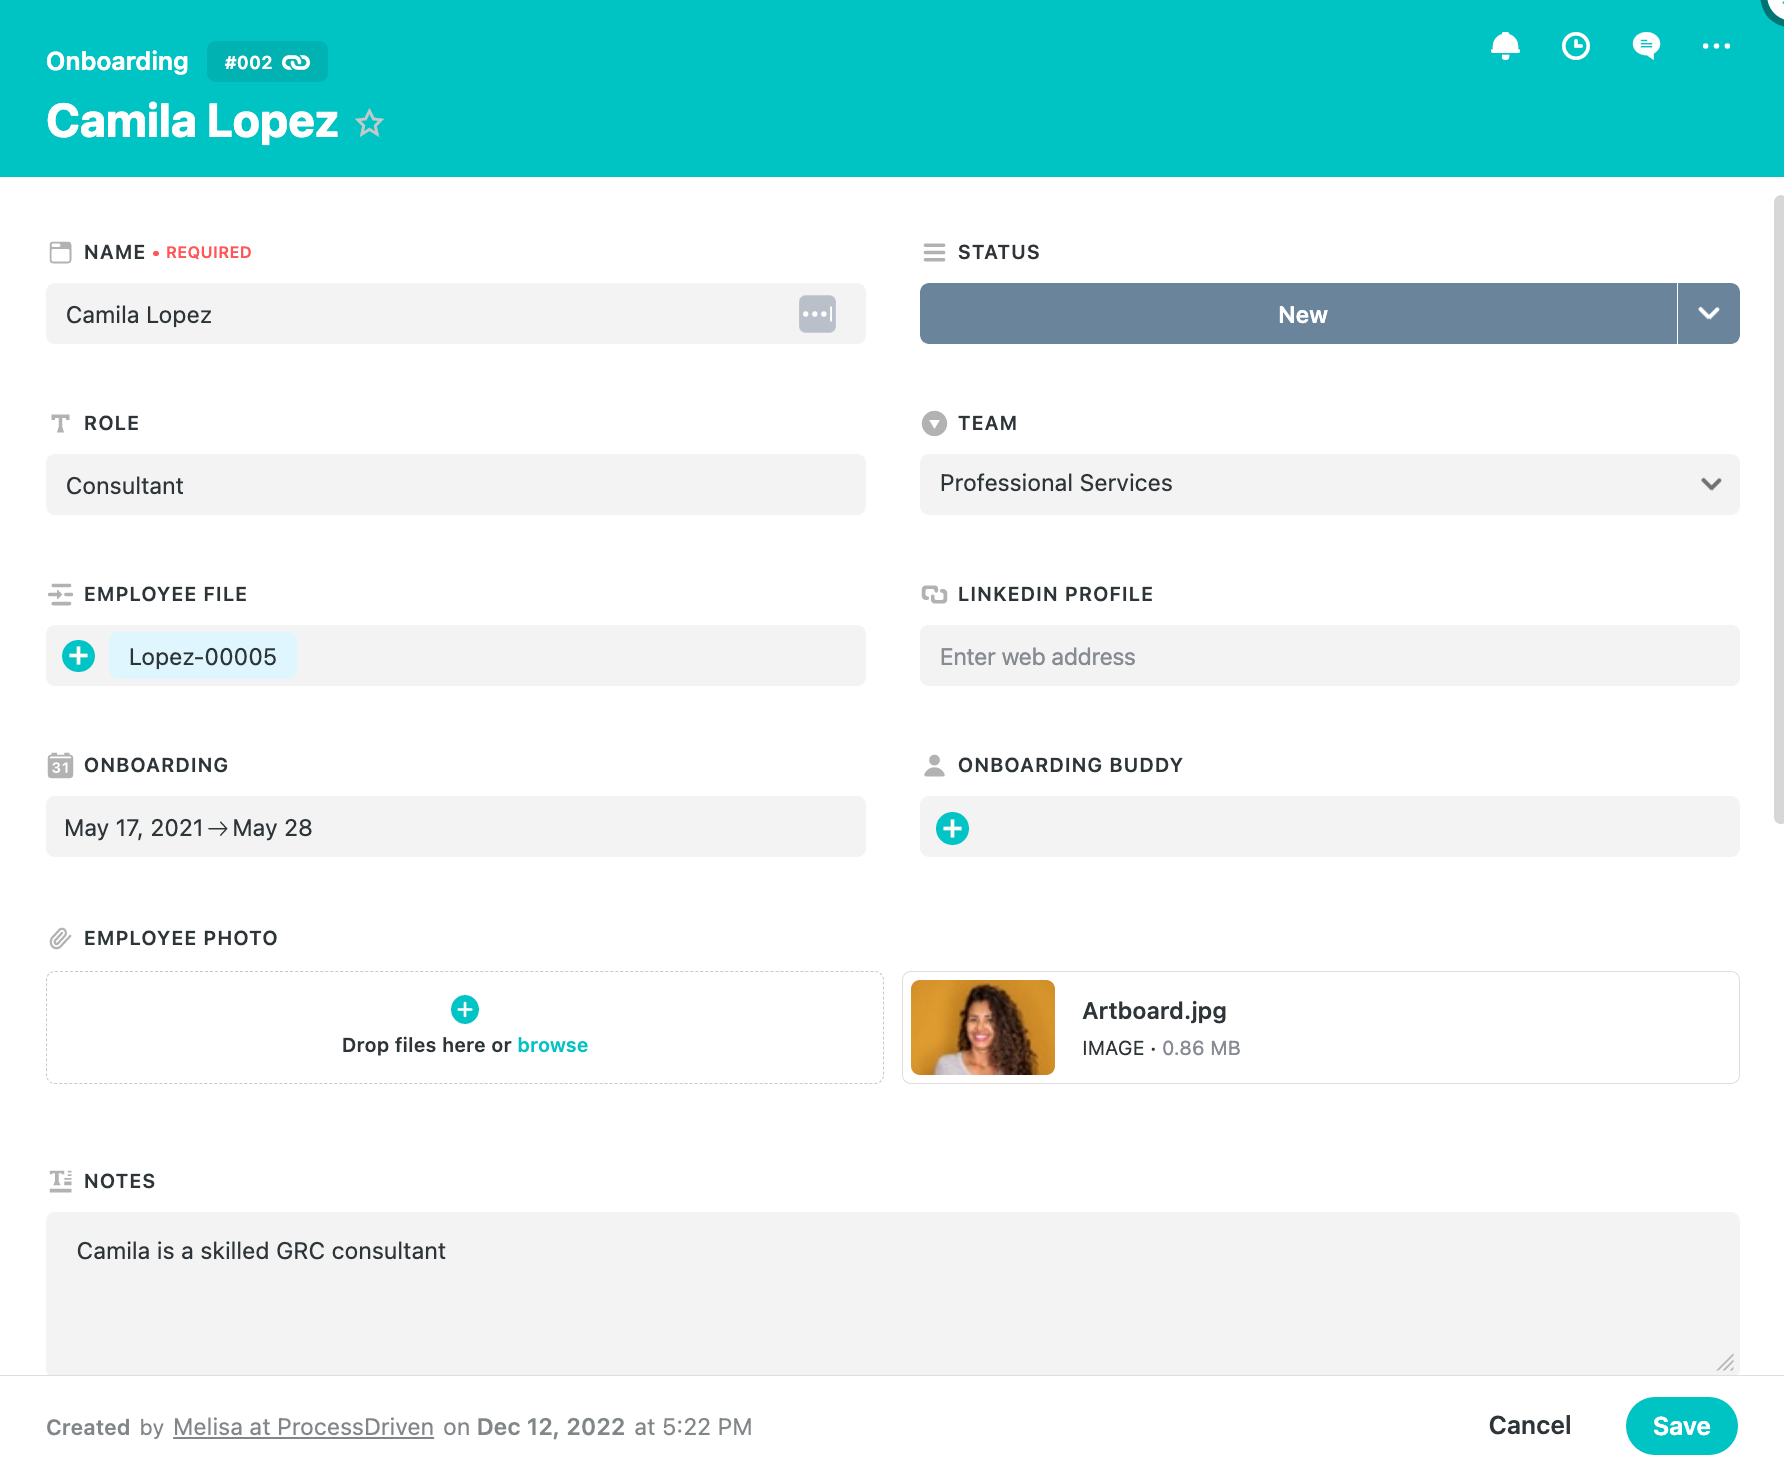
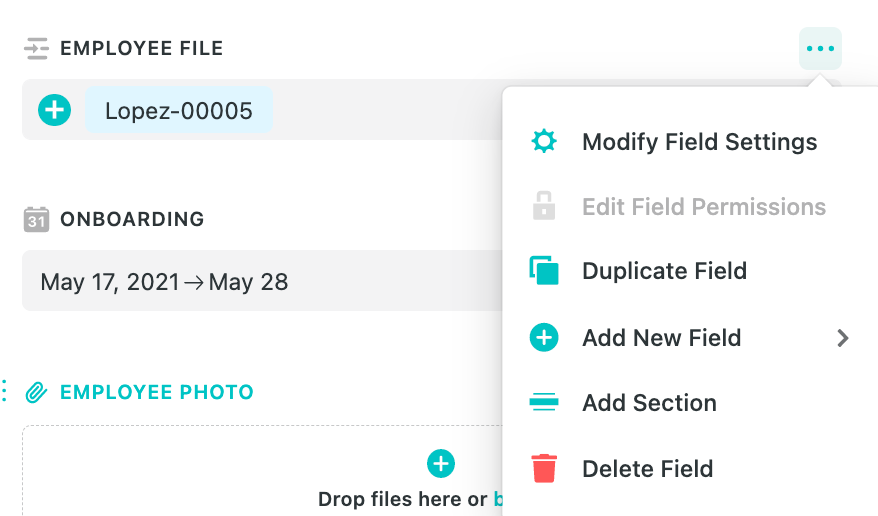
You’ll notice different areas to input information called Field Types. Easily add or delete fields by going to the Action Menu.
📌 Pro Tip: Inside the Modify Field Settings menu for the Onboarding Buddy Field, select the setting to display this Record in My Work.
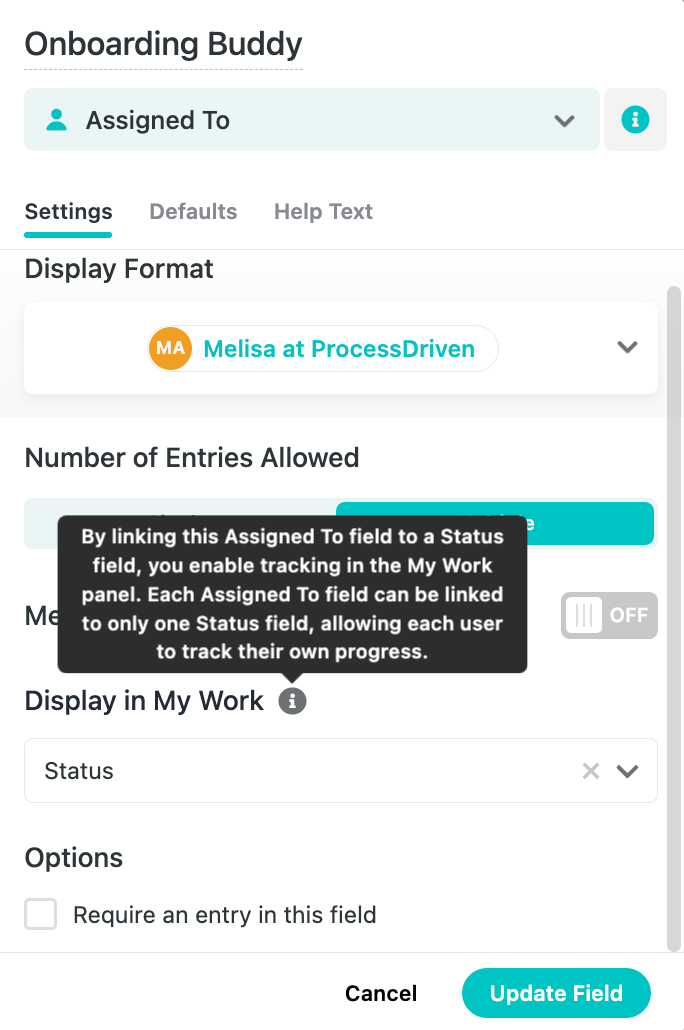
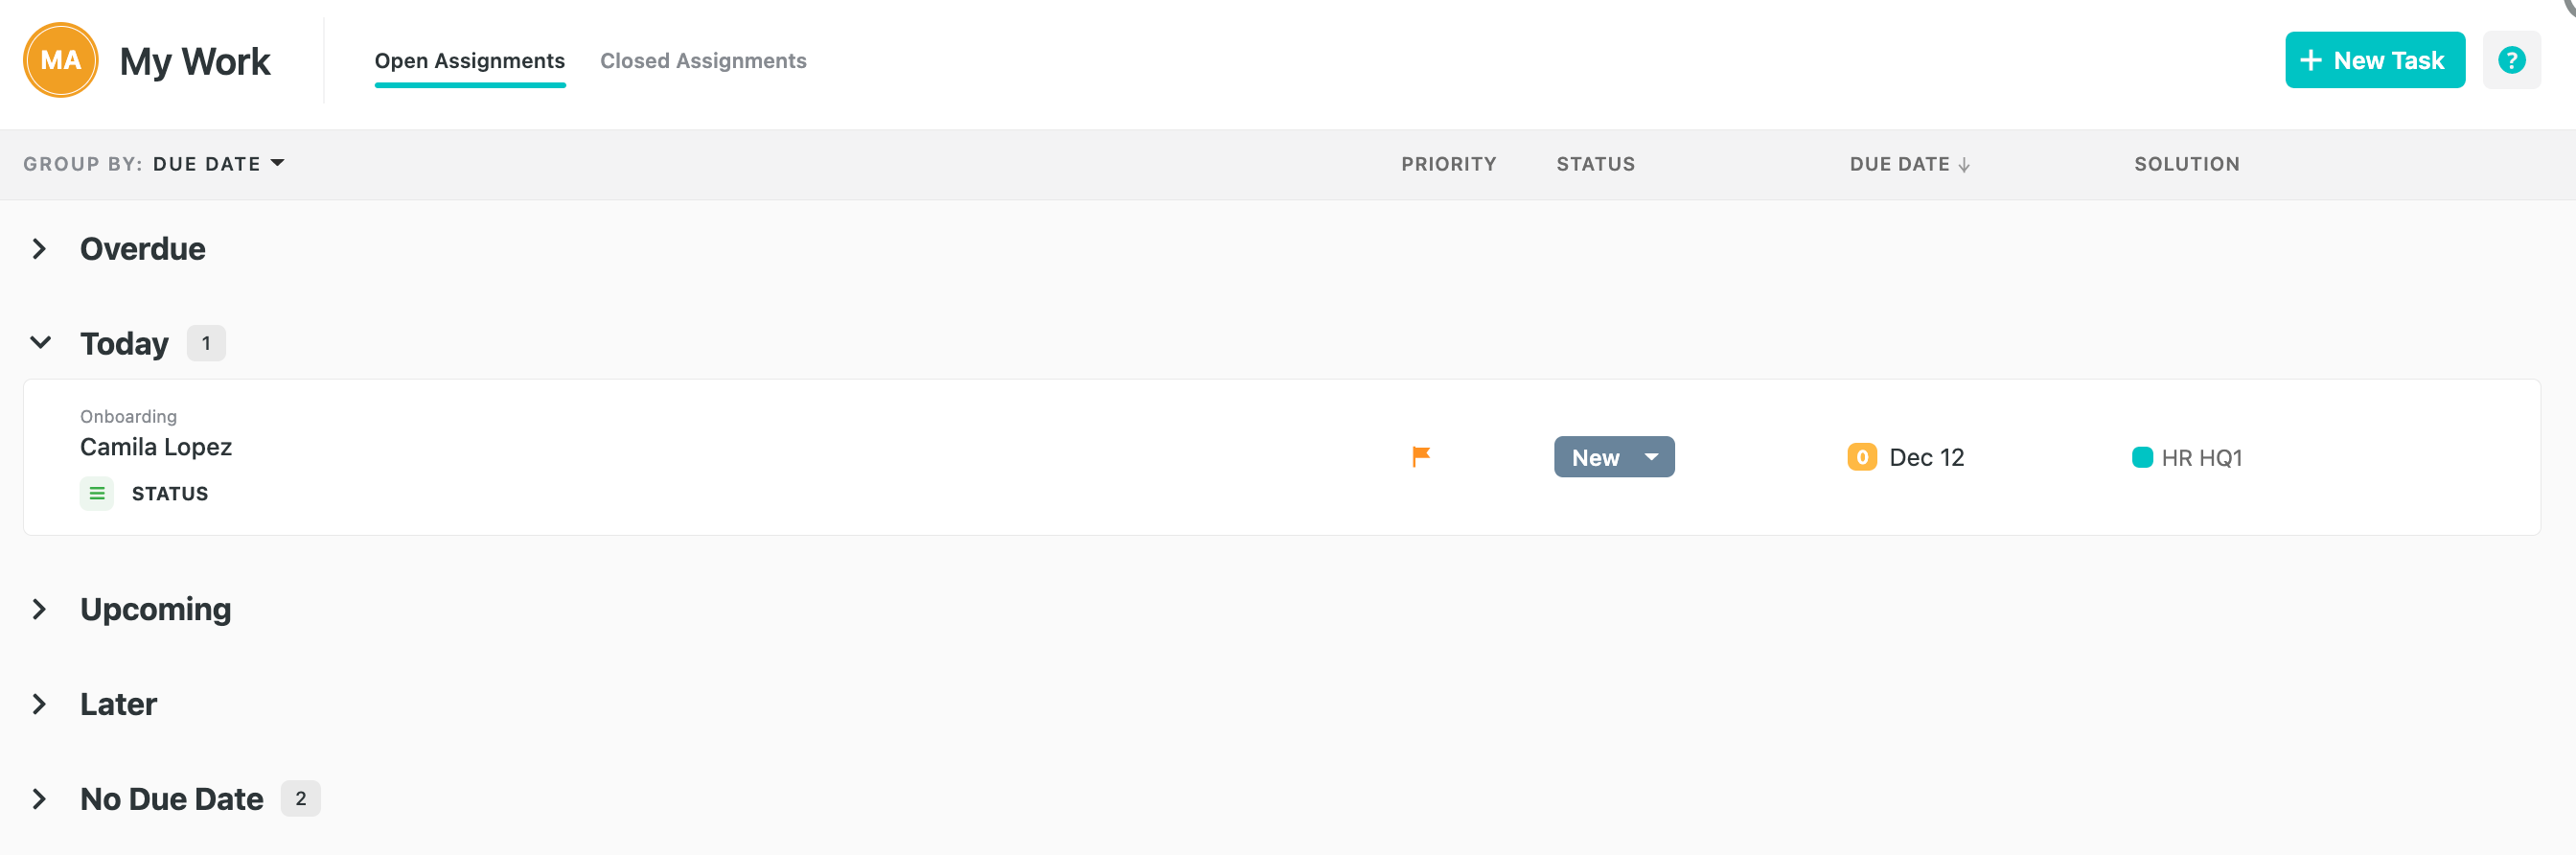
My Work is in the top right menu as a checkmark and allows us to see everything assigned to us. My Work will notify the Onboarding Buddy each time a new hire is assigned to them.
Once you’ve adjusted the Field Types you’d like to see inside each Record that lives within the Onboarding App, we can move on!
📌 Pro Tip: Add a Checklist Field inside a Record to further organize common HR steps in the Onboarding experience.
Linked Records Allow You to Centralize Human Resources Software while Maintaining Confidentiality
In SmartSuite, we can connect information from different Apps using Linked Records. Linked Records in SmartSuite are similar to Relationships and Rollups in other tools. For example, in Kristy’s Onboarding profile, the Employee File is a Linked Record Field.

SmartSuite is pulling information from the People App located next to the Onboarding App.
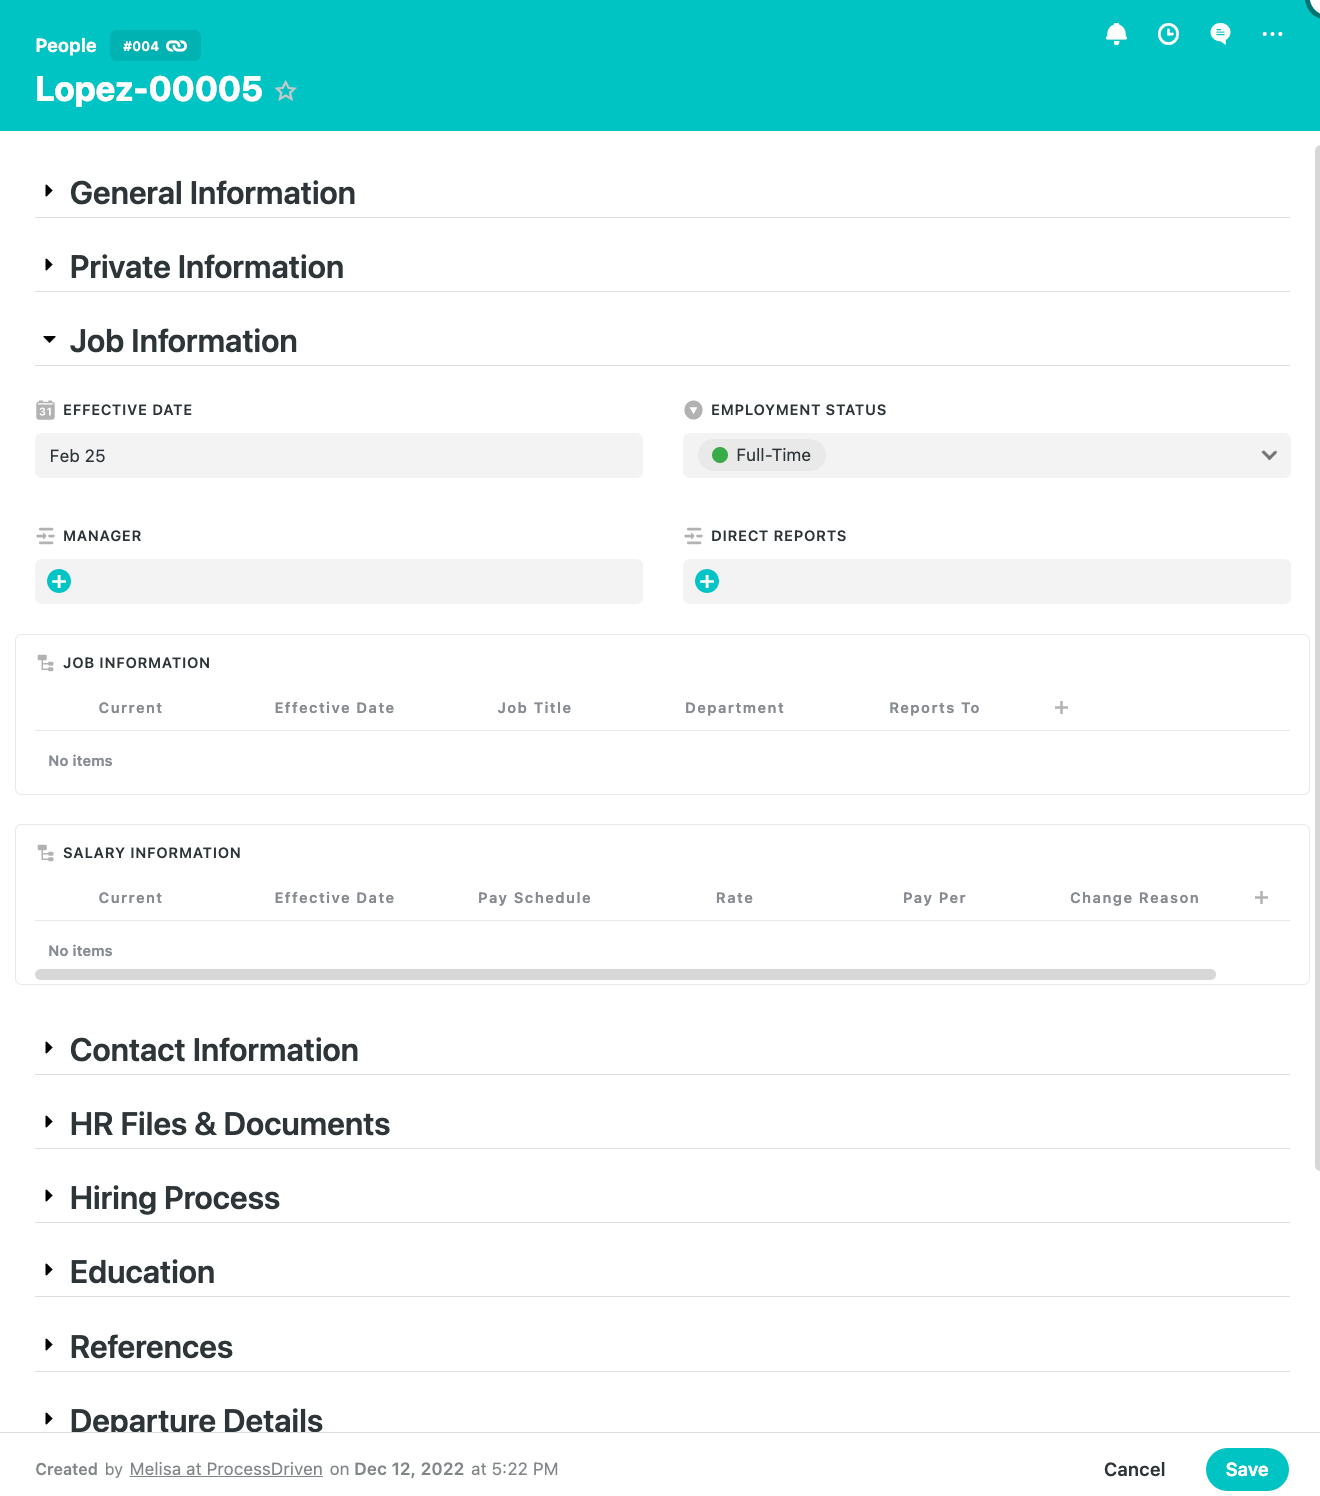
📌 Pro Tip: Expand on a Record in the People App to view and edit every piece of information about that employee using collapsible Sections.
Action steps to take this HR framework and implement it into your SmartSuite account
Step 1. Remove or Edit Fields
For each App, go into any Record and remove any Fields you know you don’t need. Make sure you edit any existing Fields to reflect how you’ll use that field. Do not focus on adding any new Fields yet!
Repeat this process for every App in this HR Solution.
Step 2. Remove or Edit Views
Similar to step 1, you’ll want to remove any unnecessary Views. Again, do not focus on adding any new Views for now! Repeat this process for every App in this HR Solution.
Step 3. Remove Demo Data
Step three to making this HR Solution your own is to delete all the demo data. To achieve this, click on the Solution settings and click on Delete It when asked if you’d like to keep or delete the template’s demo data.
Step 4. Add Your Human Resources Information to Organize It
We’re finally ready to add new information to this Solution! If you’re onboarding people right now, add them to the Onboarding App using the New Record button. If you currently have a team, add them under the People App. If you have any disciplinary actions stored in Google Drive or Dropbox, add them to the Disciplinary Actions App. Repeat this process for all relevant Apps.
Start Using this Affordable Software to Organize Human Resources & Iterate
What we’ve shown only covers one tiny process in the HR function of your business. Once you learn how to build fields and organize information in SmartSuite, you can start expanding this framework to other areas of the business.
In summary, if you want a no-code, low-cost alternative to your current HR software, use our affiliate link to create an account and start building out your entire Human Resources Management system. Don’t forget to enjoy the process!
Ready to transform the way you create and manage SOPs? Unlock your FREE SmartSuite SOP Template and embark on a smooth documentation journey today! 👌

ProcessDriven helps small teams turn chaos into process. The ProcessDriven Approach™️ combines software expertise with practical process-first strategies that have helped 1,800+ teams build a scalable foundation of business systems.