
Software Selection & Tutorials
Bridging the Gap Between Hr Software and Work Management With SmartSuite
This post may contain affiliate links which may compensate us at no cost to you. See details here.
Like many small business owners, you probably have several software programs in your data stack. Because personnel information is sensitive and there are legal issues like compliance to contend with,
Like many small business owners, you probably have several software programs in your data stack. Because personnel information is sensitive and there are legal issues like compliance to contend with, companies often use dedicated human resources solutions to handle hiring, payroll, and benefits. However, getting different software and apps to work together can be challenging. You may find too much time is spent manually transferring data from one program to another.
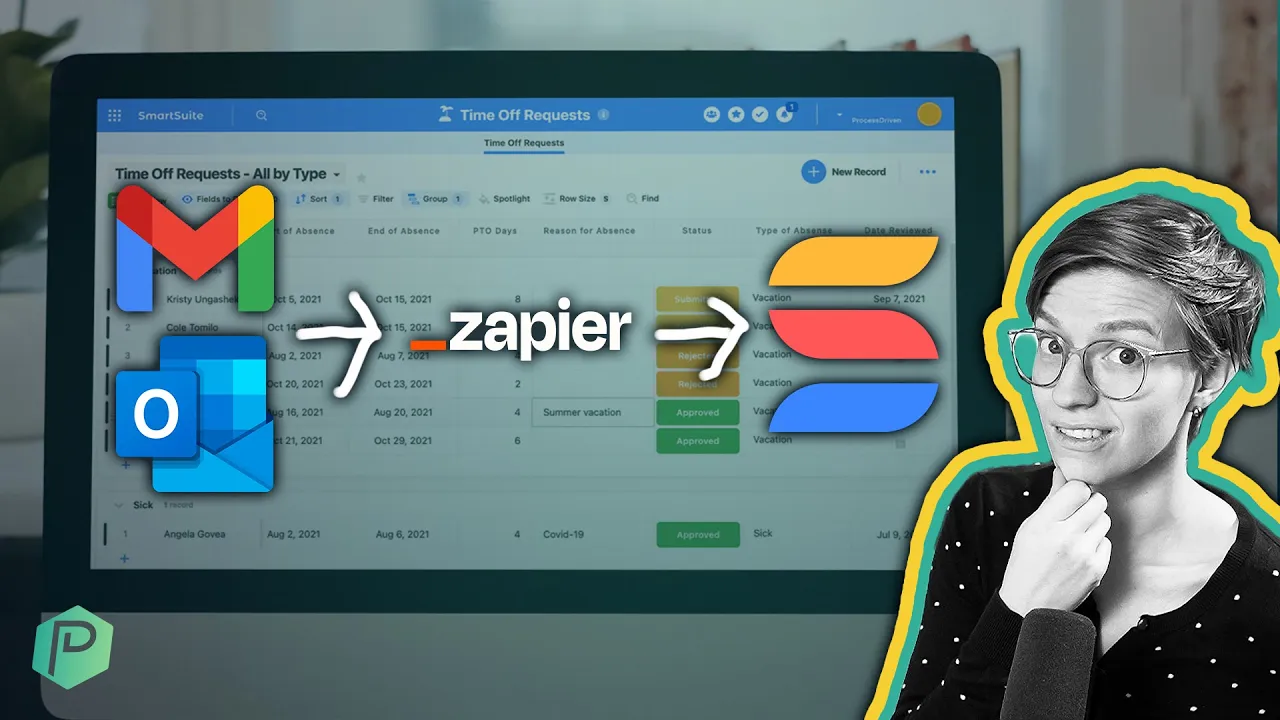
In this video, ProcessDriven CEO Layla Pomper demonstrates how to use email to automatically transfer a time-off request generated in the HR platform Gusto to the work management tool SmartSuite to reduce data entry, centralize workflows, and stay organized.
Pro tip: You can apply this lesson to nearly any software that uses email notifications to add new Records and Tasks to SmartSuite.
If you’d like to follow along with the tutorial and don’t already have a SmartSuite account, you can set one up for free using our affiliate link.
Let’s get started!
This post contains affiliate links or sponsored content for which we may receive compensation. For details, view our Terms and Conditions.
Step 1: Identify the emails you’d like to enter into SmartSuite.
For this demonstration, we’d like the email generated for a time-off request to be entered into SmartSuite as a New Record (timestamp 01:50) so that managers can view them in the My Work section when they log in. This prevents HR requests from being relegated to email and possibly overlooked while allowing for centralized workflow, task management, calendaring, and reporting.
To set up a successful automation, we’ll need some details from the Gusto email to create a trigger. For example, the email address it’s sent from, the specific language used, and subject line formatting.
Step 2: Determine where you’d like the information stored in SmartSuite.
If you don’t already have a Solution or App set up for time-off requests, you can create a new Solution by clicking on Add New Solution > Start with Template and selecting Time-off Requests from SmartSuite’s Template library (timestamp 03:15).
Step 3: Use Zapier to connect SmartSuite to your desired software.
Zapier is an integration tool that facilitates communication between different types of software (timestamp 05:00). If you don’t already have a Zapier account, you can set one up using our affiliate link.
Rather than selecting pre-made Zapier integrations (more than 5000!), we will create a custom Zap for our time-off request process.
Pro tip: A Zap is Zapier’s term for an automated workflow that connects software and apps, allowing them to understand each other.
How to Create a Custom Zap
Click the Create Zap button on the Zapier Dashboard.
Search for Email Parser by Zapier in the Trigger Field and select it from the dropdown menu.
Select the Event “New Email” and click Continue.
Choose an Account under Email Parser by Zapier (see Pro Tip below for setup instructions).
Pick the mailbox you set up for this Zap.
Click Test Trigger to ensure the setup works properly, then hit Continue to move on.
Under Action, type in SmartSuite.
Select the Event “Create Record.”
Connect to SmartSuite (one-time setup).
Copy and paste your SmartSuite API and Workplace ID into the designated fields.
Select the SmartSuite account that you just linked.
Choose the Solution and App where you’d like the New Record created.
Type Parse Output into each Field to access the options you defined in your Zap template.
Assign the appropriate data to each Field.
Click Test Action to try out your new Zap and ensure it works properly.
Confirm that a New Record was created in SmartSuite.
Click Publish Zap to make the automation live.
Pro tip: You’ll need to set up your Zapier Email Parser Mailbox and define a template for this feature to work (07:10 - 10:45).
Step 4: Test Your Zap.
To ensure that your Zap works as intended, forward a few old emails to your Email Parser mailbox (timestamp 19:00). This step confirms that the new Record is created how, when, and where you want and allows you to see if any Fields require adjustment.
Step 5: Add the Zapier Parser Inbox to your contacts.
Add the mailbox you created to your contacts. This step allows you to further your automation by setting forwarding rules (timestamp 19:50).
Step 6: Create an Automation in SmartSuite.
For our last step, we want SmartSuite to pick up where Zapier left off (timestamp 20:45). You can create a SmartSuite Automation to assign and notify the appropriate manager, add the time-off request to a calendar view, or anything else you’d like to happen once the request is received and the New Record is created.
Although this tutorial is specific to the HR tasks of requesting and approving time off, you can easily apply the above steps to other software and apps, such as accounting software, marketing, or website management.
Keeping tasks related to the various programs in your tech stack in SmartSuite gives team members one place to look for daily to-dos, helps managers see a bigger picture of operations, and allows for comprehensive reporting, especially for time tracking.
If you enjoyed this tutorial or have questions, visit the ProcessDriven YouTube channel, give us a thumbs up, and leave a comment. You may even inspire a future video!
By interacting with our sponsor, SmartSuite, you can help support our mission of bringing high-quality free tutorials, productivity tips, and hacks for sustainable small business growth. Sign up for a free account using our link.
Until next time, enjoy the process!


IF YOU'RE NOT SURE WHERE TO START, TRY