If your clients aren’t using ClickUp, you need to find alternatives that work for them — i.e., build a client portal OUTSIDE of ClickUp. Creating a public view for our clients is an excellent way to achieve that!
In this video, we’re walking through 3 methods for building client portals outside of ClickUp, along with some examples. Let’s dive in!

This post may include affiliate links, meaning we might earn a commission. For more details, check out our terms.
Not a video person? No worries! We’ll cover all the main points in this article.
Introduction to Building a ClickUp Portal…Outside of ClickUp
Congratulations! If you’re reading this blog, it means you’ve successfully organized all of your projects, tasks, jobs, and initiatives in ClickUp. There’s just one problem:
It’s become a challenge to get your clients to use ClickUp.
For many clients, the friction of having to log in to ClickUp to use it is too much. They want something simple, not another system they have to learn to navigate.
You might be wondering, “How do I get my clients to get the benefits of ClickUp without them having to log in and learn the system?”
That’s exactly what this article is about!
Disclaimer: This only works for View-Only Client Portals
Before we start, let’s get one disclaimer out the way: this article discusses methods for clients to see and interact with ClickUp WITHOUT having them be in our ClickUp Workspace. Since clients aren’t creating ClickUp accounts and logging in, there are limitations around sharing and permissions in ClickUp.
As a result, your client will not be able to edit anything. The three methods we’ll be discussing are view-only client portals. Unfortunately, the trade-off for not having to log in is the inability to edit.
Create Your Client Project in ClickUp, First
The three methods discussed in this article assume that you already have client tasks set up inside ClickUp. If you haven’t created a client area inside ClickUp, pause here, read this article (and this one, too), and then come back.
Create a shareable ClickUp Public View called “Client View”
Step one in this process will be identical for all three methods in this article: Create a client-focused view. We can choose any view we think our clients will like. Some standard views are List View, Calendar View, and Gantt View.
For this example, we’ll use Timeline View and call it “Client View,” so we know it’s intended for client view only. It’s essential that all tasks are scheduled (start dates and due dates) since that’s when Timeline View really thrives.

This Timeline View shows all the tasks pertaining to this client. However, we only want our clients to see certain things.
This step is optional, but we can choose to add filters to our Client View. One filter that might come in handy is filtering out all other tasks except Milestone tasks.

This only shows our clients the progress we’ve made for things that matter most to them. Clients don’t need to be made aware of every single step we take.
Another optional step is to adjust the date range settings only to show a month at a time. This gives our clients a big-picture focus.
Now that we’ve adjusted our Client View to what works best for them, we can share it with them!
First, we need to ensure we make our Client View public. Click the Share button in the top right and toggle on the Public link option.
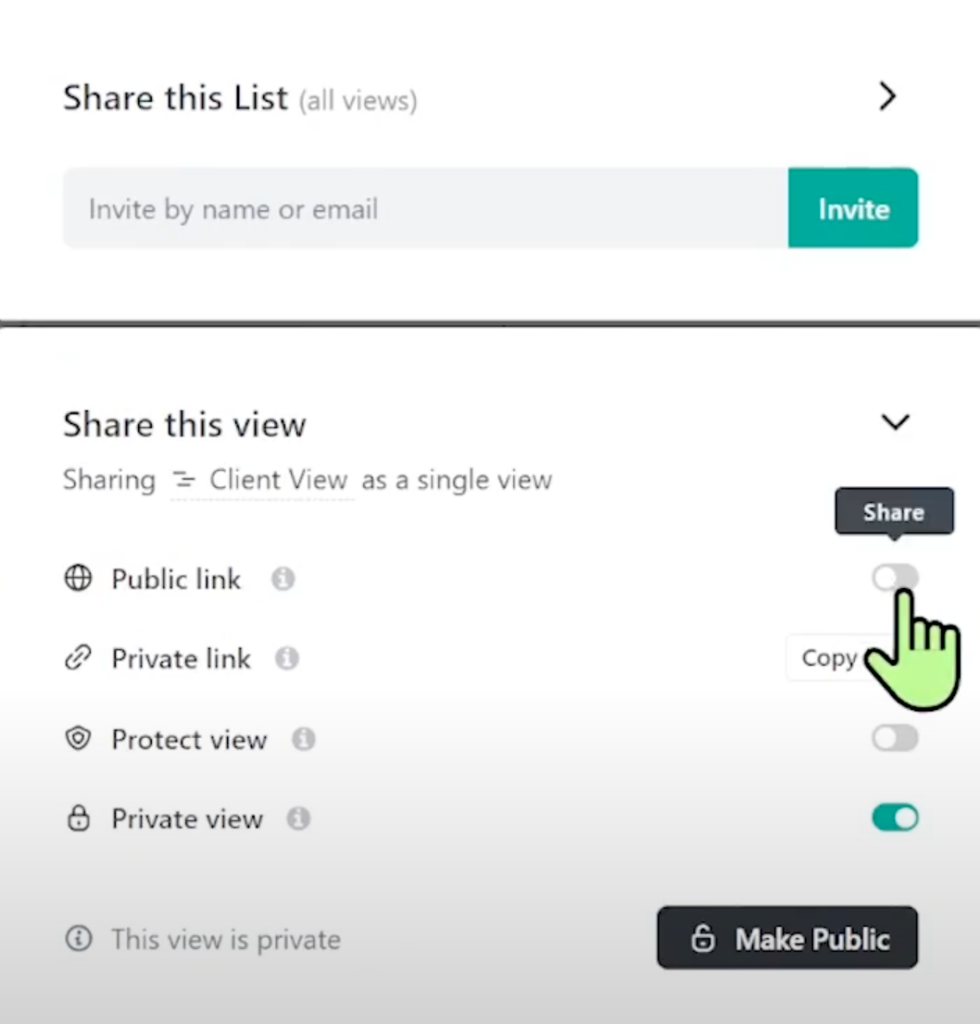
ClickUp tends to move the Share button around as they update, so you can refer to ClickUp’s Public Sharing help doc if you have trouble finding it.
To watch this explanation in video format, watch the video at the top of this article at timestamp 02:38.
Get Public Sharing Link for your ClickUp View
Once we’ve toggled on the Public Link option, click on Copy public link.

We recommend pasting this link into your browser to see what the client will see.
So what do we do with our client portal in ClickUp?
To watch this explanation in video format, watch the video at the top of this article at timestamp 04:16.
Option 1: Embed in a Public Resource (Notion, Trello, etc.)
Our first option is pasting the Public link into a public resource we already share with our client. Common examples are a Landing Page on our website or a Google Doc.
Example: Integrate ClickUp and Notion Client Portal by Embedding
For this example, we’ll use a Notion-based client portal. Notion is known for being a good word document database.
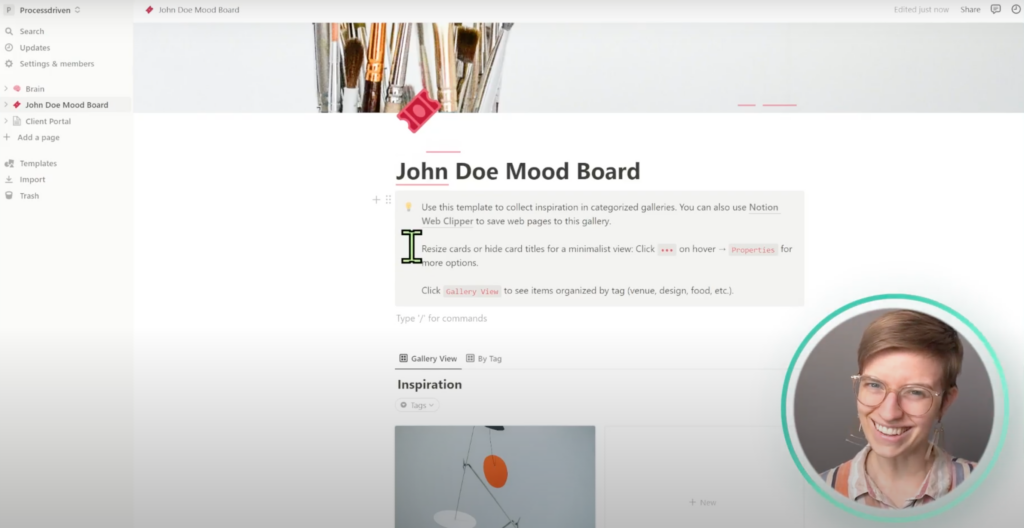
Like most web-based tools, Notion allows us to embed information into it.
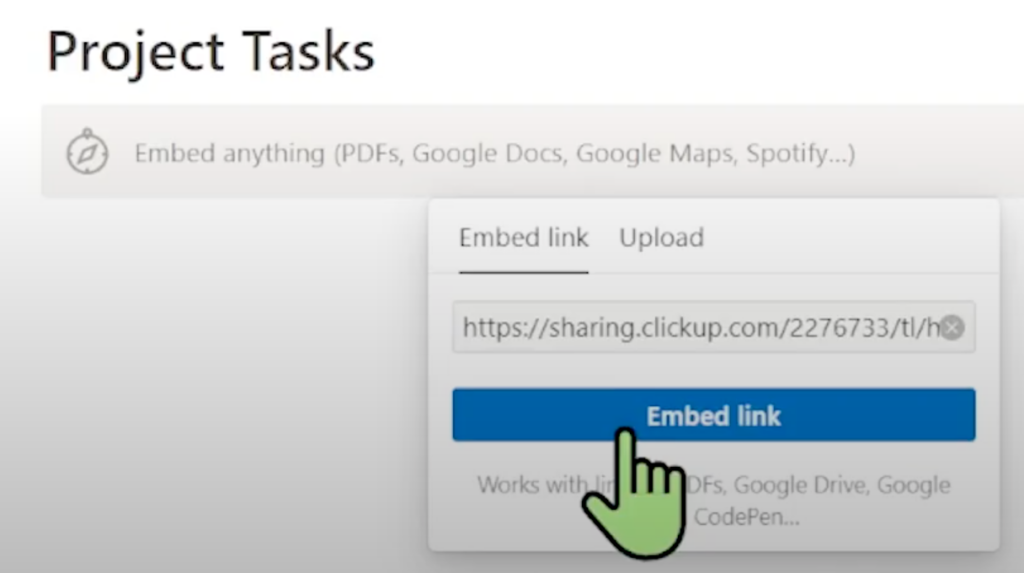
Once our client portal in ClickUp is embedded, Notion will show us a preview.

Again, we can embed this link in any web-based tool, such as a Google Doc or a Trello Board.
To watch this explanation in video format, watch the video at the top of this article at timestamp 04:46.
Ready to feel fully in control of your business so you can hire, scale, or sell your business with ease? Check out ProcessDriven Foundations™️.
Option 2: Embed in a Password-Protected Area
You might be thinking, “This is my client portal. I don’t want my embedded information to be in a public resource! I need it to be protected.”
We can take our public link and place it behind a password-protected area. The most obvious password-protected area to put this would be in ClickUp. But if we want to sidestep ClickUp, let’s first look at the other tools in our tech stack. Wherever our clients already are would be the best place to embed this public link.
Example: integrate ClickUp and Dubsado with One-Time Link
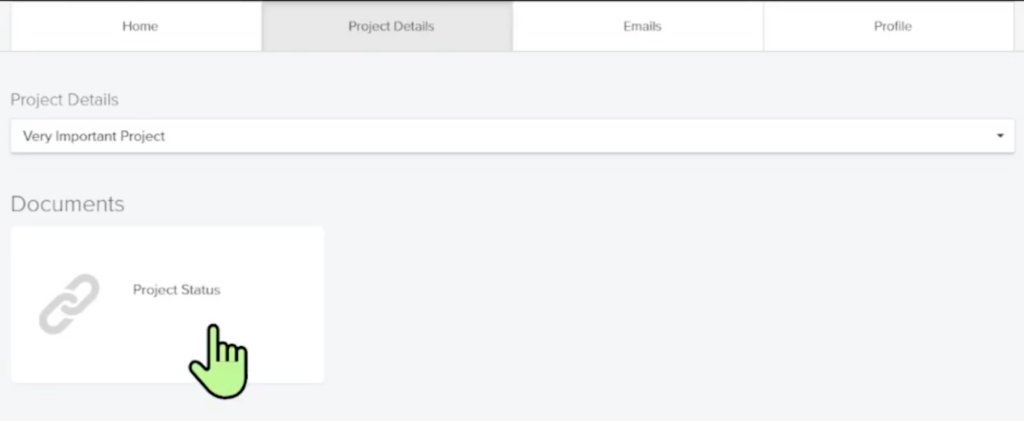
For this example, we’ll pretend our client is already inside Dubsado (a typical business management tool). We’re going to add this as a one-time link.
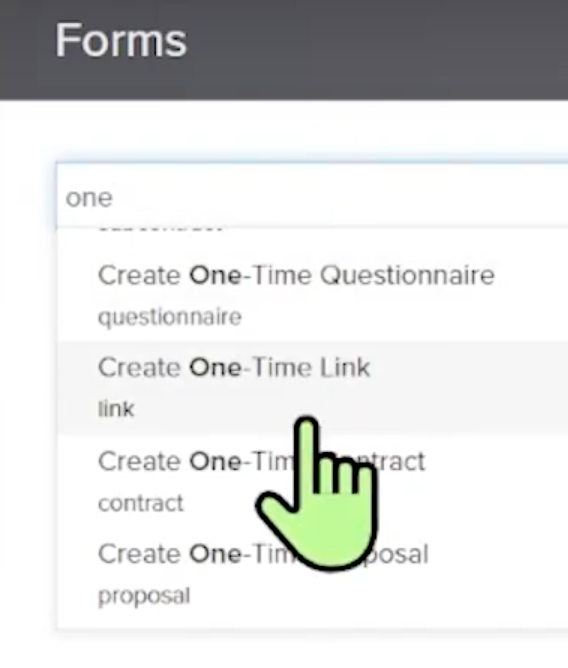
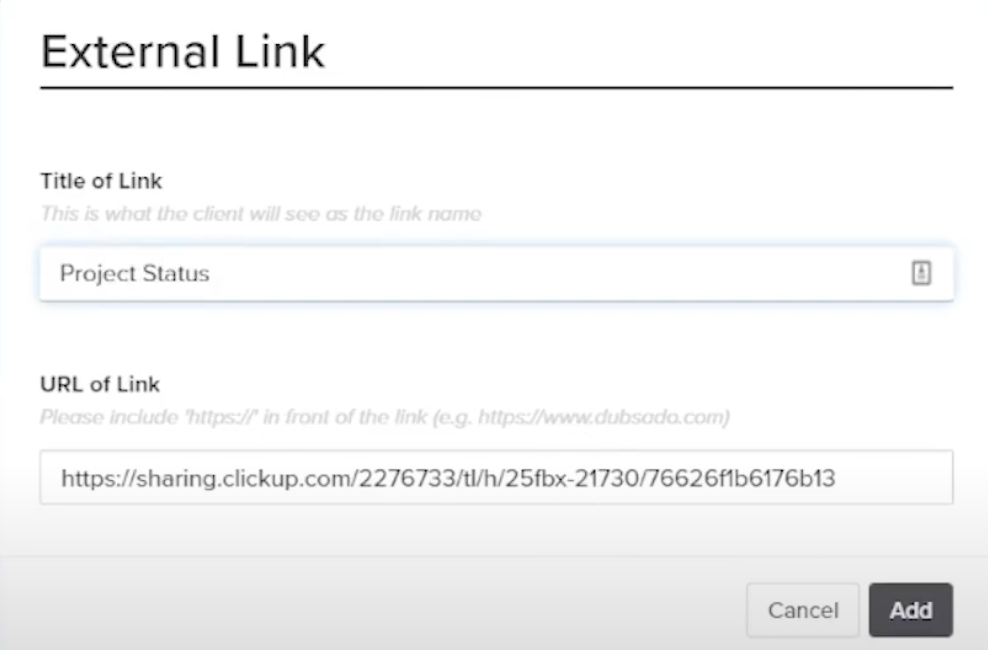
We can add this custom link to our client’s portal. If we wanted to test the link ourselves to ensure our information is protected, we’d see that the client only sees what’s necessary.
Another option to embed this link is on our website, membership portal, checkout system, order processing system, etc. Odds are we already have a tool at our disposal where we could create this password-protected area for our client portal.
To watch this explanation in video format, watch the video at the top of this article at timestamp 07:12.
Option 3: Don’t Use a Client Portal
Both of the methods discussed above require our client to complete additional steps. Our third option around client portals is to get rid of them altogether.
Do Clients need a Client Portal?
Inside the ProcessDriven Membership forum, service providers often discuss how they’ve built out amazing client portals that no one ends up using.
They wonder, “How can I get my clients to use their client portal?”
Well…why should they use it?
If our client doesn’t want or need to use a client portal, don’t create one for them! Instead, allow clients to stay in the loop by using the communication tool they already use.
Example: Add link to Missive Email Templates
One example would be to add the public link to our signature every time we email that client.
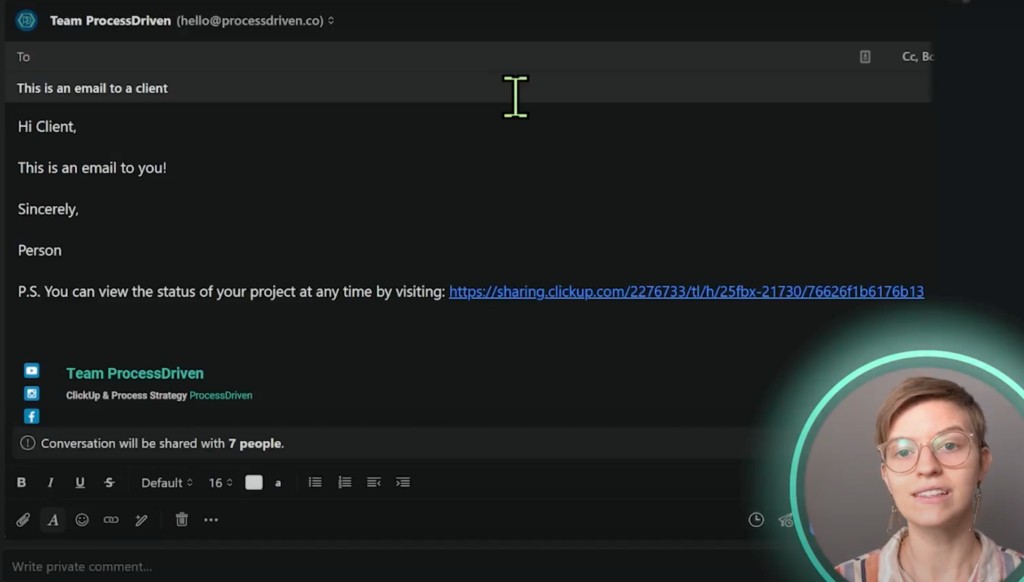
At ProcessDriven, we use an email tool called Missive. Missive allows us to template responses, so we can quickly insert this template and add our public link when communicating with clients.
For many clients, this method is way more convenient than logging in to a tool just to see how a project is going.
Example: Pin Message in Slack or Voxer, too!
If we’re using a tool like Slack, Voxer, WhatsApp, or Telegram, we can paste this public link in the channel or thread we’ve been using to communicate with our clients and pin it or add it to the description.
To watch this explanation in video format, watch the video at the top of this article at timestamp 09:34.
Warning: Public Links are Public!
Public links are similar to Unlisted videos on YouTube or public Google Docs — anyone with that link can access the information inside the client portal.
For most people, this isn’t a big deal. However, keep this in mind if we’re sharing information with our clients that we wouldn’t want others to see.
If you are concerned about privacy, the public link option is not the best path for you. The additional friction of clients having to log in to extra tools will be worth it for security. But if you strictly want clients to see the big picture, public links are a great way to keep things super simple.
Until next time, enjoy the process!
To watch this explanation in video format, watch the video at the top of this article at timestamp 12:40.
Ready to feel fully in control of your business so you can hire, scale, or sell your business with ease? Check out ProcessDriven Foundations™️.