Want to know how to use multiple dates in a Calendar View in ClickUp? We’ve got you covered!
In this post, ClickUp course creator Layla at ProcessDriven gives a short tutorial on how to make sure your custom dates (not just your start date and due date!) show up in your ClickUp Calendar View.

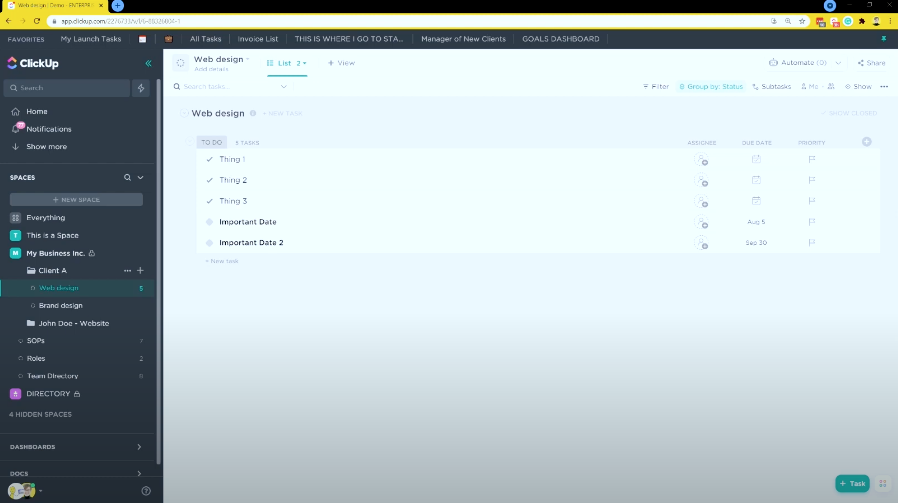
Up until recently, if you wanted to see the dates for a task or project inside ClickUp, you only had the ability to see the start and the end dates inside your calendar.
Now, you have the ability to put multiple dates on your ClickUp calendar! (Can you tell we’re excited about this feature?) In this, video, we’ll walk you through how to do it on your own along with explaining some reasons you might want to use this.
How to use Multiple Dates in ClickUp Calendar View

If you want to be able to see multiple dates in your ClickUp Calendar view, you need two things to get started:
- Calendar View
- Custom Date Field
If you go to the “+” to add a custom field, you can add in the default “Due Date” and “Start Date” options.
You can also add in additional “Date” fields – this is where you can give them a new name, such as “Publishing date” and select the date you need.
Layla shows you how to do this starting at 0:21
How to Create a ClickUp Calendar View

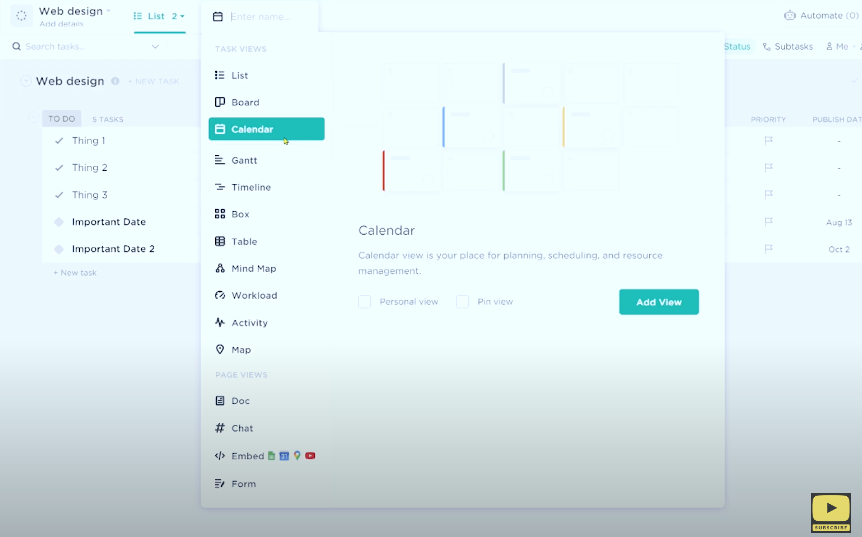
Now that you have your Custom Field dates added in, it’s time to add in the Calendar View.
At the top where your views are, you’ll want to click ” + view ” and pick the Calendar view option.
By default, ClickUp includes the start and due dates in the calendar, but that’s it. So we’re here to show you how to change that!
Layla shows you how to create a calendar view starting at 0:58
Why am I not seeing Custom Dates in ClickUp Calendar View?

Now that you’ve loaded the calendar view, let’s figure out how to add those Custom Dates!
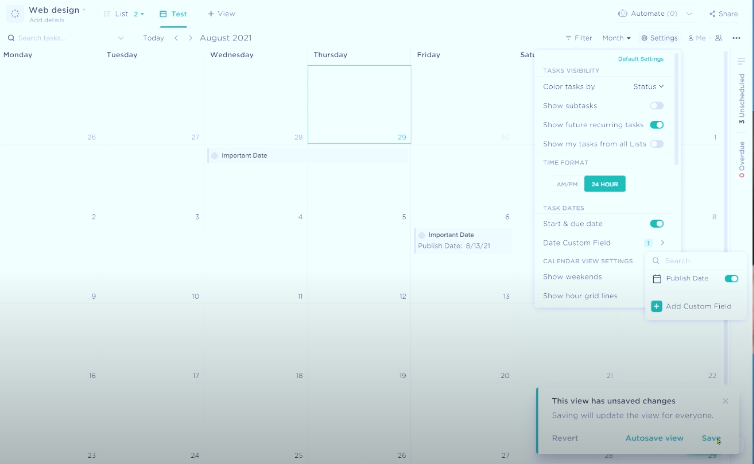
When looking at your Calendar View, in the upper right corner there is a “Settings” option.
If you scroll down, you’ll see a “Date Custom Field” option. Inside there, you simply want to trigger your new view to “on”.
Pro tip: be sure to click “Save” to save this view so you don’t have to keep turning on your custom dates.
You also have the option to customize it even further. You can turn off seeing Due and Start dates so you can only see the Custom Field date in your ClickUp Calendar.
Some other ways you can customize your calendar:
- By color (by it’s list, status, or another custom field)
- Add in sub tasks
- More custom settings such as priority, time tracked, tags, and so on
Layla breaks this down starting at 1:18
Why are Multiple Dates Useful in ClickUp, you ask?
Using custom dates inside of ClickUp can be incredibly helpful!
One popular example you’d want to use this for is for content creation. You might have internal due dates, publishing dates, drafting dates, feedback dates, and so on.
Multiple dates can be helpful when working with clients, especially multiple clients where there are a ton of dates! (We’ve been there!) It can be helpful to use custom dates to keep track of all the moving parts when you’re bouncing between client due dates and commitments.
You might also use custom dates for a team calendar or directory to bring in things like birthdays, work anniversaries, and so on.
Layla breaks down why you might want to use multiple dates at 2:47
Keep in Mind: Custom Dates CanNOT recur!
This might be the biggest factor between using traditional due dates and custom dates in your workflow: custom dates cannot recur.
If you need a date to repeat on a set schedule, you’ll want to make sure you’re using only due dates for that.
Layla explains this at 3:24
Related Resources
➤ Google Calendar Events INSIDE ClickUp + How I Time Block Using ClickUp
