Curious to know how we organize our content calendar for videos that we publish on YouTube? We got you!
This article takes you behind the scenes into our ClickUp account to show you how we organize our entire Content Creation journey for YouTube. Then, if you’re just starting out, we’ve got a recommendation for setting up your content calendar.
Let’s dive in.

Introducing ProcessDriven’s content creation workflow
Every single week, we produce one new YouTube video here at ProcessDriven.
That video needs to be scripted, edited, drafted, published, scheduled, promoted, cross-promoted, repurposed, and all the other steps to release a piece of content.
Perhaps to no one’s surprise, creating and repurposing content is a massive amount of work. You might be wondering, how the heck are we using ClickUp to manage our content calendar?
We’re about to show you!
We are looking at the Main Content Calendar Folder that we have here at ProcessDriven.
It’s responsible for all of our YouTube videos, newsletters, social media posts, and all of our repurpose.io videos — pretty much anything having to do with our original, primary content.
This process has gotten a lot of iteration because it started off with just Layla, and over time, it has expanded beyond that.
Before we go to the overview, let’s go through the journey of a video.
Collecting Content Creation Ideas in ClickUp with a Form
All of our content ideas start in a form like this:
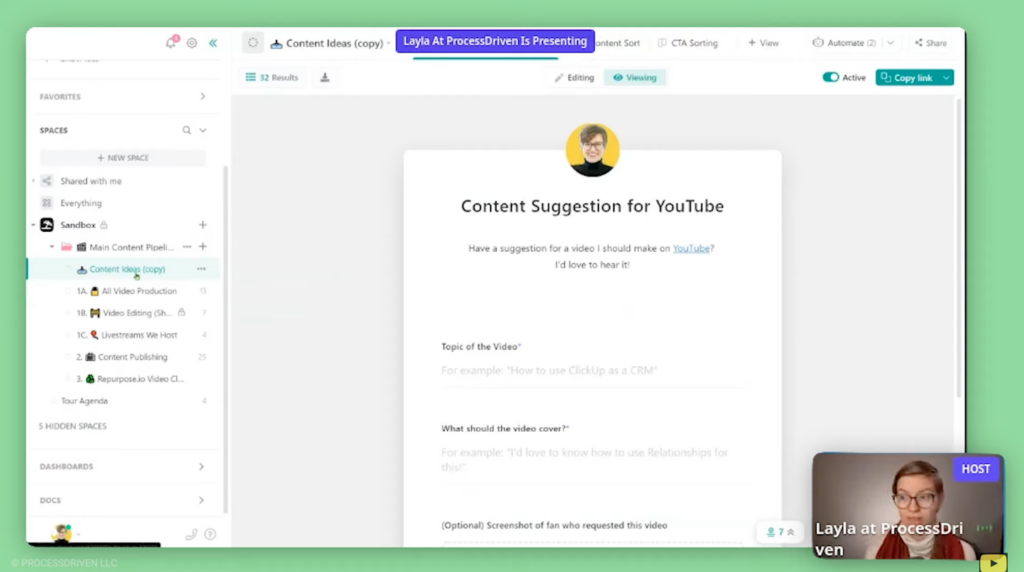
Our audience, our team, and Layla submit ideas when a burst of inspiration strikes.
We’ll see comments on YouTube videos or in the ProcessDriven Membership, “Oh my gosh, you need to make a video on XYZ.”
When it’s time to schedule the content calendar, we’re probably not going to remember a suggestion posted in a comment. So we always have this form in our Favorites in our Workspace to make sure we can easily add an idea.
That’s how the whole journey starts for our content calendar.
Let’s move on to the Sorting area. We have some old content ideas here in our demo account.
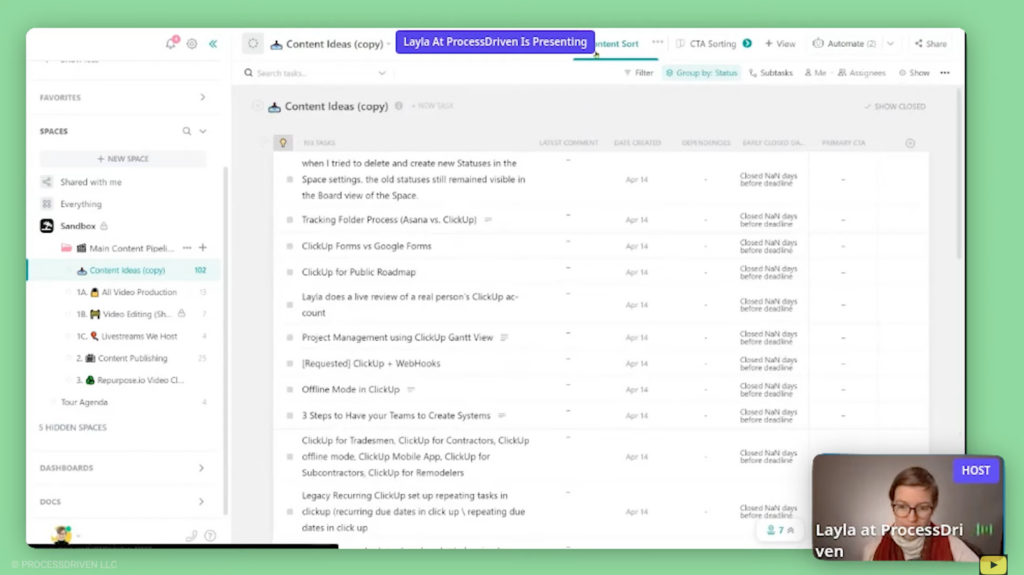
They live here until they don’t anymore.
To learn more about tracking ideas vs. tasks, check out our Tracking IDEAS vs. TASKS in ClickUp | Behind-the-Scenes Look + Bonus Tip about using Automations article here.
For the complete walkthrough, start following along with Layla at 02:16
Moving a YouTube Video Idea to the Video Production Pipeline
Once an idea is selected to be added to the content calendar, we manually drag the idea and drop it in the All Video Production List.
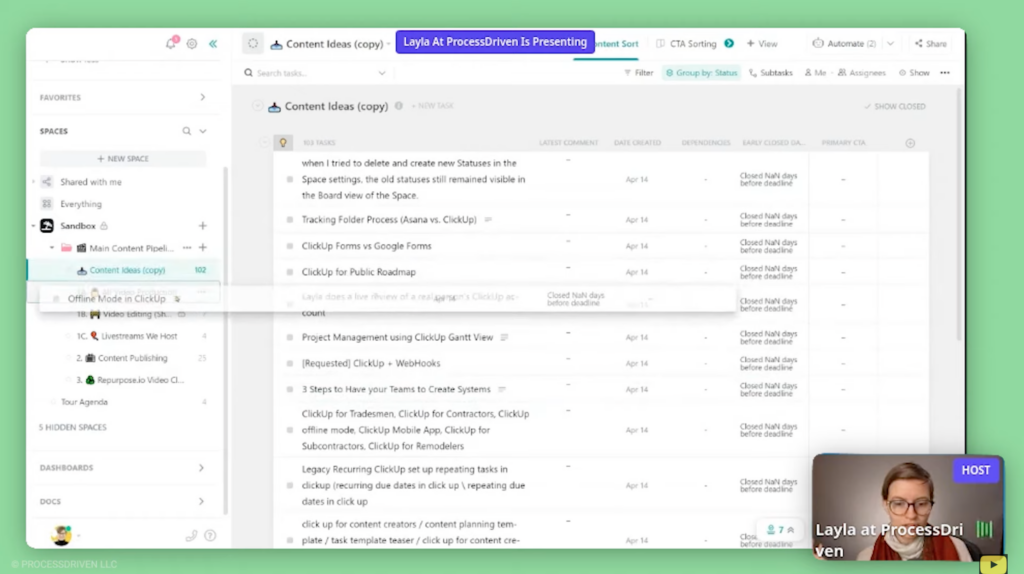
Now, it’s in our video production pipeline, and we can start producing the video.
For the complete walkthrough, start following along with Layla at 03:55
Routine Task for Content calendar Planning in ClickUp
So when do we actually do all of this? When our Routine Task tells us to!
In our Capacity Defense Area, we have a routine to remind us to, “Plan next X months of content.” Whenever that routine task is due, we shuffle over the next batch of ideas for the content calendar.
That’s how we keep it up to date. Sometimes, we don’t have many videos in the pipeline because we work through them faster than we expected.
However, generally, the routine is what tells us to do this stuff. That way, our memory is not in charge of any of it.
For the complete walkthrough, start following along with Layla at 03:55
YouTube Production Task Template (via ClickUp Template Center)
Now, we are in the All Video Production area. Let’s go into our in-progress videos.
In the first stage, Selected & Not Started, Lara, who’s scheduling our content calendar, does an initial review and jots down any notes, adds any necessary details, and she’ll put that information in the Description.
At that point, Lara will apply our template for new content for the content calendar. You can get a feel of what it looks like here:
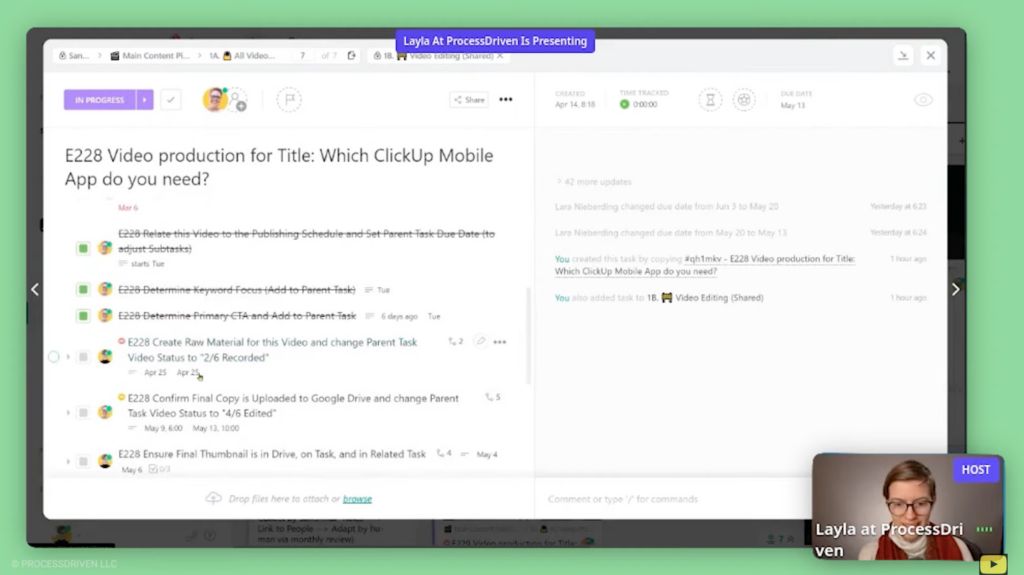
This is one video that’s in the early stages, so we’ve still got a few tasks to complete.
So once the Idea is in the “Yes, we’re doing this” stage, we apply this template to the task using the Template Center:
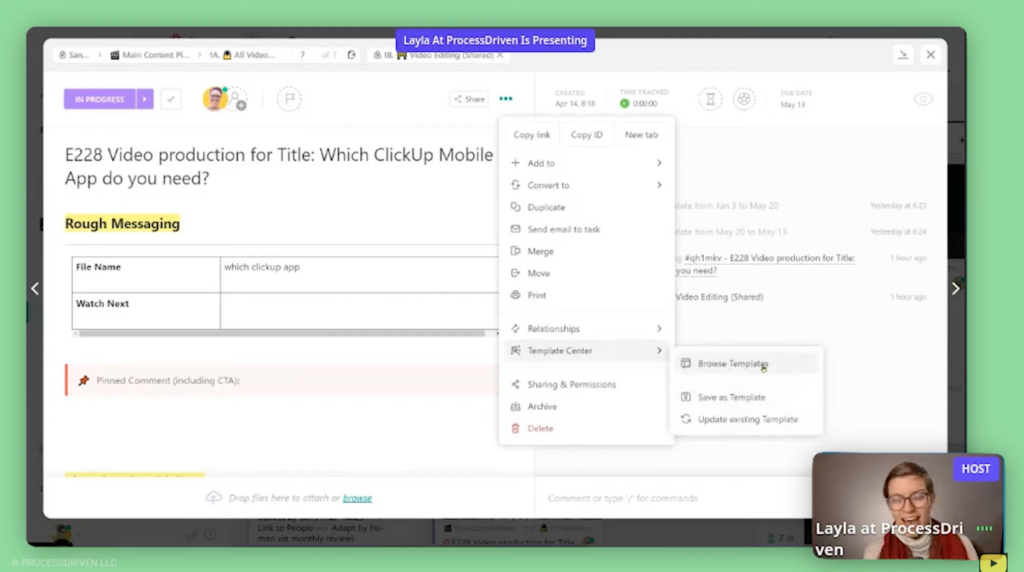
That then merges a bunch of data like the description, due dates, subtasks, and dependencies.
For the complete walkthrough, start following along with Layla at 05:43
Pro Tip: Episode Number Prefix
Lara then manually adds a prefix to each subtask. (Side note: This is something we never thought to do before Lara joined the team, and it’s been an enormous help. So shoutout to Lara!)
So we’ve got our production title (the title we’re not yet set on) and the prefix that lets us know the episode number.
We put that same episode number in front of each subtask to ensure that when these tasks show up in Home, we have context for what they’re talking about, even if this working title changes over time.
We will then script out the Pinned Comment that will go on the video after publication.
If you haven’t noticed, we’re putting all of the general information in one big description rather than subtasks.
For the complete walkthrough, start following along with Layla at 06:50
Thumbnail Guidelines in Descriptions
This is the section for our thumbnail designer:
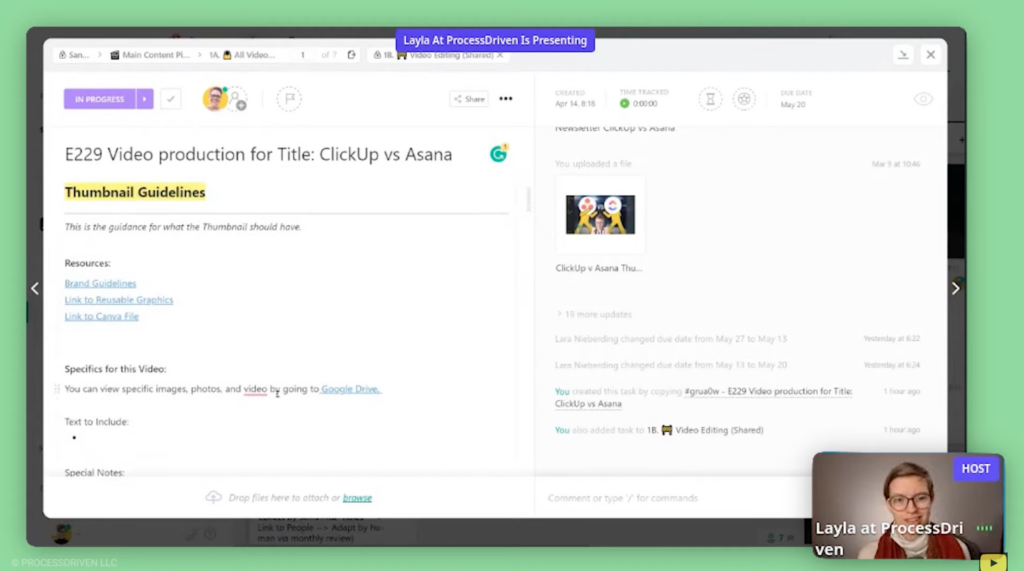
We have some resources that are always in the description because the template adds them.
If we have any notes or text that we want to see on the thumbnail, that’s where we’d put it. We might say, “No words. Special notes: include Asana logo, ClickUp logo.”
We would then have all of those things uploaded into the Assets Folder.
For the complete walkthrough, start following along with Layla at 07:48
Video Script in ClickUp Task Description
Next up, we have the video script and outline.
We’ve shown this process in our Use ClickUp to Repurpose Content for Blog, Email, and Social Media (Workflow Example) article in the past. It’s also the same as the detailed video template in the Resource Directory inside the Membership.
This is our layout for the actual video itself. We have a few critical sections like the hook, proof, information, what you learned, call to action, and exit message.
However, we tend to rearrange the order with each video.
We’ve started to outline the parameters of the information we want to have covered in this video here:

There are two columns: Editor Notes and Upload Notes. For anyone who creates YouTube videos, you might relate to this.
Editor Notes are things that we want to see in the video’s edit. Something like, “Hey, I want a graphic for this. I want to put this image on top of the video here.”
Upload Notes are notes for the person who then uploads the video to YouTube. We might say, “Have info card for ClickUp versus Monday video here,” or “Make sure the end screen says this.”
This is all done in the early stages.
For the complete walkthrough, start following along with Layla at 08:30
YouTube Video Description
If we keep scrolling down, we get to Promotion Messaging.
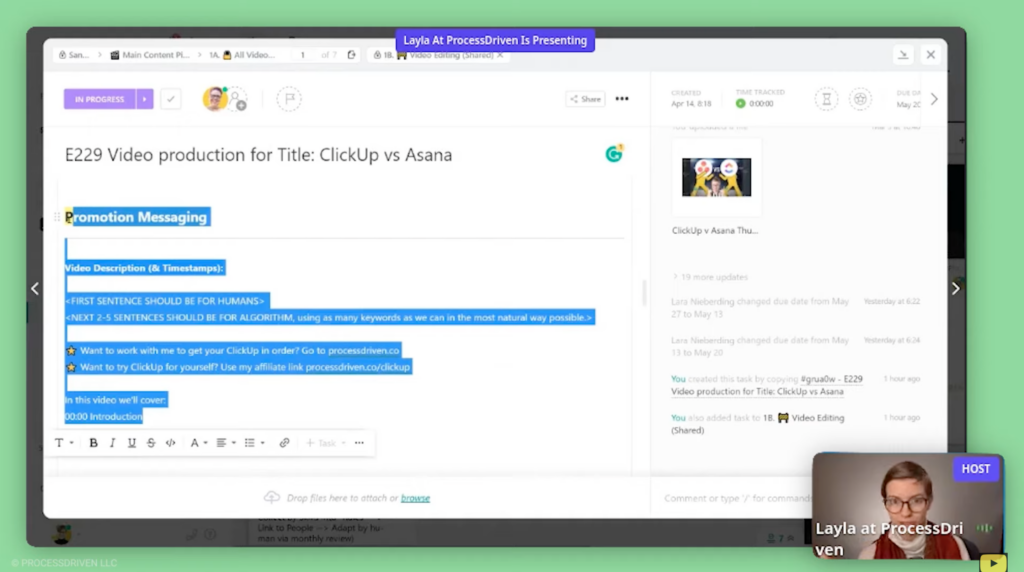
This is a brainstorming area for what’s going into the video when we actually publish it.
For the complete walkthrough, start following along with Layla at 09:56
Subtasks for YouTube Planning, Video Recording, Video Editing, and Thumbnail Creation
This process is tracked and done through subtasks.
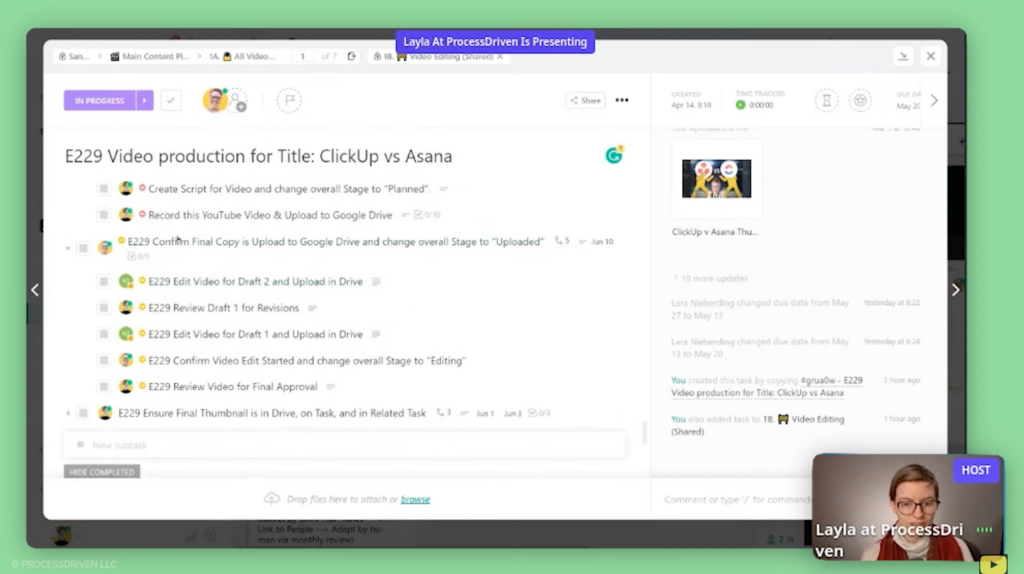
It starts with Lara planning the content, setting due dates, keywords, and the call to action.
The call to action is usually a relationship field we have to a list of our common call to actions. The thumbnail and the raw materials, which are the production tasks, are also subtasks. All of these subtasks have due dates.
We have a subtask to ensure the final copy is uploaded to YouTube. This subtask is the end result. Lara’s job here is to confirm it is done. That’s it.
To complete that subtask, she needs to make sure all of the other subtasks are done. In this case, draft one, draft two, draft three, etc.
For the complete walkthrough, start following along with Layla at 10:15
Revisions & Approvals for YouTube Video Edits in ClickUp Comments & Subtasks
Inside the editing tasks, you can leave notes and say things like, “Here’s what you need to do.”
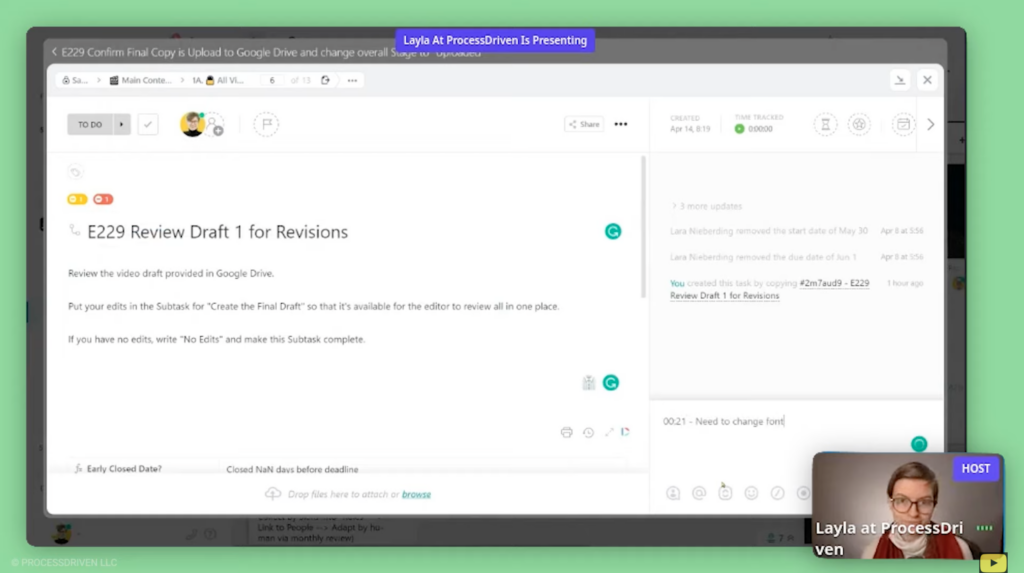
When we’re reviewing draft one, there might be a timestamp where we need to change the font. Your note could say, “Timestamp 00:21 – need to change the font.”
We’ll use a checklist for anything that requires action and a bullet for anything that’s just a note. Then, we’ll take those edits, go back up a layer, and go to the Edit Video for Draft 2 subtask.
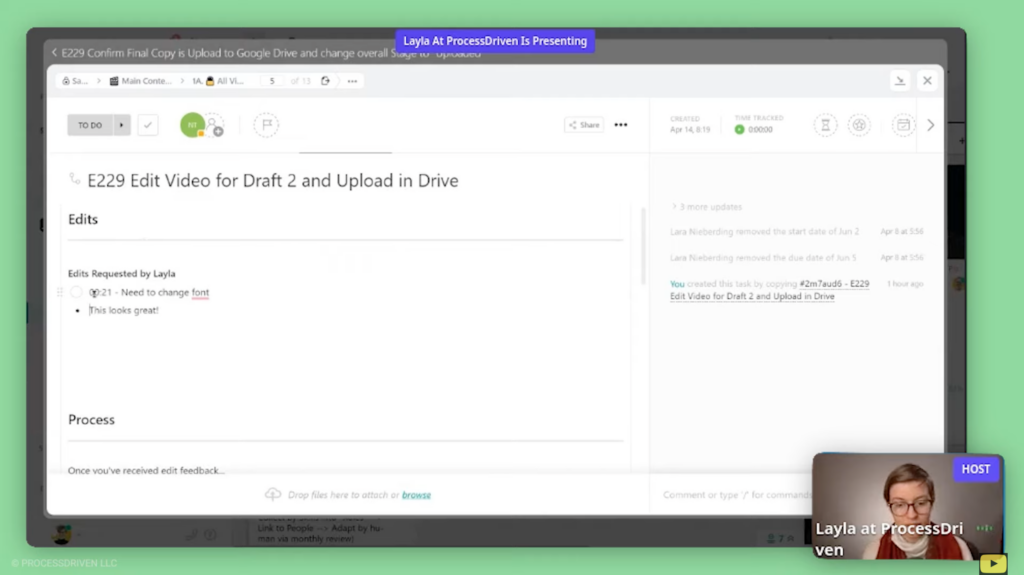
We then add our list of edits. Everything else in here is the same every time.
This person then receives a notification that their task is unblocked. They go in, check things as they go through them, and then mark the task complete. Since everything is connected with Dependencies, we’re alerted by ClickUp, “Hey, this task is ready to review.”
And that’s a video!
For the complete walkthrough, start following along with Layla at 11:48
Publishing Content into Videos and Email Newsletters
All of the “ones” (1A, 1B, and 1C) are part of the creation of content:

Then, we have the “two” (2), and this is where we publish content.
This is more complicated than most people need, but it helps us a lot to have it this detailed.
So, we have two major types of publishing at ProcessDriven: a video and a newsletter that goes out every week.

The second task in the image above is the task of publishing our weekly newsletter. We use a Dependency to say what video that newsletter is about.
For the complete walkthrough, start following along with Layla at 13:34
Separating Content Creation vs. Publishing
The creation is separate from the publication because, in theory, we’d like to have 100+ videos ready to be published. We could place them on the calendar on any day just by changing the relationship field.
The dependency relates to all of the videos in production and that’s how we schedule things.
To learn more about separating content creation from publishing, you can check out our Changing How We Use ClickUp for Content Planning article here.
For the complete walkthrough, start following along with Layla at 14:42
Scheduling Videos on the CONTENT Calendar

This dependency relates to all of the videos in production. That’s how we schedule things.
If we suddenly have an open date with no episode scheduled, what are we going to publish?
Well, we can go to All Video Production, browse any of our ideas that aren’t already scheduled, copy the link, and build a relationship between the gap in the schedule and that idea. Paste it in and there it is.
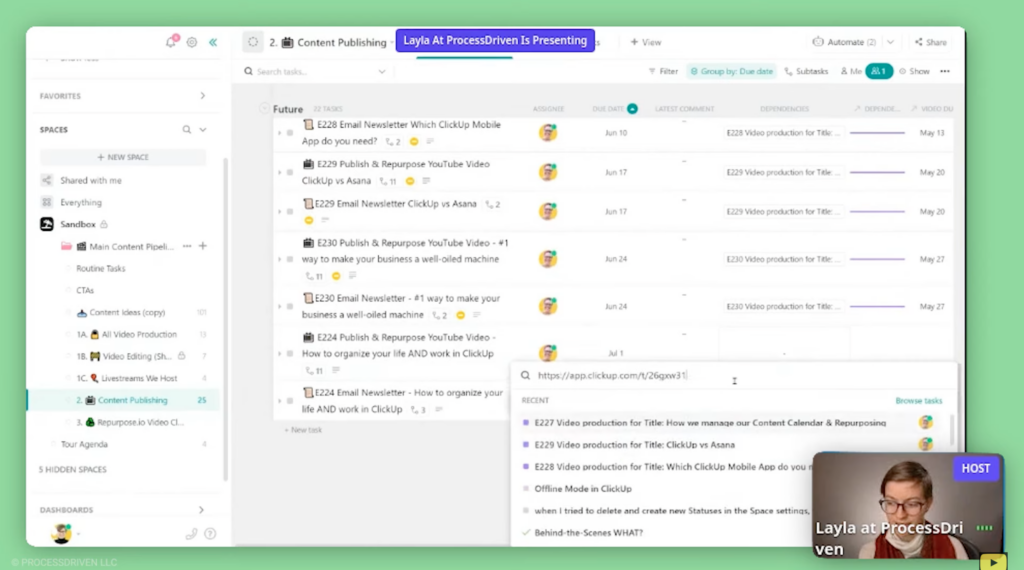
We really like doing this with the dependency because Dependencies allow us to do things automatically, unlike a normal Relationship or a custom Relationship.
For the complete walkthrough, start following along with Layla at 14:54
ClickUp Automation using Dependencies
We could then create automations like, “when task is unblocked (meaning the video is done), alert somebody.”
It also means that if the video got delayed for some reason, we would see that and we’d know to take action. It also means you can now visually see, “Hey, here’s the next three weeks of videos. All the videos are already done but the week after that is in progress. Then, the week after that, nothing is in progress.”
We actually have an entire article right here breaking down when Layla started this journey. She had this ideas list, which has simplified over time, but it’s pretty much been the same thing since the start.
For the complete walkthrough, start following along with Layla at 16:35
Why It’s Important to Not Overcomplicate your content calendar
Thinking back to when this journey was simpler, we had three subtasks and a few checklists. The three subtasks were create video, publish video, repurpose video, and then some checklists inside as a reminder of what to do. That’s where it all started. It evolved into the journey it is today way after.
We actually have a whole article right here on our very first year on Youtube.
At this point, we need more guidelines around things like, what do we need to remember not to miss? What are we looking for here? What are our parameters?
However, not everyone needs to start here. We honestly wouldn’t recommend it. If you’re interested in watching the full tour, check out the ProcessDriven Membership.
Until next time, enjoy the process.