
Software Selection & Tutorials
How to Create a DIY IT Helpdesk for Free (SmartSuite Tutorial)
This post may contain affiliate links which may compensate us at no cost to you. See details here.
As your business grows, so does the volume of client interactions. If you’re feeling overwhelmed by the number of customer queries in your inbox, it’s likely time to start evaluating helpdesk opt
As your business grows, so does the volume of client interactions. If you’re feeling overwhelmed by the number of customer queries in your inbox, it’s likely time to start evaluating helpdesk options.
By leveraging a simple helpdesk solution, like one created with SmartSuite, you can not only keep all those questions, concerns, and feedback in one organized place, but you'll also boost response times and ensure that nothing falls through the cracks. It's like having a super-efficient assistant who's got your back, ensuring every customer feels heard and valued.
This post may include affiliate links, meaning we might earn a commission. For more details, check out our terms.
In this video, ProcessDriven CEO Layla Pomper demonstrates how to set up a simple yet customized customer support ticket solution using SmartSuite. So, in a world where customer experience can make or break your brand, it’s time to get organized!
Not a SmartSuite user yet? You can set up a free account using our affiliate link to follow along. This helps support free content like this video, gives you access to a bunch of cool project management features, and you’ll even score a sweet discount if you decide to upgrade to a paid plan later! 😎
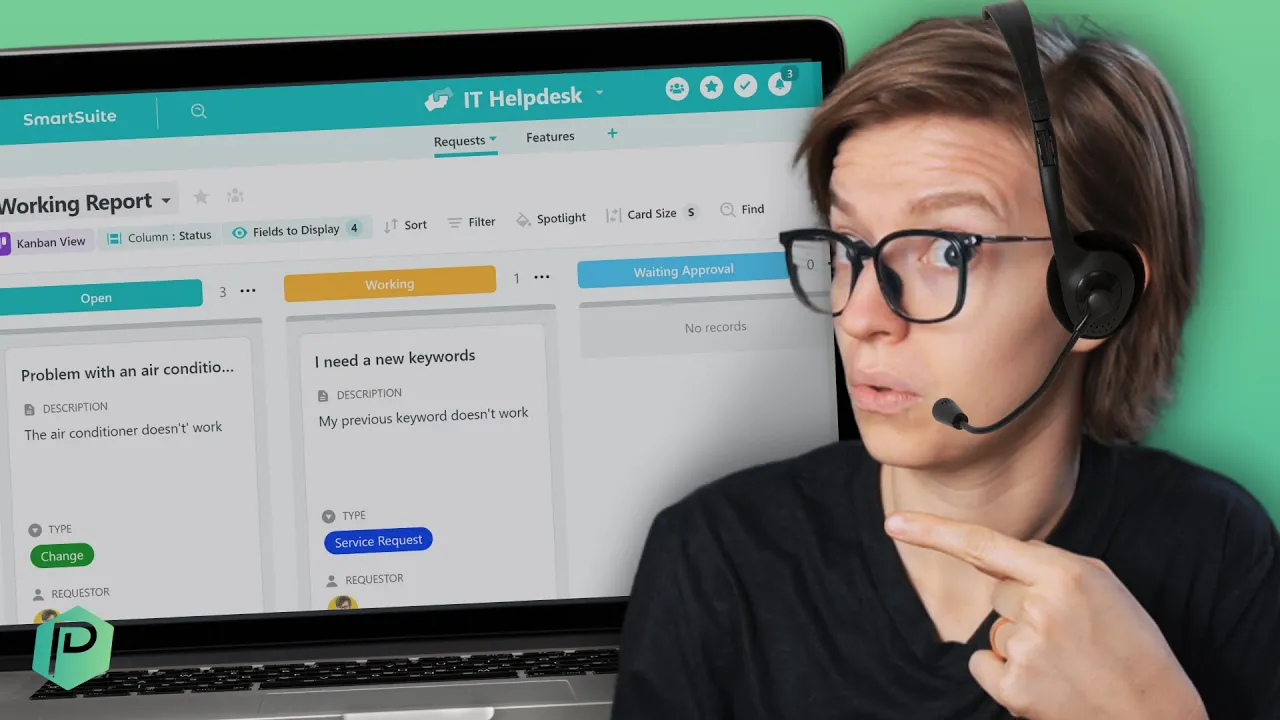
Setting Up a Simple Helpdesk in SmartSuite
On the main SmartSuite page, click Add New Solution > Start with Template (timestamp 03:40).
Use the search bar to locate the Support Tickets Template from the free template library.
Click Use Template to apply it to your new Solution.
Templates are great for giving you a head start on creating all types of organizational and project management solutions. The best part is that they can be easily customized to meet your specific needs.
Selecting the Solution name at the top of the screen gives you access to a dropdown menu. Here you can do things like change the Solution name, change the color scheme, delete demo data, and set up automations.
Go ahead and change the name to something relevant to your business.
The Support Tickets Template includes two Apps (databases) called Tickets and Companies. Since we’re setting this up for customers and not other companies, you can select the Companies App and use its dropdown menu to change the name to Customers (timestamp 04:30).
In the Tickets App, open a Record by selecting the double arrows on the left, double-clicking, or highlighting a Record and hitting the spacebar. Here, we can customize the Fields used to track customer requests to make them as simple or complex as desired.
You can add and delete Fields or modify existing Fields to change the name, layout, default data, and help text they display (timestamp 06:50).
How to Add Email to Your Helpdesk Solution
Now that we’ve customized our new Solution, it’s time to start collaborating, so let’s set up the SmartSuite Communication Center. The Communications Center allows you to send and receive emails from within SmartSuite, whether you’re emailing a customer regarding their support ticket or a team member helping process inquiries. You can also use it to chat internally with team members.
Click the chat icon 💬 in the upper right corner of the screen and then open the Communication Center settings by choosing the gear icon ⚙️ (timestamp 08:30). Toggle the Email switch to turn on the ability to send emails.
Since our support tickets have a customer email Field, when you send an email from the Communication Center, you only need to click the plus symbol ➕ to access a list of available emails instantly — no memorizing, cutting, copying, or pasting required!
You can even go a step further by creating an email template for communicating with customers (timestamp 09:35). This can be customized using different variables and then personalized. While the email the customer receives looks no different from any other regular email, when they reply, it will be recorded in SmartSuite, added to the Communication Center, and you’ll even receive a notification inside your account. This makes it easy to see new activity and keep track of conversations without searching your inbox.
As mentioned above, the Comments feature allows you and any team members to add notes, give direction, or ask questions about the correspondence as well.
Add Content Easily with AI
To make things even easier, SmartSuite has added the ability to leverage generative artificial intelligence to fill out Fields and create content like customer emails (timestamp 12:45). For example, you might ask AI to write a brief email letting a customer know that their return has been processed or explaining your refund policy. Love what AI wrote? You can save it as a template and use it again and again.
We hope you enjoyed this beginner tutorial for creating a simple helpdesk in SmartSuite. If you found this content useful, please hit the like button, share, comment, and subscribe to our channel for more helpful ProcessDriven videos.
To learn how to use even more SmartSuite features and advanced techniques in less than a day with our mini course, How to SmartSuite.
Until next time, enjoy the process!


IF YOU'RE NOT SURE WHERE TO START, TRY


