
Software Selection & Tutorials
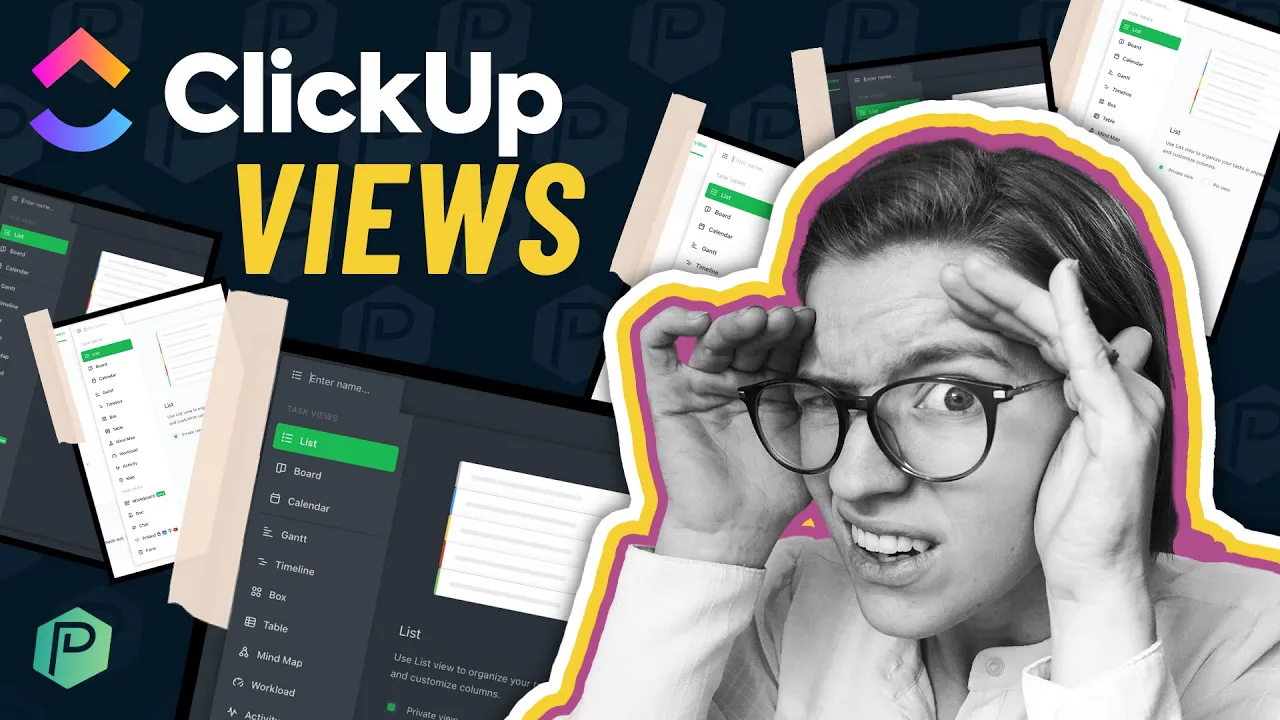
ClickUp Views Explained | ClickUp Tutorial for Beginners on Filters, Group By, Sort By, & Me Mode
This post may contain affiliate links which may compensate us at no cost to you. See details here.
Ever wonder how you can VIEW your data in ClickUp without scrolling through one, seemingly endless List View? Say hello to ClickUp Views! More important than the actual TYPE of view (List, Board, C
Ever wonder how you can VIEW your data in ClickUp without scrolling through one, seemingly endless List View? Say hello to ClickUp Views!
More important than the actual TYPE of view (List, Board, Calendar, Gantt, Timeline, Mindmap, Workload, etc.) View FILTERS allow you to customize each type of view to let you "chunk" your data in different ways.
In this video I'll talk all about taking advantage of this "horizontal hierarchy" by unpacking features like Me Mode, Filters, Group By, Sort By, and Public Views in ClickUp.
Looking to try ClickUp for yourself? Use my affiliate link to let ClickUp know Layla sent you (at no cost to you!) by going to: processdriven.co/clickup.
Related Resources
➤ Forms in ClickUp | Beginners Guide to what Forms can do (March 2020)
➤ 6 Ways to Create SOPs & Template Tasks | Advanced ClickUp Tutorial
Video Transcript
What follows is an AI-generated transcript from this video. Please be mindful that this transcript may not be 100% accurate.
[00:00:00.450]
Hello and welcome back to another feature Friday, we are here to talk all about views in ClickUp today.
[00:00:07.170]
So you if you're not interested in that, I don't know why you clicked on the video, but go check out my channel.
[00:00:11.170]
There's a lot more videos. Views are those things that allow you to see the same data in your tasks in different ways. So here we are in Click Up and just a quick 10 second tour I like to give when we're first starting out is on the left side bar, you can kind of tell what area and ClickUp I'm in. And if I go to the task area, I'm going to see all of the tasks. Here we see the vertical hierarchy that I think kind of people way too much about.
[00:00:32.280]
And then we've got the actual tasks in here and all of those tasks are grouped on a list. And just kind of like a cube like this, you can view the list from different angles. You can kind of block off things, you can partition things, you can hide it. But all of it's still in that same container.
[00:00:47.130]
The way we kind of partition off one list and look at it in different ways is by using these guys and then saving our customizations into a view. So let's actually go through these one by one. Here we have this kind of cluttered random list. The first thing you'll see here is that there's a filter icon and this works a lot like filters in Excel, if you're familiar with them, or filters and er table familiar with those.
[00:01:08.940]
And if you're familiar with neither of those, it's just a filter. It cuts down things like your water filter takes the sediments out. We can go in here and we can say only show me things where the due date is yesterday, which I don't think there is anything.
[00:01:21.480]
Oh there's one wonderful. And it cuts down the noise of our view to only show us that stuff. Does that mean everything else is deleted? No, everything else is filtered out. It's hidden, and we can make them visible again by removing that filter. So we can just do that little guy and we can exit out of it here or exit out of it actually in the filter. Now everything's back in place. You can also stack filters. So we could say where the assigneei is this and the status is whatever might be, not started.
[00:01:49.740]
Right. I can also do an or statement, meaning if either of these is true, show it. This case right now, it's only if both of those are true, which might be, you know, maybe we'll see something cut down if I do this. So now we're only seeing the combination of its unassigned and it's closed. That's what the filter is doing here in the left. The next kind of option of how we can customize our views is by filtering by task name.
[00:02:10.230]
And this is exactly what it sounds like. We just type in something and it'll cut down our view to show things that contain that word in the task title. All this does is look at the task name that you have in place and filter by them. So I'm going to filter by one because I know I have the number one and a lot of these and it's just filtering by that number. Anything that has that number in the task name, it shows up.
[00:02:29.220]
And again, we could combine this with another one where we could say the number is one and it's assigned to Layla. Great, now cut it down even further. The other things we can do are grouped by different things. I'm going to remove these other filters so we have some task to play with here. By default, when you create a list ing ClickUp, whether using list, view, board, view, any of the other types of views which we'll talk about, there are always grouped by status and status means these guys.
[00:02:55.780]
Your statuses are what's determining how they're categorized. So I could group by a whole lot of different things like status, assignee priority tags, due date, nothing. Just have them all together or even a custom field that I have that helps me break things down even further.
[00:03:09.910]
This effectively decides what vertically chunks your information. So here I could have things grouped by assignee an ever unique combination of assignee. Yes, that's how it works. It's annoying, but that is how you can actually break up your tasks in different ways. Now, all of the statuses are kind of grouped together, but we are grouping by assignee notice for all of these, just like maybe for, let's say, due dates. I love how the due date one looks.
[00:03:32.500]
We can have it either ascend or descend, that's what these tiny little arrows do, so we could flip the order. So showing no due date first or I can flip that around to show the overdue stuff first. So it's kind of like which order, A to Z, Z to A. Next to the group by button is the subtasks and these subtask decide, how do you want your subtasks to show? Do you want them to be compact, meaning they kind of show like this guy where they're all kind of smooshed within the task.
[00:03:56.020]
Do you want to show them as separate task like these ones which are subtasks, but they're kind of like exposed as if they're full tasks here?
[00:04:01.750]
We can see the difference between these two or do you want them completely hidden, which is what it would look like if we had these here. That's what the subtask option is showing you.
[00:04:09.340]
Next to that we have me mode or everyone mode. Now me is an important concept to understanding ClickUp because me is dynamic, meaning if I'm in me mode or if I save a view and me mode, or if I create a widget filtered by me, or even if I went back to my filters and I assigned and I just filtered to assign things to me mode, what that does is it'll filter for whoever is viewing it. Me mode is dynamic. It's considering who the ME is in that moment.
[00:04:36.160]
Next up is everyone mode. And yeah, by default it just shows you everyone.
[00:04:40.000]
But when you actually click on this everyone mode, you'll see a sidebar of all the people who are involved in this particular area.
[00:04:45.850]
So you could click on a particular name and effectively see their me mode, if that makes sense. So I could click on things that are unassigned, I can click on me and unassigned. I can filter things down that way just to look at what's on certain people's plate. That's again, the difference between me mode and going to that everyone sidebar, which can be as a full sidebar or more compact. The next view setting is actually the share, which basically means you can create a link that shows that particular perspective that filtered whatever you've set up and make it publicly visible by anyone who has a particular link.
[00:05:17.260]
In here, you can go through and you can actually allow people to open the task from here and just see certain parts of the task. Again, this is all a view based setting under the three dots, in every single type of view, you have slightly different features and this is just list view. If we were in board view, you would look a little bit different as well. And below that is just show closed or not show closed. Basically, do you want to see the tasks that are done or once they're done, do you want them out of your mind?
[00:05:39.160]
Now every time I've clicked on one of these filters, you might have noticed this little guy.
[00:05:42.670]
Let me just filter by some things you can see.
[00:05:45.370]
See this guy peering at the top of the page. This is what allows us to save our view. So if I click save right now, I can either save or have it autosave meaning every time I change something, it saves. This saving feature, allows us to come back later and see this same filtered setup. So let me just click save for everyone as a one time save. And now I have everything filtering to just show me tasks that have an F in the title.
[00:06:09.250]
Great. But now I can create another list view. And we can have this one just to filter by grouping by, grouping by due date and I have all subtasks separate tasks that can have a filter to me and I could save this as a second view that allows me to see the same tasks in once again, another filtered way. I can flip back and forth between these views to see different kind of cuts of the pie. Right. Different cross sections of my information.
[00:06:37.120]
And if this were me, I'd probably take these and even rename them to let me know what what's kind of the use case for that filtered view. What is it showing me? Just so I have a quick way to remember what exactly I have that calibrated to show me.
[00:06:49.170]
Now, I've talked a lot about how you can create different views, all of these different options that you have to adjust and manipulate your views.
[00:06:55.080]
But I want to be clear that the actual layout of your view can also be changed at the time of creation and at the time of creation only. So if I was in here and I wanted to create a board view, I could go ahead and create that. I'm just gonna make it a public view. And now I have all the same options, but the overall structure of how that view is going to present to me is in a board.
[00:07:16.670]
At this point in time, I can't convert this directly into a list view. But remember, these views are just different ways to slice and dice. All of the data is still there, whether the views visible or not. So in board view, I have all the same options and this time I have kind of a more in-your-face sort by versus back and list view I had to sort by just clicking on the actual column to sort things by different A to Z, Z to A situations, but in board that got that option called out that the same kind of group by options, a lot of the same stuff we've already seen.
[00:07:42.650]
Similarly, if I go in here and I had a calendar view, get the same effect here of being able to have things filtered, have things grouped by month or day, obviously there's a little bit of quirks into each view as some of the extra special things you can do, such as in calendar view, I can choose to have different things visible on the cards. So for example, I could add the assignee to be visible.
[00:08:01.280]
Back in board view, I could choose to have certain custom fields or certain pieces of data visible in each card. Whether you have everything filter down, whether you have just one view or you have 15 views, the underlying data, the tasks are still there, whether they're hidden or not, the tasks are within that area. There's still going to show up in home and inbox whether they're filtered out or not. And this is just allowing you to kind of figure out what bite of information you want to chew on at that period of time, what perspective is going to help you make the decision you're trying to make?
[00:08:28.460]
If I'm trying to look at things very quickly and I want to think about it in a spreadsheet where I can open a table view of the same exact data even without filtering it, I can flip to a calendar view if I'm trying to really focus in on those due dates and see when things are due. Similarly, if I'm really concerned about what's on each person's plate, is anyone overworked? I'm probably going to look at a timeline view and view the same tasks in that format.
[00:08:49.970]
Now, so far I've been talking very much about task views, all these different ways to manipulate your tasks based on the view settings and saving those settings so that when you come back to that same view, all of your filters and customization will still be there next time.
[00:09:03.170]
But that's only the top half of ClickUp views. I know this is why ClickUp is so overwhelming. Now, these bottom four options allow you to add information that's not necessarily related to the tasks. Chat allows you to create a chat room directly in a view in a list. You can have a conversation back and forth, kind of think of it like slack-ish inside a particular task list. It's just a public forum. If you want to learn more about chat in ClickUp or even sending private messages and click up, which you really can't kind of do, go ahead and watch my video on chat in ClickUp.
[00:09:35.000]
You can also create views for documents. Now, I have a lot of videos about documents in ClickUp, but basically these are like cloud based documents where you add additional context and you can put it directly into a view. Don't ask me why they decided that yeah, views are so simple. Let's go ahead and throw these totally not related things into the views tab. I don't know, man, but they're here. And if you want to learn more about doc views, check out some my S.O.P videos up here where I talk about using doc views.
[00:10:01.250]
The next few is an embed view. Once again, you can add data totally seemingly unrelated to your task. It's not letting you see your tasks in different ways anymore. It's just adding on random shit making it available in the same spot as your tasks. So here we can embed a bunch of different tools, including YouTube, Vigna, etc., etc. So that way directly in your task area, you can flip to this different view and have that area embedded in there for you to be able to access.
[00:10:26.990]
And finally, there is form view there, their form actually does have something to do with tasks in that if you use this view, it actually helps you input tasks in a structured way. So this is a form super basic, but if someone fills it out, it creates a task in the actual list that you have this view added to.
[00:10:44.300]
So to recap, all of these tasks views actually let you see your tasks in different ways with different perspectives and different filters that you can save per view. You can even share those views publicly, using that public share button I talked about before. Below the page views area, there are three different ways to add additional context. Chat doc, embed, that just allow to have more things at the ready when you're working on your task list. Unlike everything else we've already talked about, these do not show your tasks.
[00:11:08.990]
They really have nothing to do with your tasks. And it's really confusing that they're here, but they are.
[00:11:13.520]
At the bottom of that page views section is something that actually does seem like it should belong here, which is a form view which helps you input your data and create tasks through a structured form and click up. These forms are super basic. I have a video on ClickUp forms. I'll pull up here in case you're looking to learn more about them, but they actually help you create tasks in ClickUp. So they're kind of more of an input to the other views that we talked about.
[00:11:33.590]
They help you create the tasks. Now, once you have all these views, I want to just go through some of the options that are hiding in the three dots for these views. First of all, you can choose to make one view a default, I do not believe this is a business and up feature I might be wrong on that. But basically, if you're on a pay plan, you've got this.
[00:11:48.590]
Basically, you can say when someone clicks on this list, which view do you want them to start on? That's what this says. You can pin a view, which basically allows you to reorder them. So right now, if I just have all these views, they're kind of stuck in the order they are. But if I add a pin to a view much like pinning a custom field, it will allow me to kind of rearrange all of my pinned ones just by clicking and dragging.
[00:12:06.800]
So here we go. We can move them around once they're pinned and not before. Below that, we've got some additional options where we can actually template a view, we can reset a view to default, we can default a view to me mode, meaning basically the same thing as clicking that me.
[00:12:20.520]
So whoever sees that view is going to see things that are just assigned to them.
[00:12:25.380]
We can move a view. We can make a view visible to only me or to everyone. We can protect a view, meaning only certain people will be allowed to edit that view that we've created. We can also autosave the view, meaning any change I make to that view is going to be saved automatically. So whatever I do, it's whenever I leave and come back, it'll still be however I left it. We can copy the URL to jump right to a view if you want to link to it for some reason.
[00:12:50.200]
And you can also add this view to your favorites. So that way you can always see it at the top of your screen. Or if you don't have your favorites pinned right here on the left sidebar and see all of your views that you've got going on.
[00:12:59.890]
So I want to wrap this video up with five pro tips around views. And while you're watching this part, if you're enjoying this video, please do give it a thumbs up and click subscribe because that helps this video reach more people. And I would really appreciate it. First pro tip is you can share a specific view publicly by using that share button, like I said. So this is only going to show whoever has that link, the stuff that you have visible aka not hidden, not filtered out for that view.
[00:13:22.600]
The second pro tip is that your views stack. How awesome is that? So don't pin everything and end up with a super cluttered sidebar that looks kind of like this and you have to flip through them in this really clunky way.
[00:13:32.170]
Instead, try to have less views and stack them if they're of the same type. So you're not totally overwhelmed by this kind of thing that no one can really easily navigate..
[00:13:40.930]
Next pro tip is, if you hate having the default names for their views, which I do, I hate that the fact that when I create a view, it just defaults to the name of the view type, like really I know it's a board view based on the icon. Pro tip on this is just that if you backspace it all the way and click enter, you can now save that with no name you used to have the type of space in order to get that to stick.
[00:13:59.560]
But now you can just leave it blank and have a much cleaner experience. Next pro tip is around creating spaces. People often think that this setting is telling you what is allowed to be created in the space, which makes sense. That's what I would interpret this as too. This is not saying that, however. If we turn these on, it doesn't say you're allowed to create a board view, if this is checked, you're allowed to create it either way.
[00:14:20.830]
What this is saying is that a board view is required and is going to be on by default when you create your space. So let's just go in here. Let's create this and you'll see what I'm talking about. If I add a list in here, that list now has every single frickin view added in here blank with no actual settings. And that is not ideal at all. When you're actually setting up a space, I really recommend cutting back all of this noise.
[00:14:42.070]
Whether you turn it on or off, you always be able to add the views later. But if you keep them all on, they're going to be required and you won't be able to delete the ones you don't need because you've made it a required view. On a related note, you can also choose to make certain views default in this view. So if you have multiple views, you can choose one over the other for a certain space and you could even set certain templates for your views.
[00:15:02.200]
Remember, I said we could filter and kind of save those filters. We can also take an extra step. And when you have your funky filter set up, you can even choose to template, save as template that view. For these kinds of situations where you're creating new area and you want to enforce certain types of settings to be on there by default, certain filters to be always added.
[00:15:20.380]
When you create a new view and for my last pro tip about views, just know that views cannot be really private. The fact is, if someone's shared on the list, they see all the tasks they could get to your filtered view no matter how you do it. He only options ClickUp gives you around privacy is either personal or not. So if you want to create your own personal view that shows a certain slice and dice of information that you find really valuable, you can choose to make that area personal to you, meaning only you can see that filter.
[00:15:48.920]
It only shows up at the top for you. We can set permissions to make certain tasks private. We can make certain lists private, but we cannot do that for views. We can hide a view or show it to everybody. But we can't say, hey, Susie, you can see this whole list except for this filtered view where actually show certain tasks that I wouldn't otherwise show you. OK? So if you need to have certain things hidden, make the tasks themselves private by adjusting those permissions or create separate lists for things that you really want to segment off.
[00:16:15.460]
So that is it for the pro tups. I'm going to be able to squeeze into this video about to ClickUp views. Now I'm going to ask you to help me out here to fill in the gaps, which I'm sure there are many, about views by using the comments below to add your pro tips or, you know, things you've realized about ClickUp views after getting started. Now, obviously, this is just the tip of the iceberg in ClickUp land.
[00:16:33.070]
I try my best to get as much value into here as we can, but we're so limited on YouTube and how much our attention span, how much we can fit into one video. If you'd like to learn more about ClickUp step by step with kind of a curriculum of how to make ClickUp more effective for your business, specifically around getting your processes and procedures into ClickUp. Definitely check out ClickingUp Community up with the link in the description below.
[00:16:52.180]
That's the community I run for helping people learn ClickUp includes weekly office hours and build with me sessions and a whole lot of tutorials like this.
[00:16:59.620]
So if you want to find out more about that, check out the description. And if you haven't already also subscribe to this channel. I will be back next Wednesday and Friday with more videos like this covering key features in ClickUp and answering the questions that you have.
[00:17:10.270]
So that brings me to the last point. If you have questions, put them in the description below. I'd love to know what you're wondering about when it comes to ClickUp features.


IF YOU'RE NOT SURE WHERE TO START, TRY